Translate

Showing posts with label Passion for ProMarkers. Show all posts

Wednesday, 4 March 2015

Lilac and Lemon - hmm

Hello crafty peeps and welcome to my crafty nook! Today I'd like to share my entry for this week's blog challenge over at Passion for ProMarkers - Lovely Lilacs and Lemons. Looking at the challenge title, I may have taken things a bit too literally. We were allowed to add touches of other colours (skin, hair, grass, sky etc) but apart from that you have to stick to the two colours as stated.

Bookatrix Mother's Day card featuring Morehead "Girl" stamp 
This card is actually my sixth attempt at the theme but I didn't like how the others turned out (this is the only completed card) I'm sure I'll be able to salvage some usable elements from the reject pile. I'd always planned on using this Crafter's Companion stamp set Morehead's "Girl" for my mum's card, I'm going to do the matching "Boy" stamp on my mum-in-law's card at some point, but I hadn't thought to use the lemon/lilac combo. Being so restricted reminded me of my early days of ProMarker colouring because I had to use the saturation method to get any tonal difference in the colours, the image is flatter than it would be if I'd used a light, medium and dark yellow or purple but I rather liked the challenge of getting the colour differences in the image just using one colour - I did this all the time before getting the full range of pens. The pansy was made using the Build A Pansy stamp set by DoCrafts, it's about a gazillion years old so I don't think it's still available, and coloured in using Lilac, Lemon and Burnt Sienna Promarkers - this colour combination with the addition of Tan was also used to colour the girl image *forgot to mention the Cool Grey 2 that I used to ground the image - sorry*. The paper lace was made by punching out white card using a Martha Stewart lace punch then colouring it with lemon or lilac ProMarkers. The mum stamp was free with a stamping mag. The lemon and lilac gems were from The Works. The cardstock was from Crafter's Companion or rather from a prize I won from QCME for a card competition but it didn't say what sort of card it is. I used the Glitter Girls Bookatrix embossing board and tool to dry emboss the book shapes which I cut out with scissors.


I've made a matching box to put the card in (mainly because one of my original ideas for this challenge was to make a card featuring just the pansies), I added extra pen on the edges of the paper lace to give it a two tone appearance.

Here are some more photos.


I can't say that this has been the easiest of challenges but it has been very satisfying. I'm rather pleased to have made a card using only 5 different ProMarkers, though I'm not sure I'd stick quite so rigidly to the colour combo next time (I'm sure others will have used the light/medium/dark combo - it's highly likely that lilac and lemon have featured in the seasonal ProMarker selections which I don't own). I hope my mum likes it :)

I shall be working on the "Boy" card this weekend so hopefully I'll have another card to share with you soon. As always if you have any comments or questions then please leave them below or why not click onto my Facebook page and come say hi - I'd like that! Until next time - keep crafting!

Love and crafty hugs,

Sarah xxx

Wednesday, 25 February 2015

P is for Professor.

Hello crafty peeps and welcome to my crafty nook! A special welcome to my new follower Natalie "Hallo Natalie, ich danke Ihnen für immer ein Anhänger." I hope that is correct - I used Google Translate! As promised I have another card to share with you, this time it's my entry for the Passion for ProMarkers Blog Challenge week 285 - Letters of the Alphabet. I bought some Morehead stamp sets from Crafter's Companion from the sales section and I've been dying to try them out. For this card I used the set called 'Professor' and teamed it with papers taken from the DCWV paper stack called 'Homeroom'. I am very lucky to have quite a few of the older DCWV 12" x 12" paper and card packs because I won them about two years ago from QCME magazine. I've been subscribing to Quick Cards Made Easy magazine for years and one of the best things about it used to be a monthly card making competition which unfortunately they stopped over a year ago to have giveaways instead. I loved the challenge of coming up with a card to fit the theme (rather like I do with the PFP challenge) and over the years I've won around half a dozen times though I only had a card featured once (they only showed 3 cards but had prizes for 10), funny enough the one card they featured was my least favourite, it had to be based on a Christmas carol or song and I chose "Santa Baby"  - it was far too cluttered for my taste.

P is for Professor
I cut the papers to size and rounded the corners of the black patterned paper and stuck them down with glue in the above arrangement then I stamped the image using Memento Tuxedo Black ink and coloured it with ProMarkers. I fussy cut around the image and adhered it to the card using foam tape. I die cut an apple using a die from Clearly Besotted Stamps and covered the main part of it with Versamark ink and covered that with Claret embossing powder which I heat set using a heat tool. Once it had cooled down I covered the leaf and stem section with Versamark ink and green embossing powder which I also heat set. When I was using the heat tool I held the apple using a pair of tweezers and heated it from the back to get a smooth finish. Once it was cool I added a clear gem and attached it to the card using Dovecraft Clear 3D Pearl Effects. I added 3 stars in different colours and sizes to the top left hand side as shown.

Close up of the Professor


I'm afraid this picture doesn't show how shiny this apple really is :(


I'm trying something new for taking photos and although they're not as crisp as I'd like, I do think the quality is slightly better than normal. I hope you've enjoyed sharing my latest card - I don't have any plans for it at the moment but I think it would make a great card for a boy finishing Primary school and starting high school. I'm sure my beloved hubby would say it's too cutesy for a boy *rolls eyes*.

As always if you have any comments or questions, please leave them in the section below or use the comments form in the sidebar. I love reading all your comments and try to leave a reply promptly on the post it's addressing. I'm in the process of making a first anniversary card for one of my favourite friends but I won't be sharing it until the actual day. I've got three mother's day cards to make too so hopefully I'll have something to share with you all very soon, until then - keep crafting!

Love and crafty hugs,

Sarah xxx

Monday, 23 February 2015

Card Share - Then I really "mustache" lol

Hello crafty peeps and welcome to my crafty nook! I hope you all enjoyed your weekend as much as I did. I think having the girls to stay has worn Chris out, that and staying up until 4.30 am listening to the cricket because he's gone back to bed, bless him. Gives me a chance to add a post about the card I made for my sister's partner Simon though so I'm not going to complain.

I always find men's cards challenging, even more now since my beloved told me "Men don't like cards featuring rabbits going fishing!" - cheers for that little nugget dear husband, now what I'm I supposed to put on male relatives cards??? After seeing this card Chris wants a mustache card too and he'll be getting a rabbit fishing card WEARING A FALSE MUSTACHE card and like it lol.

For screen villains everywhere....
I made this card using a Darice Mustache embossing folder which I covered with white pigment ink on the negative side so the kraft card that I put inside got swiped with colour on the background but the embossed mustaches remained mostly kraft colour, I rather like the chalky effect you get using this method. I diecut the mustaches out of plain white card using a Cat's Pajamas die set and I coloured in the diecuts using ProMarkers. The sentiment came from the coordinating stamp set and both are available from My Mum's Craft Shop for £10 for both in the sale clearance section. Just a little word of warning though, I've ordered twice from this site and both times I've been contacted by the owner to say that one of  stamps I've ordered was no longer available and as they were from the clearance they wouldn't be getting any more in. As much as I appreciate getting the option to have a refund or a replacement item (one site I went to just refunded me when an item was out of stock!) it's a bit disappointing to have to change my order twice in a row, so although I'd recommend this site don't have your heart set on the clearance items as you may be disappointed. Of course they may have sorted out their computer glitches by now. Anyway back to the card - I stamped a speech bubble around the Curses! Foiled again sentiment using a stamp taken from Clearly Besotted Stamps set called "You Said It!" which I fussy cut round as I don't have the coordinating dies. The largest mustache and the speech bubble were both stuck to the embossed panel using double sided adhesive foam tape. The three smaller mustaches were glued down using Dovecraft's clear 3D Pearl Effects as I wanted to use a quick drying strong adhesive on the uneven surface. I rounded the bottom two corners using scissors then layered it onto black card and finally onto a pre-scored card blank.

Inside of the card
I used a sentiment taken from another Mustache themed stamp set but this one is by Hunkydory, the mustaches above and below are from the Cat's Pajamas stamp set and I left them uncoloured.


I stamped this fun sentiment onto the flap of the envelope as a bit of a teaser to the contents.

Tomorrow is Tuesday which means another challenge over at the Passion For ProMarkers blog so hopefully I'll have a new card to share with you all in the next few days. I find some challenges easier than others which is why I sometimes post the day after but if I find the challenge difficult it takes longer for it to be posted as I need more thinking time - sometimes of course I'm overwhelmed by choice which takes me even longer still! I'm not sure how the other bloggers do it but I make a new card for each new challenge, I don't just adapt what I've already got made. My reason for taking part in the challenges is to stretch myself creatively and practice my ProMarker colouring techniques so if I just added a few pearls to a previously made card so it fulfils the challenge criteria, I wouldn't be staying true to my own objectives. This is in no way a criticism of anyone who does do that by the way. Crafters tend to be busy people and might not have the time to make a new card for every blog challenge. *steps down from soapbox and stashes it away in a corner of the crafty nook* As always if you have any questions or comments then please leave them below or use the comments form in the sidebar. I hope to have a card or two to share with you in the next few days but until then - keep crafting!

Love and crafty hugs,

Sarah xxx

Wednesday, 18 February 2015

Masquerade Ball card Entry for week 284 - Perfect Pearls

Hello crafty peeps and welcome to my crafty nook. I hope you are all having a brilliant week. I'd like to share my entry for this week's blog challenge over at Passion for ProMarkers blog, the theme this time is "Perfect Pearls" and can be any sort of pearl product including half backed pearls, pearl strands and liquid pearls.

Kanban - Magical image with pearls
Unfortunately I haven't had time or the resources to make my white box yet and the main photo of this card is pretty bad so I thought I'd start with a close up of the main image which is taken from an old Kanban stamp set from 2010 called "Magical" which features this main image, masquerade masks, sprinkles and a sentiment. This image is huge so i had to lay it flat on my desk, ink it up then lay my card over it and rub it all over to transfer the ink. I inked the feathers on the headdress using Distress Ink in Peacock feathers then carefully inked the rest using Memento Tuxedo Black ink. I coloured the image using ProMarkers (see list below) I went over the star tinsel with Sakura Gelly Roll Clear Star pen using a dotting action. I added silver Dovecraft 3D Pearl effects at various points and a half backed pearl on her headdress.

Mask embellishment and sentiment

I stamped the large mask from the same stamp set, coloured with ProMarkers and fussy cut it out. I stamped a Feather from a Hot Off The Press stamp set using Peacock feathers ink and cut it out using the coordinating die, I the cut out two other feathers using the same die which embosses the feathers as shown. I coloured these feathers using Salty Ocean distress ink and Peacock Feathers ink as shown. I highlighted the veins of  all the feathers using the clear star pen. I shaped the mask and added a pearl from Dovecraft Modern Back to Basics Christmas to the left hand side of the mask. I took a scallop 8" x 8" card blank and covered it with the feather paper taken from Craftwork Cards Venetian 8" x8" paper pack and cut down a topper from the same set which I added to the mask using Siesta Refillable tape runner.

Sorry this is a bit blurry

I arranged the elements as shown and stuck them with a combination of foam tape and tape runner. I added 3 large half pearls on the right hand bottom corner.

Close up of top half of main image with liquid pearl embellishments

Close up of lower part of main image

Close up of feathered mask

ProMarkers used

Skin - Tan
Lips - Putty and Sunkissed Pink
Moon - Primrose
All purple areas coloured using a combination of  Lilac, Lavender, Orchid and Amethyst
Other areas on costume coloured using Cool Grey 3,4 and 5

I'm not sure who this card will end up being for my mum for Mother's Day perhaps but I like it and for once I'm pleased with how the colouring turned out. The colour combination may be a bit unusual but I really like it and I love how the 3D liquid pearls turned out! 

If you want to join in with the challenge click on the link promarkerchallenge.blogspot.co.uk/2015/02/week-284perfect-pearls.html I hope you like my entry as always if you have any questions please leave them below or find me on Facebook and friend me! (just click on the FB badge on the sidebar!)

Until next time - keep crafting!

Love and crafty hugs,

Sarah xxx

Thursday, 12 February 2015

SHH! don't tell Chris.

Hello crafty peeps and welcome to my crafty nook! I hope you've all had a good week. Today's card is a Valentine's Day card for Chris. I'd like to enter it in the Passion for ProMarkers Blog challenge 283 - to someone I love. 


Card for my bad bad boy lol

I made this card by folding an A4 sheet of off white card stock in half to make an A5 card blank and then I stamped over the front with A lip print stamp (no idea what brand as I found it in a drawer and it has no info with it - could be Bratz, yes the dolls Bratz at one point it was difficult to buy craft stuff cos I didn't trust internet shopping which is laughable now, so I had to improvise and Bratz had a craft set available) the OX stamp is from a Clearly Besotted stamps set called Just my Type (I think!) both images are stamped in Brilliance Crimson ink and has a slight sparkle to it. I stamped the Acid Drops & Whatnots "Bad Bad Boy" image and text onto a tall scrap of 350 gsm card stock with Memento Tuxedo Black ink and coloured it in with ProMarkers:- Putty Gold metallic Berry Red Warm Grey 1 and 5 plus the blender (I coloured the stocking'd leg with WG5 then removed most of the colour with the blender). I stamped the Wild Rose Studios "Love Circles" sentiment onto a piece of white card, fussy cut it out and coloured over it with the Berry Red ProMarker. I layered it onto a scalloped circle punched out of gold card using a Woodware punch. I embossed a sheet of Colour Connection Red Glitter Card using a Sizzix Textured Impressions folder taken from the Love Set#2. I then cut it to size and layered the topper onto it with a generous amount of wet glue and weighted it down while it dried. I used thin foam tape to stick this layered topper onto the card blank. I added double thickness of foam tape to the circle and added it to the lower right hand side, then added a epoxy circle topper over the sentiment to magnify it slightly.


A slightly better photo?

Love this sentiment lol

For bad boys everywhere...

Close up of Circle sentiment

Naughty, naughty!

Close up of the image coloured with ProMarkers
Because Chris has very little sight, I've tried to introduce texture through the embossed glitter card and I've carried this through to the inside.

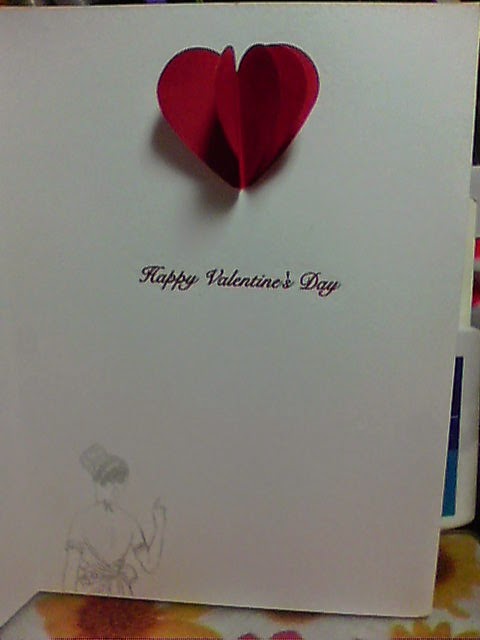
Inside of Valentine's card with 3D heart pop up

Closer look at the heart

The stamp set comes with a smaller version of the main image so I stamped this at the bottom left hand side of the card using Memento London Fog ink. The sentiment is a foiled rub on which I've had for nearly 5 years now and unlike other brands still rubs off onto the project perfectly (some brands I've had in the past dry out and stick to the carrier sheet after a few years these ones only cost 50p and are fantastic - wish I'd bought more!) To make the heart pop up I punched out 6 hearts using a Woodware punch and folded them in half vertically. I stuck one half of each heart to another until I had a heart that would lay flat in the card but pop up once opened (with a bit of fluffing). 

I hope you've enjoyed seeing my new creation, if you'd like to join in this week's challenge pop over to the Passion For ProMarkers blog. Until next time - keep crafting!

Love and crafty hugs,

Sarah xxx

Thursday, 5 February 2015

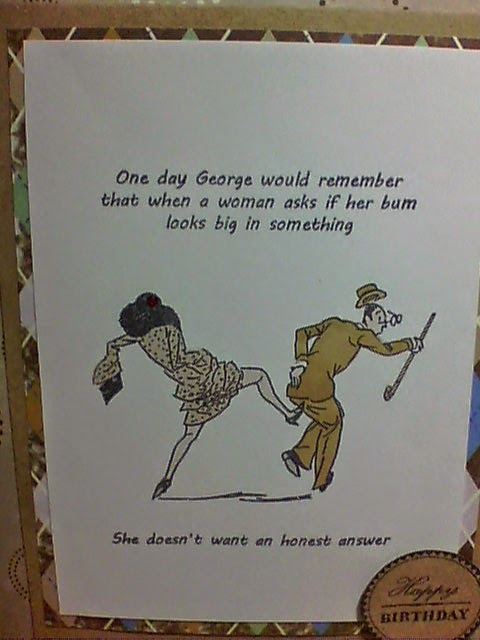
Acid Drops and Whatnots "Does my bum look big?"

Hello crafty peeps, welcome to my crafty nook! Nearly the weekend again, not sure where this week's gone. It's my hubby's best friend's birthday on the 10th and Chris asked me to make a card for him. The timing was perfect because this week's challenge on Passion for ProMarkers is "One For The Boys" (male themed makes). There isn't a lot of ProMarker colouring but it is there on the stamped image so I'm entering it in the challenge but plan on submitting a second entry once it's made.

Acid Drops and Whatnots card

For this card I used a stamp set from one of my favourite company's - Acid Drops and Whatnots, I don't have a huge collection of the stamp sets but I try to purchase a couple or three sets every time they have a sale. The featured stamp is from their last sale (aciddropsandwhatnots.co.uk click on this link and then on the Sale Stamps and Topper Sets to purchase this stamp set for the reduced price of £6.99) and is one of my favourites as it's one of the few stamp sets I own which are suitable for men's cards. Because it's a vintage image I wanted to keep the colours muted (ProMarkers used are Caramel, Putty, Almond, Sandstone, Cool Grey 1 and Vanilla) and just added a splash of colour to the lady's hat by adding a small red gem. The papers are cut down from a Dovecraft 12" x 12" paper pack and I'm afraid I can't remember the name of it as I bought it 6 years ago and the front cover's gone walkabout - those pesky craft gremlins probably stole it! The card base and card layer are both Kraft card purchased from my local craft shop and I used a sentiment taken from a Kirstie Allsopp stamp set that came free with one of my craft magazines, probably Simply Homemade or Crafts Beautiful. I stamped it on a piece of scrap kraft card using my usual ink. The inside of the card is stamped using a sentiment taken from a Docrafts Papermania stamp set from the Heritage Press range. Here are a couple of additional photos.

Nice Aim Madam!

Inside of card.

I had a lot of fun making this card and I really hope Les (Chris's friend) likes it. If you'd like to follow along with this week's challenge click on the link promarkerchallenge.blogspot.co.uk/2015/02/week-282one-for-boys.html. As always if you have any questions or comments please leave in the box below or use the comments form in the side bar. Until next time - keep crafting!

Love and crafty hugs,

Sarah xxx

Thursday, 29 January 2015

Passion for ProMarkers Blog Challenge week 281 - Garden Life #2


Hello crafty peeps, welcome to my crafty nook! On this cold snowy day I thought a lovely summery card would be just the thing to cheer us up. I used a Wild Rose Studios stamp called 'Summer Meadow' that came free a few years ago with Quick Cards Made Easy magazine and teamed it up with some floral and polka dot pink papers that I've had free with various magazines to make a 12cm by 12cm easel card. I added a sentiment and a couple of fun foam roses which I coloured with a Rose Pink ProMarker to match the roses in the picture. Here are some close ups of the card - the photo quality is a little better in these.


The link for this week's blog challenge is on the post below this one if you'd like to join in. I'm in the process of making a birthday card for my niece Millie who will be turning nine next week. Once I've made the card I shall add a post to this blog, in the meantime - keep crafting!

Love and crafty hugs,

Sarah xxx

Tuesday, 27 January 2015

Passion for ProMarkers Blog Challenge week 281 - Garden Life

Hello crafty peeps and welcome to my crafty nook! I hope you are all well and enjoyed the weekend. I've very nearly organised my crudy! There are just a few hot spots that need tidying up and the floor to vacuum but I'm very pleased with how it's turned out, most things now have a designated home which makes tidying up after a crafting session a lot easier and I even have a few box files, boxes and baskets empty ready for new purchases. It isn't perfect but as near to a workable system that I can get in the space available, ideally I should have a stash purge and get rid of things I haven't used for a while but I gave quite a bit of stuff away just before Christmas and I'm reluctant to do so again just a month later. Like most things in life it's a 'work in progress' and I'm sure it won't stay this way for long.

As you probably know Tuesdays are when the new challenge is announced on Passion for ProMarkers and this week's theme is "Garden Life", I may enter this challenge a few times as I have quite a few floral and gardening themed stamps. My first offering is an old stamp set (004) from Kanban and features a rose bush. This stamp set was a real favourite of mine a few years ago but as I've got more stamp sets it's fallen out of favour. I thought this week's challenge was an excellent reason to start using it again. I stamped the image out three times and coloured it in using ProMarkers (Poppy and Crimson for the roses, Holly and Pine for the leaves with a smidgen of Sandstone for the stems). Once coloured I fussy cut out some leaves, the large bloom rose, the inner part of the largest rose and a fully opened smaller rose and went round the cut areas with the crimson or Pine  ProMarker depending on which component it was, to stop them looking so raw. I shaped them slightly with a bone folder. I decoupaged the largest rose using different thicknesses of sticky foam pads and added sticky pads to the single layer rose and the leaves and layered these over the matching flat images on the main panel. I added the large rose last as I wanted it to be above the leaves.


I layered the card panel to black card stock then matted that onto black holographic card stock using tape runner. I cut an A4 sheet of Acetate to slightly wider than my layered panel and scored both sides so that the central part of the acetate was a few millimetres larger than the card panel. I added red liner tape to both flaps and stuck them to the back of the card which causes the acetate to bow outwards. I added a 3D butterfly to the upper right hand side of the acetate dome.


I haven't mounted this onto a card blank yet as I'm not sure how I want to present it, I might just add a panel of white card to the back to write on as the bow of the dome means it already stands up to be put on display without a card blank.

Click here for this week's challenge: promarkerchallenge.blogspot.co.uk/2015/01/week-281garden-life.html
I hope you like my latest creation, I will add another post if I make any more Garden Life inspired cards. As always if you have any comments or questions please use the box below or the comments form on the side bar, until next time - keep crafting!

Love and crafty hugs,

Sarah xxx

Friday, 16 January 2015

Passion for ProMarkers Blog Challenge week 279 - Teddy Bears

Hello crafty peeps - welcome to my crafty nook! I can't believe it's nearly the weekend again - where has this week gone? I hope you've all had a good week and have lots of crafty plans for the weekend. My "crudy" still leaves a lot to be desired but one good thing has come from all this chaos - I've finally found the star dies that the craft gremlins had stolen inside a Amazon cardboard wrapper of all places (I save them in case I can think of a way to re-use them!), fingers crossed they'll put the water colour pencils in a place I'm going to look very soon too lol. Please excuse any typos that I may miss, my fur baby Jinx is being 'challenging' and keeps standing on the keyboard, in front of the screen or on my head! Not sure how he quite manages the last one as he is quite a big cat - I can only conclude that I have a giant head!!!

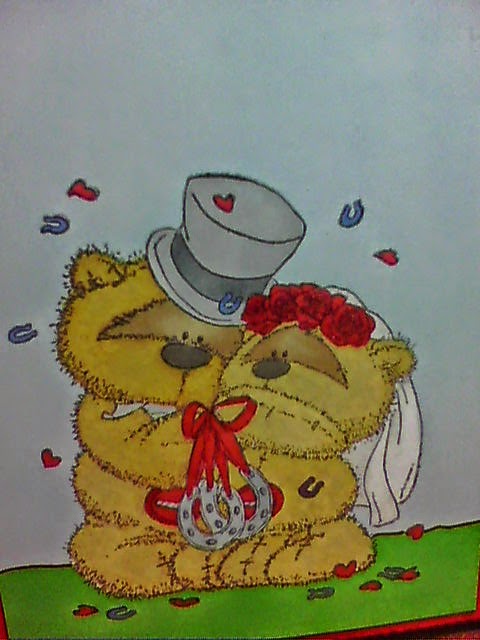
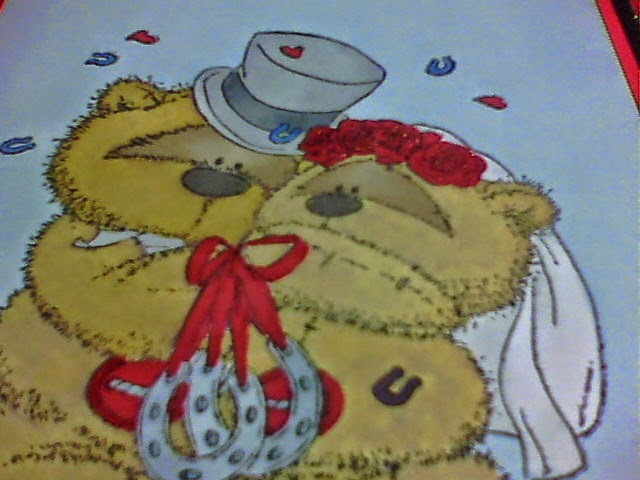
Anyway back to the main reason for this blog post - this week's challenge is Teddy Bears and one that I again found challenging (but not as challenging as Jinx!) not because I don't have the right supplies but because I have too many (what a lovely complaint to have, right?) and it was extremely difficult to chose which bear stamp to use. In the end I chose a Fizzy Moon stamp called Wedding Bells which I bought at the beginning of last year from my local craft shop. TBH I usually rigorously follow the coloured image on the packaging which is fine when it's something like "Tatty Teddy" or the "Forever Friends" bear where the images are well known but I think a little experimentation is good for images that don't have that brand recognition (saying that I haven't been in a card shop for about 10 years so I've no idea if Fizzy Moon is as popular as the two brands already mentioned - people may be horrified with the way I've coloured the two bears!) One of the reasons I've started to take part in the challenges on Passion for ProMarkers is to push myself out of my crafting comfort zone and not following the packaging of this stamp really did do that (babysteps still) saying that though the colouring isn't that different to the original. I've also tried a new way of colouring fur (new to me anyway) and instead of using pens in the same colour wave (yellows with yellows etc) I've actually blended mustard yellow with either caramel (Bride) or cinnamon (Groom) AND if that wasn't Avant Garde enough I scribbled the brown colours all over the images (obviously keeping inside the lines - I'm not that much of a rebel!) before going over it with the mustard! - Yes you did read that right, I SCRIBBLED!!! lol As usual my camera lets me down so you can't see how much texture this method gives the bears, they look all nubbly and worn in real life, just like the ted does that I've had since I was born. My husband and I married relatively late in life (we'll probably be pensioners when we celebrate our silver wedding anniversary) so I find the thought of middle aged bears getting married oddly comforting and I think other late bloomers would like it on their wedding card too.
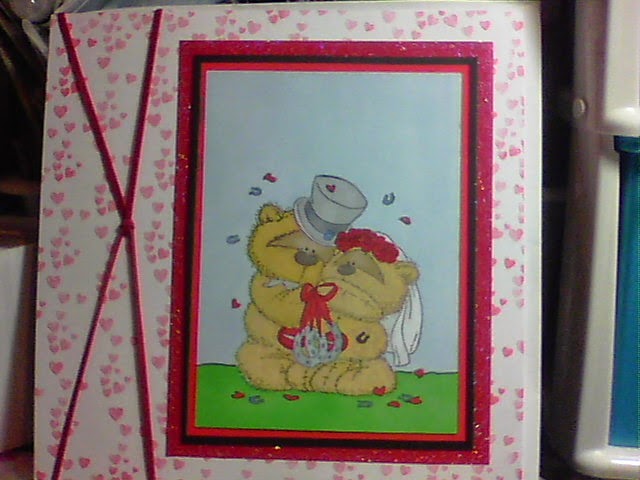
Fizzy Moon Wedding Bells 8" x 8" card
I stamped the card blank all over using a heart stamp from the Clearly Besotted range called "Love Chemistry" (I think) * I've checked and the Clearly Besotted Stamp set used is actually called "Scientifically Speaking", sorry about any confusion caused, the hearts are meant to bubble out of a test tube or beaker but I thought they'd be perfect to reduce the starkness of the white card blank. I layered the main image on red card, black card and then holographic paper from Paper Cellar. I originally made red paper roses to stick on the top right and bottom left corners of the card but couldn't bring myself to clutter the card up (now that would truly be a hard challenge for me - use lots of embellishments!) so I made a couple of red felt coiled roses which I still couldn't face using lol. Instead I off centred the stamped image and added two lengths of suede cord tied in a knot in the centre which I added to the left hand side of the card. I've just realised I've forgotten to add a sentiment - please pretend it's there.

Here are some close ups.


I couldn't resist adding some clear Wink of Stella to the roses, hearts and belly buttons on the bears.

I hope you like my new card, as always if you have any questions or comments please leave them below or in the comments form in the side bar if you want to say something not for public viewing.


A Few Sites You Might Like To Visit


click to enter teddy bear challenge

Every Crafts A Pound has got some FABULOUS new stock in including Papermania's Chronology metal embellishments and stamps - very steampunk and similar to Tim Holtz clock faces, cogs and spinners but only £1!!!!

Please let me know if you like having sites to visit on my blog and if you do I'll continue to link sites as appropriate on my posts. Until next time - keep crafting!

Love and crafty hugs,

Sarah xxx

Thursday, 15 January 2015

Happy News and a small haul

Hello crafty peeps and welcome to my crafty nook! As you've probably noticed I've been redecorating here in my crafty nook and have a new water themed wallpaper to brighten the place up in 2015. Even better I have a sparkly blinkie from Passion for ProMarkers at the top of the sidebar, after the lovely Loopy Lou chose my card as one of the top 5 Passionista for the sketch challenge week 278 (see post below for the chosen card). I am really chuffed to be awarded this blinkie and I've been insanely happy since I found out yesterday. I had a little trouble adding it to my sidebar, as regular readers of this blog know I'm not exactly computer literate, but Denise from Passion for Promarkers kindly guided me through the process and I managed to add it without the rest of the blog self-destructing lol.

I also have a very small haul to share with you that came on Tuesday. The last two cards on this blog have featured stamps from the Crafter's Companion range "Scruffy Little Cats" and I've wanted some more images while the post Christmas sale was still on. Not only were the stamps reduced to £1.00 each (when I bought them last I think they were £2.50 or similar) but they were included in the 6 for £5.00 deal. I originally only put 4 in my basket as I had the other stamps but when I went to the checkout it kept coming up with the 6 for £5 offer so I decided to add two stamps I already owned in as well to give to my niece Charlie. My new stamps are called "Chelsea, Pixie, Perry, Ashleigh, Francesca and Lola" the last two stamps are the ones for Charlie.

Francesca and Lola stamps for Charlie

Chelsea and Pixie Stamps

Ashleigh and Perry Stamps
Eventually I'd like to get the full sized stamp sets in the range as they have different characters featured and sentiments included but they are currently £4.99 each or 3 for £12.00 and unmounted rubber which I really dislike - I much prefer the acrylic versions. If you want to get your mitts on these rather lush stamps they are still only £1.00 each or 6 for £5.00 which means you could get all 8 for only £7 (plus £1 p&p) plus if you are a Bronze member of the Club Inspire (free to join after first purchase) you get 5% off every order (think its 5% could be 10%) not including p&p. www.crafterscompanion.co.uk is the link if you want to check it out.

This week's challenge on Passion for ProMarkers is Teddy Bears  http://promarkerchallenge.blogspot.co.uk/2015/01/week-279teddy-bears.html so please join in and see if you can win a blinkie too or a digi stamp from polka doodles. I'm in the middle of my card entry so I hope to share it with you soon. I haven't managed to finish my "crudy" re-organisation - it came out of the room so it must go back in somehow!!! I'm not sure it's ever going to be at the stage where I share it online mainly because there's a heck of a lot of stuff in a very small space and things are stacked high so even though it's actually quite organised it looks like complete chaos lol. I have managed to find things I hadn't realised I'd lost (a copy of John Wyndham's "Midwich Cuckoos" for example) but not the things I know should be in there like my lovely water colour pencils and a couple of star dies that came free with "Simply Homemade" magazine last month that I hadn't had a chance to use before the craft gremlins stole them! Damn those pesky craft gremlins! lol

I hope you've enjoyed my little bit of good news, if you have any comments or questions then please use either the box below or the contact form in the sidebar and I'll get back to you as soon as I can. Until next time - keep crafting!

Love and crafty hugs,

Sarah xxx

Friday, 9 January 2015

Card Entry for Passion for ProMarkers Sketch Challenge week No:278


Hello crafty peeps - welcome to my crafty nook! Today I'd like to share my entry to the Passion for ProMarkers Sketch Challenge which is currently running on the Passion for ProMarkers Blog www.promarkerchallenge.blogspot.com (scroll down for sketch post). I've never followed a sketch before and found this one quite daunting because it features a circular card with multiple layers and I don't actually own any circle dies. I have a Fiskars shape cutter and circle templates but in all honesty I find it very difficult to use as the blade tends to skip away from the side of the circles and ruins the card stock and when I first used it I must have been holding it wrong because the blade would fall out as it cut! In the end after ruining 3 sheets of black card I decided to just use the shapes as templates and drew around them using a pencil then I cut them out. The result isn't as perfect as I would like but I've now run out of black card so it'll have to suffice.

Card using challenge sketch
Sorry the quality isn't very good, if you scroll down this post I've added some close ups of the main topper that are clearer. I used another Crafter's Companion Little Scruffy Cats stamp as my main image and coloured it with ProMarkers and highlighted the hearts, shoes and hair with clear Wink of Stella brush marker. The heart paper comes from an A4 paper stack from Do Crafts Papermania called Tilly Daydream - I love the cross stitch hearts on this sheet. The large flower was made using a stitch flower die and has a pearl centre. The smaller flowers came from the Works and I shaped them using an embossing ball tool and layered them together to make a more 3D flower, again I added a flat backed large pearl to each centre. I mounted my circular panel onto a scalloped 8 " by 8 " card blank because I don't have any circular cards in my stash. I've probably stuck a little too close to the sketch but as its my first one I wanted to follow it as near as possible (babysteps!) Below is a slightly better quality photo that I've just taken with my phone.

Slightly better photo quality! 
Here are some close ups...


I'm not happy with how the hair has turned out but the challenges on the Passion for ProMarkers blog are an excellent way for me to practice my colouring technique and they are allowing me to try new things and think outside the box craft wise.

I hope you like my latest card and as always if you have any questions or comments please leave them in the section below or if you look in the side bar I now have a "contact me" form. I'm still in the middle of re-arranging my "Crudy" (craft/study - crudy! lol) but the new oak sideboard is in place and looks FABULOUS!!!! lol nearly put my back out lifting the glass fronted cupboards onto the base though. I shall be working on the crudy reshuffle over the weekend and hopefully I'll have a new card share for you on Monday. Until then - keep crafting!

Love and crafty hugs,

Sarah xxx

p.s. I've just realised I forgot to mention the lace strip across the card front - I made this using the lace daisy punch by Martha Stewart. x Sarah x