Translate

Showing posts with label cards for men. Show all posts

Tuesday, 23 January 2018

Tech card by a technophobe

Hello crafty peeps and welcome to my crafty nook! I hope you've all had a brilliant weekend, we've had a bit of snow but it hasn't settled fortunately. We're having a few problems with our computer at the moment so if I vanish for a few weeks it's probably because we've taken our hard drive in to be repaired for the THIRD time! I really wish Microsoft would sort Windows 10 out properly, we've had to pay twice for Windows 10 to be installed at a total cost of £140 and I refuse to pay a third time - it's really eating into my craft budget *angry face*. The computer keeps trying to install updates and it seems ok but when it configures (not actually sure what that means) after the restart it goes so far then just freezes onto a blue screen with the microsoft logo on it and nothing happens. We then have to somehow get the computer to restart itself, repair itself, remove the update that it says has failed to fully install and then reboot again. The main problem is it keeps trying to install the stupid update (or a number of stupid updates) and the exact same thing happens again. I don't understand computers - tbh I barely understand my phone but things like this just make me even more of a technophobe, not less of one I'm often tempted to see if kicking the damn thing would make it work properly lol.

Being a technophobe it's quite ironic that the card I'm sharing today features yet more technology, but an iPhone and xBox controller in this case. I've only met my niece's partner once so it was quite hard to know what sort of card to make him for his birthday as I don't really know him. I asked my niece what he liked and got the reply 'computers and xBox and stuff like that', not a huge help but you work with what you've got and luckily I do have an oldish stamp set from Clearly Besotted Stamps which is called "Text Me" that has an iPhone or similar and a wireless controller plus a few 'text speak' stamps. I'm not a huge fan of text speak as I'm sure it's one of the reasons a lot of people are abysmal spellers, language may be continuously evolving but it needs to be intelligible to everyone not just a select few! This isn't even a 'grumpy old woman' rant because one of my friend's is only a few months younger than I am and half the time I can't understand the texts she sends me even when I try to read it out phonetically. I'm particularly not keen on the text speak I've used on this card as it sounds like I'm ecstatic that he's got some high end bathroom fixtures  (bidet!) - I'm sure Michael will like it though 😉


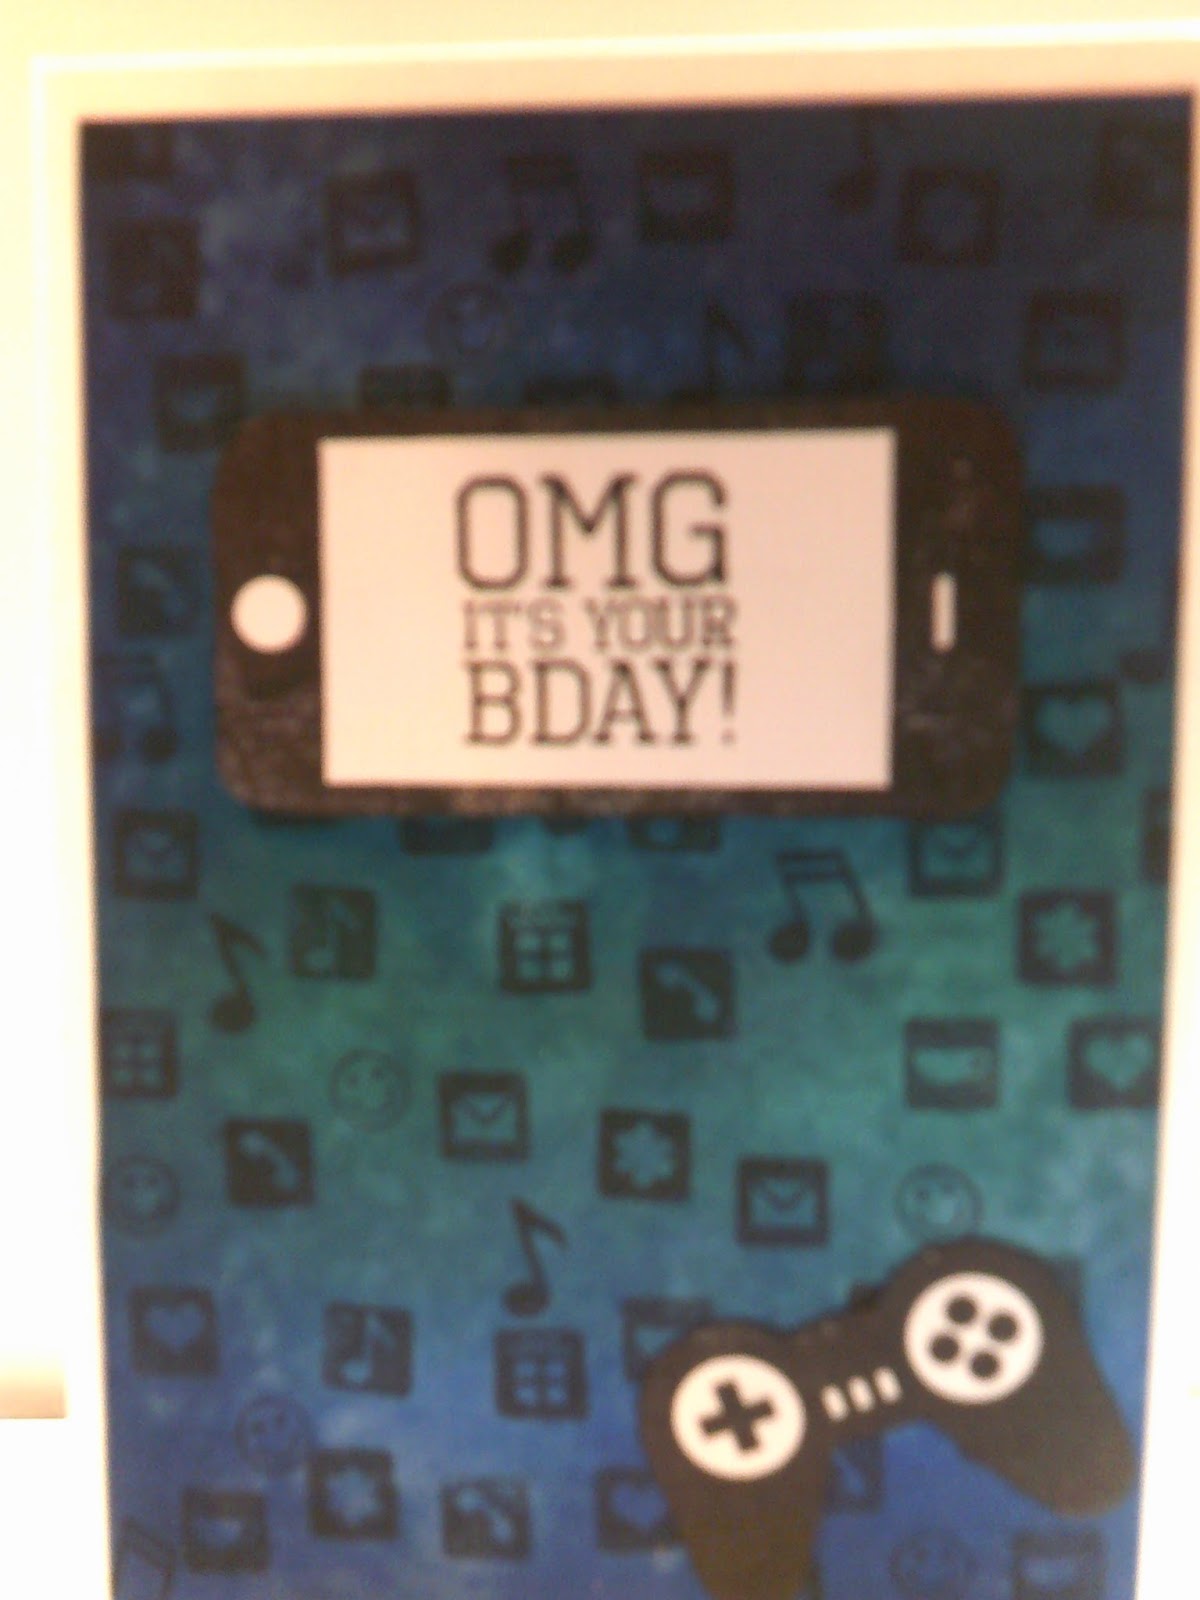
To make this card I started with the background and cut a panel of Bristol Board to 4" x 5 1/2" so that it would leave a border on an A6 card blank. I ink blended a background using Tumbled Glass, Mermaid Lagoon, Salty Ocean and Peacock Feathers - this was my base layer which I further distressed using a distress sprayer filled with water. I dried this off using a heat tool and didn't really like the results so I went over the panel using a bit of Chipped Sapphire, Mermaid Lagoon and Lucky Clover distress inks, again I lightly sprayed with water but blotted it straight away for a more subtle look. I dried it again and put it under my glass mat while I worked on the rest of the card so it could flatten out more. I stamped the controller handset being careful not to ink up the lead using Versafine Onyx Black ink as I wanted a crisp dark image and did the same with the phone but I added the OMG sentiment onto the screen. I dried the images with my heat tool to prevent smearing the ink and then fussy cut the images out. I used a Memento brush pen to go over the edges so there wasn't a distracting white edge where I'd fussy cut and added double sided foam tape to the phone and d/s tape to the controller and put to one side. The distress inked background piece was nicely flattened by this point so I stamped icons from the stamp set using  Memento Tuxedo black ink in a random pattern to make my own bespoke patterned paper. I added this panel to a pre scored card blank from my stash (Dovecraft brand) then added the tech toppers as shown.

I really like the background I made, it appeared a bit splodgy to begin with but the colours smoothed out once it had thoroughly dried. I'd really like to use this Bristol Board with the new Distress Oxides because I've heard many good things about them and I must admit that I've had less trouble blending on Bristol Board then I have on any other card, so I'm very curious to see the Oxides on it but alas I don't own any - yet!

I hope you like my latest creation, I readily admit I find men's cards particularly challenging so I hope I've inspired some of you for your manly makes 😉 Michele and I are planning to resume our joint blog challenge soon using magazine freebies so I hope you'll keep an eye out for that and hopefully join it too. If you have any comments or questions then please leave them in the usual places and I will try to get back to you if needed. Until next time - keep crafting!

Love and crafty hugs,

Sarah xx

Tuesday, 16 January 2018

A Blue Hot Air Balloon for Blue Monday...(and a card!) but added on the Tuesday - cheer up Tuesday perhaps?

Hello crafty peeps and welcome to my crafty nook! I hope you are all well and not too 'blue' on Blue Monday. I'm not sure why there's suddenly a need to practically give every day a special name - Blue Monday, Black Friday, Cyber Monday etc etc, but I wish they'd stop! TBH every day is a special day and I don't know why we have to have extra labels on them - it's just an excuse to try and get you to buy even more stuff you neither need nor can afford (I think Blue Monday is so called because it's when people start to get their credit card statements etc and realise how much money they actually spent on Black Friday etc on those 'bargains' and they get all depressed about it - I could be wrong though so feel free to put me straight if you want 😉) I know January can seem like a very long and gloomy month but on the bright side it's not long until Valentine's Day (and my dad in law's birthday!) so that's something to look forward to - I've even started on my husband's Valentine's card. #smugface

It was my mum's birthday last week and I've been working on a paper mache hot air balloon to give to her for quite a while (started September but obviously had a lot going on between then and now) and as she was coming round for a visit this morning I finally got my finger out and finished the project by making a heart shaped basket to hang underneath. I've tried to make the hot air balloon shabby chic, a style I much admire but find quite difficult to utilize within my own crafting.  Please excuse the photos, I'm still trying to get used to my new camera and I was also taking photos in the hallway because there just wasn't room to hang it and take photos in my crudy, though now I'm thinking about it I could have hung it on the coat hook at the back of the door!


The basket is made from two scalloped diecut hearts 

I'm afraid there's only one photo of the actual balloon and not even a good one at that! I did have a second one but it's too blurry to use. The second photo is one of the steps I took to make the heart shaped basket. I die cut two large scalloped hearts out of pale blue card and the cut a strip of matching blue card to make the bit to link them together. It measured 21cm by 7cm and it was scored either side at 1cm the at 10.5cm. I ended up cutting it down slightly as it overlapped the longest scallop on the hearts. I folded it in half and snipped a thin wedge off both sides to mitre the middle scoreline so that I could form the card piece into an L shape. I used wet glue to secure the joints and then stuck one side down to a scalloped heart using an acrylic block (as shown) to weigh it down while it dried. Once it was dried I repeated the process with the other side and decorated the front with half back pearls. I used a small hole punch on both sides of the inner part of the basket to punch two holes and threaded black thin craft wire through them both. The balloon itself was made using paper mache (strips of newspaper and watered down PVA glue - extremely messy to do!) It probably took about a fortnight to add all the layers of paper and allowing it to dry between each layer but once it was completely dry and of an even thickness I popped the balloon and removed it from the paper mache shell. It did soften a little during the painting process and the next time I make one I'll do a layer of gesso first before adding paint just because you could actually read some of the newsprint even after three coats of paint. For a truly shabby chic effect you could make this work for you by adding torn book pages as a final layer (an old dictionary or botany book would work well for this) so that the words and illustrations sort of peek through the paint. I decorated it using ivory coloured lace and pearl drop strands plus clear dew drops (not visible on the photo). I attached the basket to the balloon using the thin wires and added another wire from the top of the balloon so it can be suspended from the ceiling or in my mum's case in her lounge window.

It was my nephew's birthday on Friday and I had to make him a very quick card to try and get it in the post on time. I used the music themed stamp set (and some inspiration from the magazine!) that came free with this month's Creative Stamping Magazine.


A stamping platform is useful for making a short stamp seem longer

I made this card by ink blending Fossilised Amber, Spiced Marmalade and Fired Brick Distress inks on a sheet of Smooth Bristol board paper using a round foam applicator and foam pads (Woodware), once I was happy with the coverage I spritzed it with water and dabbed it off with kitchen roll. I dried it with my heat tool and popped the piece under my glass mat while I stamped the shadow dancers on a strip of white card using Versafine Onyx Black ink. I used my Crafts too Stamp To Impress stamping platform just because I wanted the dancers to be really black and it's easier to double stamp if necessary using a stamping platform. I stamped a Happy Birthday sentiment out and die cut it using a stitched circle die. The distressed ink card was now flattened from being under my glass mat so I stamped a pattern on it using stamps from the stamp set as shown, again I used Onyx black ink but used acrylic blocks to hold the stamps rather than my stamping platform because it's easier to stamp the same pattern multiple times if they are on separate blocks. Once the ink was dry I added the 'patterned paper' piece to a A6 card blank, added the dancers using foam tape and added the sentiment as shown. I added some orange gems to the centres of some of the note mandalas and a couple to the sentiment circle.

It probably took about an hour to make the card and unfortunately I did put the dancer strip on slightly crooked but the foam tape was stronger than I realised and I couldn't move it without ruining the whole card so I had to leave it crooked - still it proves it's hand crafted I suppose!

I hope you like my latest makes, sorry the photo quality isn't the greatest - The balloon is actually quite pretty in real life and my mum seemed thrilled with it which is the main thing. I probably will have another attempt at making a hot air balloon at some point just because this first one was a learning curve and I now know what to do and not do so I'd like to see if I could make a better one for my mum. I did enjoy making the card for my nephew, as I've said a few times I find it rather challenging to make men's cards so I'm sure I'll be putting the stamp set from Creative Stamping magazine to good use as they are good for all sorts of occasions and for both sexes. As always if you have any questions or comments then please leave them in the usual places and until next time - keep crafting!

Love and crafty hugs,

Sarah xxx

Friday, 14 July 2017

What I've been making this week...

Hello crafty peeps and welcome to my crafty nook! Wow I can't believe another week has passed and it's almost the weekend again - this year is just flying by. I hope you've all had a brilliant week, it's been rather quiet here in my crafty nook but I have managed to do some crafting. Here are my latest makes.


It's strange that although I'm not a fan of making cards for men/boys, I seemed to have made a lot in recent weeks (these are just the ones I remembered to take photos of). The robot card was made for one of my husband's cousins who turned two last week. The steampunky robots were made using dies bought from eBay and I also used some DCWV 6" x 6" papers to complete the card. The footballer card was made for a boy I heard about on Facebook called Ben. Ben has high functioning autism and finds it very difficult to make/keep friends due to his condition. He's bullied terribly by his peers and last year for his birthday his mum organised a special birthday party for him, only two people replied to say they'd attend and his mum assumed that more would just turn up on the day (I've noticed myself that it appears to have gone out of fashion to say thank you for cards etc, so I don't exactly blame her for coming to that conclusion). The day of his party arrived and Ben was very excited but the time of the party came and went and not a single child arrived, not even the two who had bothered to reply to the invite. Ben as you can imagine was devastated and his mum wants to make his 11th birthday this Saturday (15th) the best one ever so put out a FB appeal asking people to send a card wishing Ben a happy birthday just so that he knows that he is loved and valued. This football card featuring Whizz Kids stamps and papers is what I came up with to send to Ben. My final card is one I've made for my best friend Adam, it's also his birthday this Saturday and I was struggling to come up with a suitable card for him. Then I remembered this ink blended background I made a few months ago, it's the first time I've managed to get a near perfect blend (I used Fired Brick, Spiced Marmalade and Scattered Straw distress inks with a tiny bit of Black Soot distress ink at the top) I wanted to use it for something special and when I came across these Katy Sue Designs Savannah Stories Silhouette stamps in my stash, I thought they'd be perfect stamped in Versafine Black Onyx ink. The hot air balloons aren't part of the stamp set but were actually the smallest petal of a build a bloom die set that came free with one of my craft magazines recently. I die cut one out of funky foam and stuck it onto an acrylic block before stamping it as shown above. I really like this card, it's very simple but a beautiful image. I just hope Adam likes it.

I hope you've enjoyed my latest makes, as always if you have any questions or comments then please leave them in the usual places and until next time - keep crafting!

Love and crafty hugs,

Sarah xxx

Monday, 17 April 2017

A couple of cards to share

Hello crafty peeps and welcome to my crafty nook! I hope you all had a wonderful Easter Sunday and if you are blessed enough to have a day off today, are having a wonderful time today too. We had my mum over for a roast chicken dinner and it was fantastic. (Hope that doesn't sound too boastful!) My lovely hubby even prepped some of the veg which made things a bit less stressful for me - once I'd left the room that is! As you may know my husband is severely sight impaired - he's been blind in his left eye since birth and his right eye has very little sight as a result of scar tissue - and the stubborn so-and-so refused to use a veg peeler and insisted on using a small kitchen knife to peel the carrots and potatoes. My hands were itching to take the knife off him and do it myself not only because I was dreadfully worried he'd cut himself but because he was wasting so much of the veg that he had to peel an entire 2kg bag of potatoes just so we'd have enough for mash and roast potatoes (if I'd done it myself or if he'd used a peeler we could have used half the amount!) In the end I went into another room and wasted veg (and oddly squarish potatoes which were 'interesting') aside he did a good job and I was able to prep the cauliflower and get the chicken in the oven so it worked out okay.

Another thing I managed to do was make a very quick Easter card for my mum because Chris and I have been on a bit of a Game of Thrones bender the last few days and we've been watching series 6 together, two episodes at a time (*sobs* we've finished it now!) which really ate into my crafting time so I hadn't made any cards apart from the very first Easter Egg hunt card I shared a few posts ago. Although neither of us go to church anymore I wanted to make my mum a faith based card so came up with the following card.


I am a huge fan of eBay dies from China and this ornate cross was one of my earlier buys. It die cut through the gold mirror card perfectly even though I was using my Sizzix Sidekick which is past it's best and not designed for thin dies. I stuck it down on a piece of purple card and cut around it. I got an C6 sized piece of white card and ran it through my Big Shot machine in an embossing folder called Bubble Explosion from Crafter's Companion. I adhered the cross to the embossed card using plenty of tape runner (normally I'd use wet glue or red liner tape but I couldn't find any and I was in a hurry.) and stamped a Happy Easter sentiment from one of the stamps that came with Creative Stamping magazine during the past few months on a non-embossed area of the card. I then added this panel to a pre-scored card blank from Dovecraft.


The second card is my favourite. Men's cards are always a challenge for me so I'm very pleased with how this one turned out. The motorbike die for this card came from eBay (are you noticing a pattern) and embosses the card stock as well as cutting it out. I die cut it three times out of silver mirror card, metallic red card and black card. I kept the red die cut shape in one piece (though some inner parts did fall out and got lost) and added parts of the silver and black to the top of it as shown so that the wheels and the chrome areas were the right colour - it's probably not all that accurate as I'm not all that familiar with motorbike design but I thought it looked pretty cool. The crash helmet was diecut out of the same metallic red card as the motorbike and I used one of the dies from the Icons die set from Mr Mister collection from DoCrafts, the map paper also came from the same collection. The Route 66 sign was made using a die from the same collection but is actually a Best Dad shield die. I cut it out using the die out of black card and carefully removed the Best Dad words so only the thin black border remained. I traced around the die itself onto white card and carefully cut it out. I added the black border onto the white shield shape with glue and once it had dried added a thick line using a black marker across the top as shown and wrote out ROUTE and US. I coloured in two die cut sixes from my stash with the same pen and added them to the shield. I found a thin strip of Kraft card in my scraps and cut it to the right length to use as a pole for the sign. I made a double Z fold card using Kraft card (see my Easter Egg card post for details on how to make one or check YouTube for a tutorial) and decorated as shown. The stamped Happy Birthday was yet another eBay buy from China. I made the envelope using my WRMK envelope punch board and decorated it before sticking it together  using some stamps from my stash - the tire marks stamp is a roller stamp which doesn't have a brand and only cost 29p quite a few years ago, it's actually the first time I've used and I'm really glad I didn't purge it at some point as I really love the effect. Once it was decorated I stuck the sides etc with tape runner.

I hope you like my latest makes - I had a lot of fun making them and the motorbike card was very time consuming but worth the time, whereas the Easter card was a lot quicker but still quite a nice card. As always if you have any questions or comments then please leave them in the usual places.

Love and crafty hugs,

Sarah xxx

Thursday, 6 April 2017

A couple of birthday cards

Hello crafty peeps and welcome to my crafty nook! I hope you all had a brilliant week, it's been lovely here on the east coast - bright with a crispness to the air. I was supposed to do my spring cleaning two weeks ago but kind of lost heart in it when my mum-in-law wasn't able to come for Mother's Day and these bright days are making me wish I'd done a bit more than I ended up doing for just my mum visiting. (It's not that I don't make an effort for my mum's visits but she knows what a untidy moo I can be and she's seen me at my worst but I wanted to make a good impression on my in-laws!)

It was my mum-in-law's birthday last Sunday and it was my Gramps-in law's birthday Tuesday so I thought I'd share the cards I made for them.


The first card features the wonderful Verity Rose from Crafter's Companion. She was coloured in using Promarkers and Spectrum Noir Shimmer markers. I added details with a Sakura stardust pen on her hat and beads. The layering piece was die cut out using a Tonic Studio die and I ink blended over it using Salty Ocean and Tumbled Glass Distress Inks.

The second card was inspired by a card made by Christine Smith AKA CraFTiPoTeNTiAl  https://www.youtube.com/watch?v=Dl_yNA4vpuo - please click the link to see the original card that inspired mine. Like Christine I used the hobby themed stamps that came free with Creative stamping Magazine a couple of months ago. I stamped them onto 200 gsm card and coloured them in using Flexmarkers then I fussy cut them out which was rather challenging for the pinchers/pliers and the screwdriver because the thin parts curled up on themselves after I cut them. I die cut the pinboard frame out of white card using two stitched rectangle dies from eBay and I held them in place using some washi tape so the dies didn't shift as the card went though the machine. I also stamped out the tool box and coloured it in using the Flexmarkers and then stamped over it using the small wood grain stamp from the set and the Happy Birthday sentiment. Again it was fussy cut out and I used a scalpel to cut out the inner part of the shape so I could add some extra tools. These tools were cut out using a set of dies from the Sara's Collection of Just For Men dies. I cut a piece of adhesive backed cork to just slightly smaller than the frame and layered the two together as shown to form the pin board.I added the tools with tape runner to the board and added foam pads to the back of the tool box - the tools were stuck to these so that they peeped out from the tool box. I used papers from Papermania Mr Mister range and added them to a Dovecraft A6 card blank using a tape runner from Crafter's Companion. I added the board to the 'wall' of the shed and the tool box to the 'floor' using extra glue on the tools that covered the sticky foam pads.

I did make another card for my mum-in-law on my mum's behalf but forgot to take any photos of it so I can't share here. As always if you have any questions or comments about my latest cards then please leave them in the usual places and until next time - keep crafting!

Love and crafty hugs,

Sarah xxx

Saturday, 16 July 2016

Another HOTP Steampunk Card

Hello crafty peeps and welcome to my crafty nook! First of all please excuse any typos that may be present in this post, my cat Jinx has decided to hog the desk so the keyboard is balanced on the edge and resting against my tum! I wouldn't be surprised if the little darling decides to climb on top of either the keyboard or me while I'm writing this. I like to pretend that I'm in charge but in all honesty Jinx rules the flat with a paw of iron lol - we're just his chattels.

Today I'd like to share the Steampunk themed birthday card I made for my wonderful friend Adam, it was made using the same stamp set as the card featured in yesterday's blog post.

Envelope decorated with steampunk corner stamp

Steampunk blended distress ink birthday card

Close up of main image

Inside of card
I started this card by making the card blank from a sheet of Kraft card which I cut down to 11" x 5 1/2". I scored it at 5 1/2" and rounded the corners using a punch. Only one side of this card is Kraft and the other is an off white which makes it perfect for making card blanks out of as it means you don't have to use either a white pen to add your message inside or add a paler coloured insert. For this card though, I did add an insert as I wanted to add a stamped sentiment and the inner surface is rather slick which means the message smudges unless you heat set it. To make the focal image, I cut a sheet of cream card stock to 5" square and stamped the largest stamp from the set in the middle of the card. I then added most of the colour using Distress Inks and a blending tool. I started with Spiced Marmalade and pulled the colour in towards the centre of the card using the blending tool, I concentrated the colour around the image but added a little of it over the clock when the ink was nearly gone from the foam applicator so it's a much paler colour. I added some Fired Brick and finally a little Black Soot around the edges. I then added a little more of each colour until I got the blended look I wanted. I've no idea where I got the cream card from but it is brilliant for ink blending, I don't have a mini round blending tool yet and sometimes I find I have streaks and lines left on my project after I've coloured it in but this card seems to smooth all the colours together with very little skill on my part. Once the inks had thoroughly dried I added some yellow Flex marker to the light bulb. I added a layer of Glossy Accents over the bulb and the seconds indicator on the clock face and put it to one side to dry. While the Glossy Accents was drying I cut another piece of the cream card stock for the inside of the card and removed the corners using a ticket corner punch, I then stamped the sentiment and images as shown using Memento Black Tuxedo ink. I stuck this inside the card using double sided tape. I stamped "Happy Birthday" in the four corners then added the topper to the front of the card using more d/s tape once the Glossy Accents had set. As a final little touch I added a coating of Spectrum Noir Clear Glitter brush marker over the hat band. I made a matching envelope using my We R Memory Keepers Envelope Punch Board.

I really enjoyed making this card but I think if I duplicated it I'd add a thin border of black around the topper just to make it pop a bit more. I'm hoping Adam likes it as it's a bit different to the cards I usually make him. If you have any questions or comments then please leave them in the usual places. I hope you all have a brilliant weekend and until next time - keep crafting!

Love and crafty hugs,

Sarah xxx

p.s. I thought you might like to see a photo of my 'helper'


Thursday, 16 June 2016

Get Well Pop up Flower Box card

Hello crafty peeps and welcome to my crafty nook! I hope you are all well, it's nearly the weekend again which means even more time for crafting - yay. I'm still sort of missing my mojo but I have made some cards or at least started them. I'd like to share a get well/thinking of you card I've made for Chris's step-grandad. He came to visit recently and wasn't feeling well so my in-laws took him to the local hospital, unfortunately they managed to miss the fact that the poor man has an abscess on his appendix and he's now in St James' hospital being nursed back to enough health that he can be operated on for a second time (first time was keyhole to drain the abscess). I know a lot of hospitals in the UK have banned flowers from the wards so I decided to send Gramps a pop up box card filled with flowers (manly flowers of course!) to brighten up his bedside and to let him know that he's in our thoughts and prayers.


Envelope made using Mr Mister scrapbook double sided paper


Flowers are seen to be a feminine card item so I tried to make this card be more masculine by using Kraft card for the card blank and decorating it with wood plank printed paper panels from the Papermania Mr Mister double sided 12" x 12" scrapbook paperstack. I've used a different colour palette to the one I'd use for a female card and although there is a bit of pink amongst the flowers it's a special paper which changes colour as it is moved and the light hits it so I think it's gender neutral. I used a number of dies most of which came free with different magazines the exceptions being the two sizes of pointed ending petal flowers and the leaves.  The card was made in the usual way and the only real difference construction wise is that I used thicker widths of acetate than usual so that I had something to stick the leaves and flower heads to.

I'm hoping to have another card to share with you later on today or tomorrow - it needs to dry first before I can take any photos of it. As always if you have any questions or comments about the card featured in this blog post then please leave them in the usual places. Until next time - keep crafting!

Love and crafty hugs,

Sarah xxxx