Hello crafty peeps and welcome to my crafty nook! First of all please excuse any typos that may be present in this post, my cat Jinx has decided to hog the desk so the keyboard is balanced on the edge and resting against my tum! I wouldn't be surprised if the little darling decides to climb on top of either the keyboard or me while I'm writing this. I like to pretend that I'm in charge but in all honesty Jinx rules the flat with a paw of iron lol - we're just his chattels.
Today I'd like to share the Steampunk themed birthday card I made for my wonderful friend Adam, it was made using the same stamp set as the card featured in yesterday's blog post.
 |
| Envelope decorated with steampunk corner stamp |
 |
| Steampunk blended distress ink birthday card |
 |
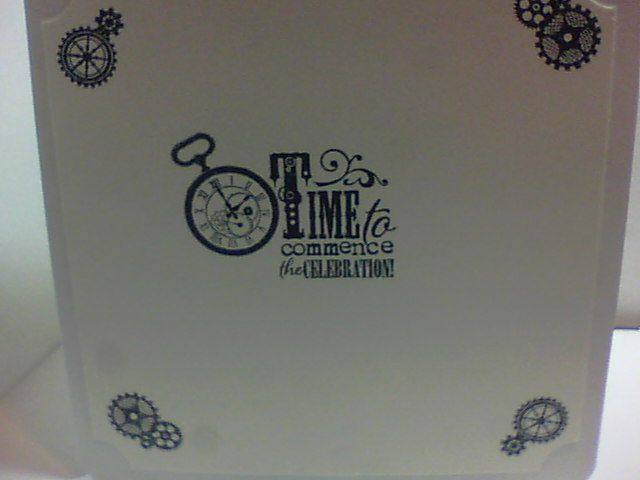
| Close up of main image |
 |
| Inside of card |
I started this card by making the card blank from a sheet of Kraft card which I cut down to 11" x 5 1/2". I scored it at 5 1/2" and rounded the corners using a punch. Only one side of this card is Kraft and the other is an off white which makes it perfect for making card blanks out of as it means you don't have to use either a white pen to add your message inside or add a paler coloured insert. For this card though, I did add an insert as I wanted to add a stamped sentiment and the inner surface is rather slick which means the message smudges unless you heat set it. To make the focal image, I cut a sheet of cream card stock to 5" square and stamped the largest stamp from the set in the middle of the card. I then added most of the colour using Distress Inks and a blending tool. I started with Spiced Marmalade and pulled the colour in towards the centre of the card using the blending tool, I concentrated the colour around the image but added a little of it over the clock when the ink was nearly gone from the foam applicator so it's a much paler colour. I added some Fired Brick and finally a little Black Soot around the edges. I then added a little more of each colour until I got the blended look I wanted. I've no idea where I got the cream card from but it is brilliant for ink blending, I don't have a mini round blending tool yet and sometimes I find I have streaks and lines left on my project after I've coloured it in but this card seems to smooth all the colours together with very little skill on my part. Once the inks had thoroughly dried I added some yellow Flex marker to the light bulb. I added a layer of Glossy Accents over the bulb and the seconds indicator on the clock face and put it to one side to dry. While the Glossy Accents was drying I cut another piece of the cream card stock for the inside of the card and removed the corners using a ticket corner punch, I then stamped the sentiment and images as shown using Memento Black Tuxedo ink. I stuck this inside the card using double sided tape. I stamped "Happy Birthday" in the four corners then added the topper to the front of the card using more d/s tape once the Glossy Accents had set. As a final little touch I added a coating of Spectrum Noir Clear Glitter brush marker over the hat band. I made a matching envelope using my We R Memory Keepers Envelope Punch Board.
I really enjoyed making this card but I think if I duplicated it I'd add a thin border of black around the topper just to make it pop a bit more. I'm hoping Adam likes it as it's a bit different to the cards I usually make him. If you have any questions or comments then please leave them in the usual places. I hope you all have a brilliant weekend and until next time - keep crafting!
Love and crafty hugs,
Sarah xxx
p.s. I thought you might like to see a photo of my 'helper'