Translate

Showing posts with label Pro Markers. Show all posts

Thursday, 12 February 2015

SHH! don't tell Chris.

Hello crafty peeps and welcome to my crafty nook! I hope you've all had a good week. Today's card is a Valentine's Day card for Chris. I'd like to enter it in the Passion for ProMarkers Blog challenge 283 - to someone I love. 


Card for my bad bad boy lol

I made this card by folding an A4 sheet of off white card stock in half to make an A5 card blank and then I stamped over the front with A lip print stamp (no idea what brand as I found it in a drawer and it has no info with it - could be Bratz, yes the dolls Bratz at one point it was difficult to buy craft stuff cos I didn't trust internet shopping which is laughable now, so I had to improvise and Bratz had a craft set available) the OX stamp is from a Clearly Besotted stamps set called Just my Type (I think!) both images are stamped in Brilliance Crimson ink and has a slight sparkle to it. I stamped the Acid Drops & Whatnots "Bad Bad Boy" image and text onto a tall scrap of 350 gsm card stock with Memento Tuxedo Black ink and coloured it in with ProMarkers:- Putty Gold metallic Berry Red Warm Grey 1 and 5 plus the blender (I coloured the stocking'd leg with WG5 then removed most of the colour with the blender). I stamped the Wild Rose Studios "Love Circles" sentiment onto a piece of white card, fussy cut it out and coloured over it with the Berry Red ProMarker. I layered it onto a scalloped circle punched out of gold card using a Woodware punch. I embossed a sheet of Colour Connection Red Glitter Card using a Sizzix Textured Impressions folder taken from the Love Set#2. I then cut it to size and layered the topper onto it with a generous amount of wet glue and weighted it down while it dried. I used thin foam tape to stick this layered topper onto the card blank. I added double thickness of foam tape to the circle and added it to the lower right hand side, then added a epoxy circle topper over the sentiment to magnify it slightly.


A slightly better photo?

Love this sentiment lol

For bad boys everywhere...

Close up of Circle sentiment

Naughty, naughty!

Close up of the image coloured with ProMarkers
Because Chris has very little sight, I've tried to introduce texture through the embossed glitter card and I've carried this through to the inside.

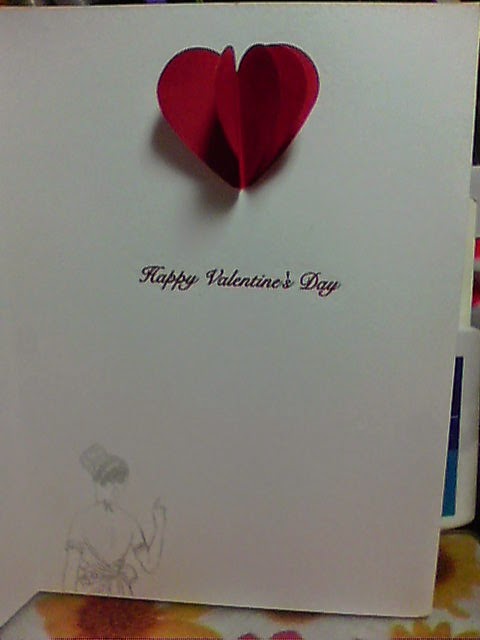
Inside of Valentine's card with 3D heart pop up

Closer look at the heart

The stamp set comes with a smaller version of the main image so I stamped this at the bottom left hand side of the card using Memento London Fog ink. The sentiment is a foiled rub on which I've had for nearly 5 years now and unlike other brands still rubs off onto the project perfectly (some brands I've had in the past dry out and stick to the carrier sheet after a few years these ones only cost 50p and are fantastic - wish I'd bought more!) To make the heart pop up I punched out 6 hearts using a Woodware punch and folded them in half vertically. I stuck one half of each heart to another until I had a heart that would lay flat in the card but pop up once opened (with a bit of fluffing). 

I hope you've enjoyed seeing my new creation, if you'd like to join in this week's challenge pop over to the Passion For ProMarkers blog. Until next time - keep crafting!

Love and crafty hugs,

Sarah xxx

Saturday, 3 January 2015

Entry#1 for Passion for ProMarkers week 277 Mega Christmas Challenge

DIE CUT, FREE, GLITTER

Entry#1 for Passion for ProMarkers Mega Christmas Challenge

Hello crafty peeps and welcome to my crafty nook! I hope you are all enjoying the first weekend of 2015, I'm in the middle of a huge re-organisation of my living  room and my "Crudy" after purchasing a much bigger than I thought sideboard/dresser from one of the local second hand shops using some of the Christmas money I was given by very generous relatives! The unit is 5 ft 4 " long and almost 6 ft high, my husband would love for me to get rid of some rather outdated 70's units but I rather like them so they're staying lol. Instead I'm hoping to replace a desk I've had since I was about 12 (plus a cupboard) with a rather battered but still functional black sideboard in my crudy and put the "new" oak sideboard in it's place in the living room. It means I'm going to be rather busy for quite a while emptying the black sideboard of around 800 books and various other stuff (can't really remember what's in the cupboards apart from a rather pretty coffee service), moving the sideboard out of the way and replacing it with the two halves of the new sideboard then putting everything away so Chris doesn't trip over the boxes and bags. Then I'll have to repeat the whole process in the crudy (probably even more stuff in there than the living room - I'm a craft hoarder!) To make things even more 'interesting' I'd really like to have everything sorted by Wednesday 7th Jan '15 as it's my mum's birthday and I've invited her over for a meal.

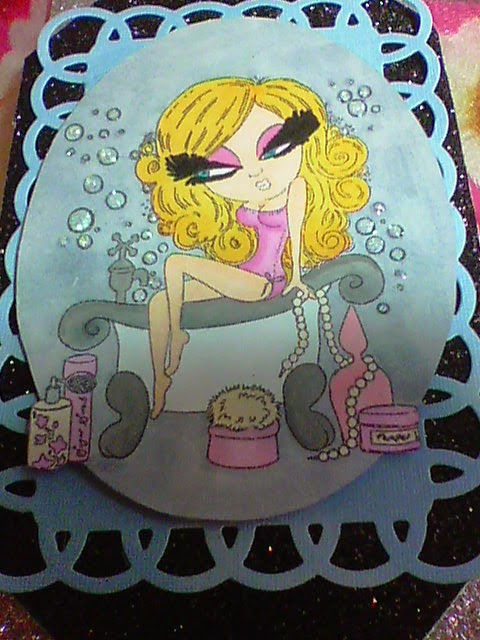
 Unfortunately I'm rather a Procrastinating Princess and I've already got distracted today making the above card for the Passion for ProMarkers blog challenge. I wasn't actually planning on entering but I've still got loads of diamond fold accordion blanks just crying out to be decorated and I treated myself to some Crafter's Companion "Scruffy Little Cat" stamps when they were in the sales (they still may be on sale so check out the Crafter's Companion Website). I've coveted these stamps for months now ever since they appeared on "Create and Craft" tv channel. I couldn't afford them at the time but I'm really glad I waited as they were only a couple of pounds each and stamp beautifully. I decided to use the Die Cuts, FREE, Glitter, choice of the craft bingo card (pearls were my FREE item). I hope the judges are ok with my interpretation of Glitter as I haven't actually used loose glitter just glitter card and glitter glue. For some extra sparkle I added black wink of stella to the main image's eyelashes, silver WOS to the bath fittings and clear WOS to the powder puff and over the eye shadow. The main image was stamped using Black Tuxedo ink and coloured in using ProMarkers. As always I apologise for the photo's quality, it doesn't do justice to the glitter card in the slightest. Below are some more photos including close ups of the ProMarker colouring.

Closed card ready for DL sized envelope

Close up of Image coloured with ProMarkers


With Added Red Glitter Hearts
I hope you've enjoyed this card share, as always if you have any comments or questions I'd love to hear from you so please leave them in the space below. I'm off to do a bit of packing and I think I hear the siren call of the crudy so I may have to do a bit of crafting too (I have to make a card for my mum!) so until next time - keep crafting!

Love and crafty hugs,

Sarah xxxx

P.S. I've just had to delete then re-submit my link on Passion for ProMarkers Mega Christmas Challenge because I'd somehow managed to link my draft version of this post instead of my actual blog post - D'oh! Sorry for any confusion caused. Sarah xxx

Tuesday, 4 November 2014

Card for Isobel

Hello crafty peeps - welcome to my crafty nook! I would like to share with you the "welcome" card I've made for Isobel.

Little Star Welcome card for Isobel

I'm rather pleased with this card and of all the baby cards I've made in recent weeks it's got to be my favourite. I started off stamping a Baby on A Cloud stamp (can't remember who it's made by - sorry) using Memento Tuxedo Black ink onto 300gsm coated white card stock and while the stamp was out I stamped it onto a large post it note to make a mask. This stamp has a very thick outline so I cut it on it rather than just inside it to make the mask ready for some Distress Ink blending. I covered the stamped image with the mask and blended three Tim Holtz Distress inks all over the A6 card (I have a ready cut stock of A6 card so I can stamp as I want to and I renew this as it gets low.) I started with "stormy skies" and blended it all over the card being careful around the top of the mask as it didn't have any sticky on it. Then I added "chipped sapphire" and blended the two colours together until there was no blender marks - I really need to get my hands on the new round blenders. Finally I added "black soot" round the edges and blended it into the centre without adding more ink. I heat set the ink and tested the card surface with embossing powder to make sure it was dry enough to heat emboss without excess powder sticking to the surface (to test if a surface is dry just pour embossing powder over it and if loads stick you'll need to heat set it or use an anti static bag) Unfortunately I tested mine over the middle of the card and not the edges so some powder did stick, however it's a happy accident because I love the way it turned out! I got three magazines today through the post and one of them had a star stencil as it's cover gift. I used this stencil and an embossing ink pen to draw the stars then I added pinpoint dots all over the background (at this point the baby mask remains on the image) and sprinkled the card with Do-Crafts silver embossing powder which I melted with a heat tool until the  powder turned opaque and silver. I removed the paper mask from the image and once I shook out the embossing powder that had gathered inside I coloured the image using Pro-markers. I stamped "Little Star" from Fancy Pants Welcome Little Star stamp set on top of the clouds but it was really hard to read so I stamped over it using clear embossing ink and heat set silver embossing powder on the words. In all honesty it looked a complete mess so I stamped the baby image again, coloured it using Pro-markers, stamped the sentiment in clear ink and heat embossed using Rangers Blue Pearl embossing powder, then I fussy cut the image out. I added black foam tape to the underside and stuck it over the original image. I found the metal Lil Charms embellishment in my stash and attached  to the top part of the card with more of the black foam tape. Finally I stuck the whole card piece to a Papermania pink A6 card blank. I stamped "Welcome" inside and a sprinkling of stamped stars (also from the Fancy Pants stamp set) in the four corners of the inside panel. I also stamped these stars onto the outside of the envelope.

I've a few more cards I'd like to share but that's for the next blog post, so until then - keep crafting!

Love and crafty hugs,

Sarah xx


Monday, 13 October 2014

An early birthday pressie...


Hello crafty peeps - welcome to my crafty nook.My lovely hubby let me place an order with Clearly Besotted stamps last Tuesday and it arrived Wednesday! I continue to be amazed by this company. It's got to have the quickest order to delivery times of any internet craft company ever. To take advantage of the free P & P if you spend £50 or more I placed an order of £52.60 for 8 stamp sets and 4 dies which are my birthday present from Chris. He very kindly allowed me to have it straight away instead of waiting until the 25th so I've been able to have a bit of a play with two of the stamp sets.  My order consisted of the Notebook Edge Die @ £3.00, Geometric Style II Die Collection @ £5.50, Apple Die @ £1.50 (fits the apple stamp set I got in my first order), Wave Edge Die @ £2.60 (sale item), You're A Hoot stamp set @ £4.00, You're A Hoot II stamp set @ £4.00, Scientifically Speaking stamp set @ £9.00, Key To My Heart stamp set @ £4.00, Little Onesie stamp set @ £4.00, Just A Note stamp set @ £4.00, Dandelion Dreams stamp set @ £9.00 and Build A Bug stamp set @ £2.00 (sale item). Included in my order was a mini banners stamp set as a thank you for loyal custom over the two years that Stephanie Wincott has owned Clearly Besotted Stamps www.clearlybesottedstamps.com. Felt a little guilty for receiving this freebie as this was only my second order but also extremely pleased to get it as it has some fantastic sentiments on it and fits the mini banner die I got in my last order.

Dandelion Dreams stamp set £9.00

Scientifically Speaking Stamp set £9.00

Little Onesie stamp set £4.00 and Key To My Heart stamp set £4.00

Just A Note stamp set £4.00 and Build a Bug stamp set £2.00


You're A Hoot stamp set £4.00 and You're A Hoot II stamp set £4.00

My free stamp set!

Notebook Edge Die £3.00

Geometric Style II Die Collection £5.50

Wave Edge Die £2.60

Apple Die £1.50

To show my appreciation for the free stamp set I made a thank you card using the free stamp set and the Dandelion Dreams stamp set - I love these stamps as they are very versatile even though the dandelions aren't exactly what I'd call a dandelion clock but are very attractive in their styling.

Thank You card using Dandelion Dream 


I kept things simple by stamping the images out using black ink and added a splash of colour with polka dot red washi tape. I think I went a bit OTT with stamping out the individual seeds but it was very rather relaxing and I couldn't stop lol. I continued the seed theme on the inside of the card and went over the black ends of both the flower heads and the seeds with a black wink of stella marker. Finally I added a single coloured gem to the centre of the main flower.


The other stamp set which demanded instant use was the Little Onesie stamp set - deceptive in it's simplicity I've actually used it to make two very different style cards. My sister-in-law is due to have her baby girl on my birthday but I've a feeling she'll have it sooner than that so I wanted to have a new baby card ready for her.


This very simple card was made by stamping the onesie using Memento Black ink onto white card with the flower stamped using a purple ink (not sure of brand). The centre was coloured in using a yellow Promarker and some Dovecraft glitter glue was added to the top to add some sparkle. Once the glue was dry I fussy cut the onesie out (really easy with such a simple image) and then a It's A Girl printed sentiment was added behind it (originally from a card kit) and the whole thing was popped up on sticky pads and stuck down to the centre of a scalloped edge card blank. Crocheted lace and pink velvet ribbon was added on the right side and BABY was spelt out using embossed letters from the same card kit as the it's a girl sentiment.

The second baby card isn't quite finished yet so I'll share it with you all the next time I post. Until then - keep crafting!

Love and crafty hugs,

Sarah xxx


Wednesday, 8 October 2014

Baby, it's cold outside!!!

Hello crafty peeps welcome to my crafty nook! Brrr, well you can certainly tell it Autumn now. Cold, rainy days and nights have made it the perfect time to snuggle into my crudy and work on some projects. As you know if you're a regular reader of this blog I'm rather fond of entering card comps in magazines and as it's looking increasing unlikely that I was one of the winners of the Cardmaker of the Year 2014 comp I've started to work towards the next competition, "Papercrafter of the Year 2014" that's currently running in the Papercraft Essentials magazine. The entry needs to consist of two cards and one papercraft project (mini book, scrapbook page etc) and as I find the papercraft project the most challenging I decided to work on that first. To begin with I did consider making an emergency card kit out of some cardboard packaging sent through the post (the judges seem to like upcycling if previous winning entries are to be believed) but as one of the rules is that the third part of your entry must not be a card I was slightly worried that my entry would be disqualified if I did this project. So instead I've made a Santoro Simply Gorjuss themed birthday book with matching gift bag. Ironically enough the pages of the birthday book are sort of gatefold cards - 14 of them in fact!
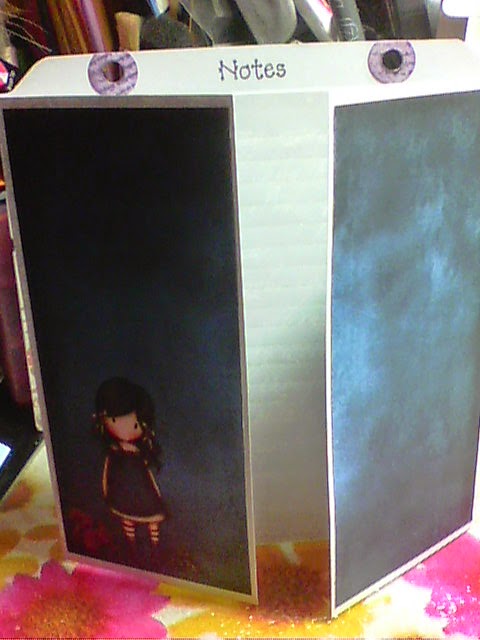
Front Panel of Gorguss Girls Birthday Book

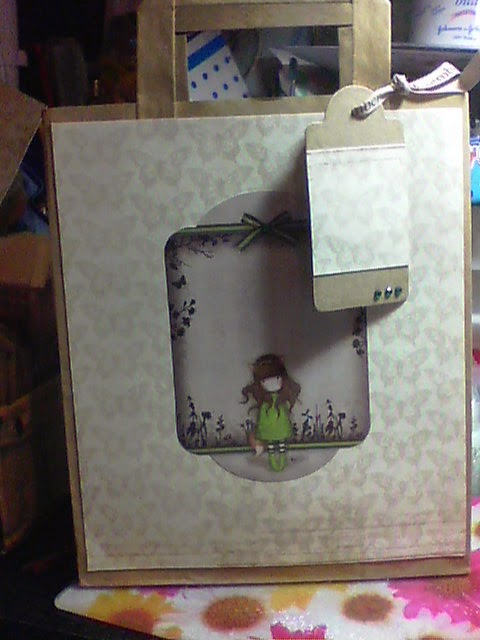
Simply Gorjuss Gift Bag featuring "The Fox"
Close up of "On Top of the World" stamped image
I had to trim the OTOTW stamped image because once I fussy cut it out I realised it was far to big for the front of the book but I think it still looks okay.


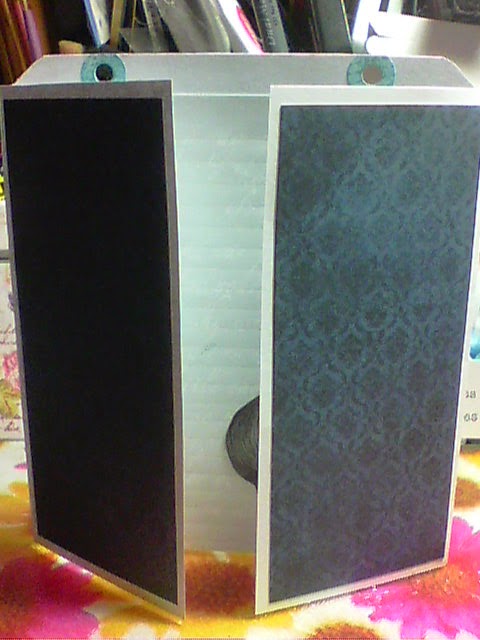
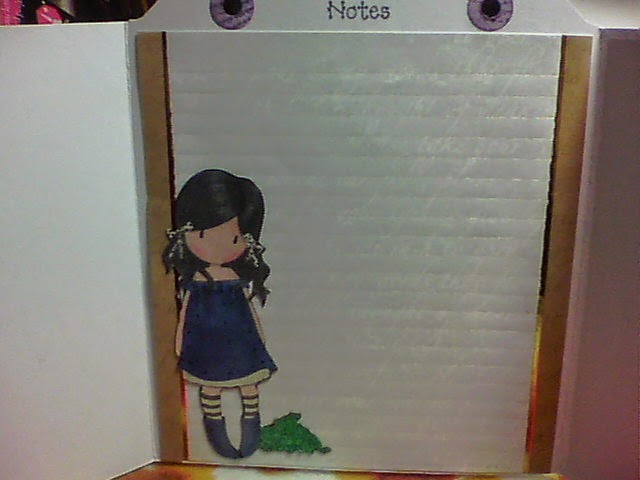
I made 14 gatefold cards out of A4 white cardstock and trimmed them down to 7" tall as I wanted the gates to be 6" by 3" and the inner panel to be 6" by 6" (ignoring the tabbed top) I used a WRMK envelope punch board to create the tab top and cut the excess card from the gates. I then used an ordinary two hole punch to punch out the holes for the Woodware book rings to go through.The hole reinforcers were plain white but I stamped over them using a script stamp and Distress inks then I blended the same ink over them once the stamped image was dry. I used Dusty Concord, Red Brick. Walnut Stain, Shabby Shutters and Tumbled Glass (I think) to stamp and blend over the various hole reinforcers. I added the altered hole reinforcers and trimmed them slightly down to size. I've had a Santoro notepaper set for absolutely years and it had 15 sheets of gold embossed paper with faded script in the background which is perfect for this project so I cut them down to size and added them to the inside of the gatefold as above. The front panels were decorated with Docrafts Santoro Simply Gorjuss 6" by 6" paper pack and were simply cut in half and trimmed slightly so that there was a small white border round each panel. I then stamped 15 Gorguss Girl stamps, coloured them in using promarkers and fussy cut round each image. I went round the images using a waterbased black marker (a black Promarker would just bleed into the image as I discovered on one of the images - I had to start again!) so the edges look more finished (think I may have missed a spot or two) and then the coloured images were added to the inner panels. To finish the gatefold "cards" I stamped the tabs with the relevant month using a calendar stamp set which I got free with Simply Homemade magazine last year and the front and back panel were stamped with notes and calendar notes. I thought these panels could be used for things like Easter which changes dates and for Christmas card lists. The front and back panel were cut to 6" by 7" and tabbed in the same way that the gatefold "cards" were but I used 350gsm hammered white cardstock instead of the 250gsm plain white cardstock that I used for the gatefolds. I decorated the front panel using more of the 6" by 6" paper and the On Top Of The World stamped image. I hand lettered some relevant book titles and "remember" on a piece of white cardstock which I stuck behind a metal book plate. I then fixed the book plate to the front page using two mini brads. Finally I added a length of "Remember" printed ribbon to one of the book rings and secured it using black waxed cord.

The paper gift bag was simply decorated using Santoro A4  butterfly paper cut to size - it's hard to tell from the photos but the butterfly paper is textured and feels like canvas. I added a Gorguss Girl Notelet (£3.00 for a pack of 12 assorted from Docrafts) to the centre, made a tag using kraft card and a Sizzix Tag#2 die and decorated with the cut off strip from the front panel then finished the whole thing off by adding some green gems (Hunkydory - total bargain from Goodwins in Bridlington at only £1.00 a pack!) and a length of printed ribbon. Because the paper bag is quite flimsy I added a sheet of kraft card cut to size to the back and a panel of mountboard to the inside of the back to reinforce the bottom.

Below are some more photos of the complete project. As always, if you have any questions please write them in the comments section and I'll get back to you ASAP. I got a birthday present from my lovely hubby today which I'll be sharing with you in the next few days, but in the meantime - keep crafting!

Love and crafty hugs,
Sarah xxxx


Tuesday, 23 September 2014

Pro-Marker colouring

Hello crafty peeps, welcome to my crafty nook. I've not done a lot since the last time I posted on this blog but I have been colouring in some images using Pro Markers. My favourite images to colour are DoCrafts Santoro Simply gorjuss stamps which I always stamp in Memento Tuxedo Black ink as it doesn't react to the alcohol.

This image is called "Black Star" and you may recognise it from the Pop Art inspired card from my Cardmaker of the Year Entry. Both these photos are of the same image I just changed the place where I took the photos.


If  you have any questions about the Pro Marker colours then please leave a comment below. I'm planning on doing a couple more Simply Gorjuss images in the next few days and I'll post them as I finish. Until then, keep crafting!

Love and crafty hugs,
Sarah x x x