Translate

Showing posts with label Santoro gorjuss stamps. Show all posts

Tuesday, 15 December 2015

My comp entry

Hello crafty peeps and welcome to my crafty nook! I hope you are all well and are prepared for Christmas - I'm not. My copy of Papercraft Essentials arrived today and it's announced it's winner and runners up of the Papercrafter of the Year competition. I haven't got my entry sent back but then it was nearly four months before I got last year's returned and that was in someone else's box with their details scribbled over with a black marker. As I don't want to wait four months until they get around to sending my cards and project back, I thought I'd share them with you now as I took photos before sending it off.

Alice in Wonderland Shadow Box

For the project element of the entry I made an "Alice in Wonderland" themed shadow box. The base is made from a 12" x 12" piece of black card stock and I added panels of embossed black card onto the sides to make the shadow box look wider than it is. I highlighted the embossed areas of the black card with silver gilding wax. I quilled a 3D toadstool and made a mini pack of cards using a heart stamp and rounded the corners with a punch. The roses have been 'painted' red using a Promarker. I stamped and coloured a Docrafts Simply Gorjuss image from their 'Alice' range. The pocket watch was made using a Xcut set of dies and the metal keys and clock pieces were from Papermania. The faux metal frame was from my stash as were the jewels and the little bottle. I added a 'Drink Me' label to the neck of the tiny bottle. I really love the end result and can't wait to get it back so it can have place of pride on my wall.

You've already seen this...
My first card is one I've previously shown and it featured the HOTP steampunk colorist image.


Sorry these pictures aren't very clear - the mirror card is so shiny it effects the focus of the camera and it can't be altered manually as my camera is very basic. This card is very simple but I loved the unusual card fold and decided to do a bit of water colour envelope art to accompany it. The mirror card it embossed using two embossing folders and I added jewels to highlight parts of it. Although it is very 3D it folds completely flat for posting. It isn't the easiest card to make though as you have to align the front and middle panels very carefully otherwise they won't stand upright.

If you have any questions or comments about this post then please leave them in the usual places. I'm working on some Christmas cards and gifts so hopefully I'll be adding another post soon. Until next time - keep crafting!

Love and crafty hugs,

Sarah xxx


Thursday, 20 November 2014

Entry For Passion for ProMarkers Challenge 274 "Entertain us".

Hello crafty peeps - welcome to my crafty nook! I had fun doing Challenge 273 over at Passion for ProMarkers and enjoyed going out of my crafty comfort zone by using lace so I've decided to enter the challenge this week too which is themed around "entertain us", this can be either inspired by a film or song so I've chosen "On Top of the World" by The Carpenters. I've always loved this song plus it gave me an excuse to use one of my favourite stamp sets - santoro's simply gorjuss...! on Top of the World.

santoro's simply gorjuss ~ ....on top of the world stamped card
Close up of image coloured with ProMarkers
A little closer still! lol


Inspired by last week's challenge to make a lace flower!

Same card but with two leaf hat pins added

Close up of lace flower with added hat pins

PRODUCTS USED:

Stamp set - santoro's simply gorjuss...! ...on top of the world.

INK: Memento Tuxedo Black ink

CARDSTOCK: White 300gsm (brand unknown), Papercellar Silver card, The Works holographic card, The Works black card. Scalloped edged 8" x 8" card blank (local craft shop), DCWV cloudy sky paper from all occasions scrapbook in a stack kit.

Lace from Boyes

Gems from Poundland

Woodware Ticket corner punch

Dovecraft "Brights" Chalks (the sky)

Clear Wink of Stella Brush pen (shimmer on hair and pigeons)

Leaf Hat Pins Every Craft's A Pound

Metal World Charm taken from Avon Keyring

PROMARKERS
Skin: Almond, Sunkissed Pink
Hair: Cool Grey 3,4,5
Leggings: Cool Grey 1 and 5
Pinafore and petticoat: Ice Grey 1
Dress: Pastel Blue
Pigeons: Slate and Cool Grey 2

I hope you've enjoyed my challenge entry and if you're inspired by my card please leave a comment below with a link to your creations. Until next time - keep crafting!

Love and crafty hugs,

Sarah xxx

Wednesday, 8 October 2014

Baby, it's cold outside!!!

Hello crafty peeps welcome to my crafty nook! Brrr, well you can certainly tell it Autumn now. Cold, rainy days and nights have made it the perfect time to snuggle into my crudy and work on some projects. As you know if you're a regular reader of this blog I'm rather fond of entering card comps in magazines and as it's looking increasing unlikely that I was one of the winners of the Cardmaker of the Year 2014 comp I've started to work towards the next competition, "Papercrafter of the Year 2014" that's currently running in the Papercraft Essentials magazine. The entry needs to consist of two cards and one papercraft project (mini book, scrapbook page etc) and as I find the papercraft project the most challenging I decided to work on that first. To begin with I did consider making an emergency card kit out of some cardboard packaging sent through the post (the judges seem to like upcycling if previous winning entries are to be believed) but as one of the rules is that the third part of your entry must not be a card I was slightly worried that my entry would be disqualified if I did this project. So instead I've made a Santoro Simply Gorjuss themed birthday book with matching gift bag. Ironically enough the pages of the birthday book are sort of gatefold cards - 14 of them in fact!
Front Panel of Gorguss Girls Birthday Book

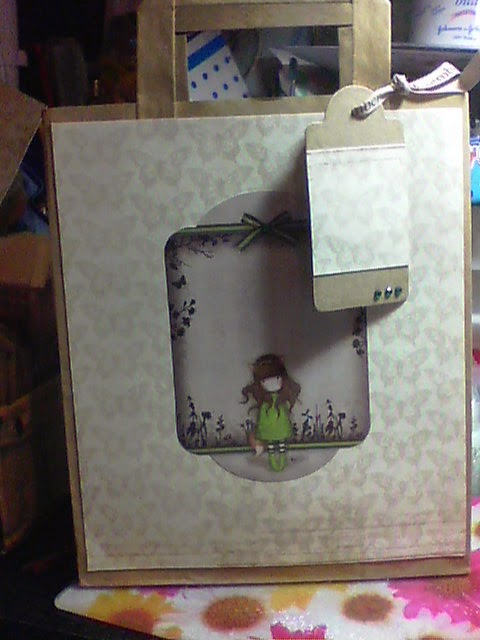
Simply Gorjuss Gift Bag featuring "The Fox"
Close up of "On Top of the World" stamped image
I had to trim the OTOTW stamped image because once I fussy cut it out I realised it was far to big for the front of the book but I think it still looks okay.


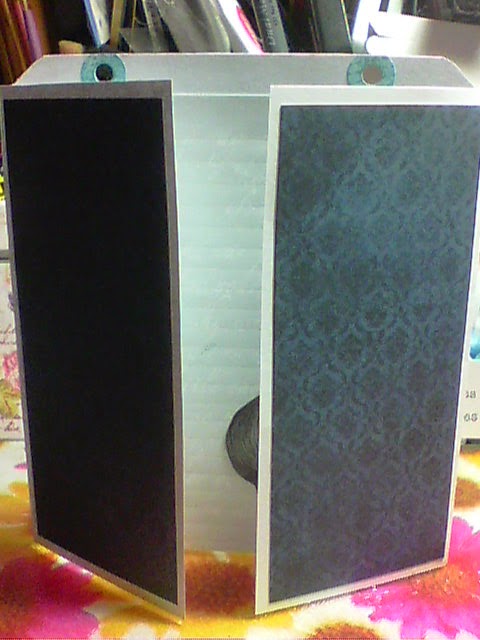
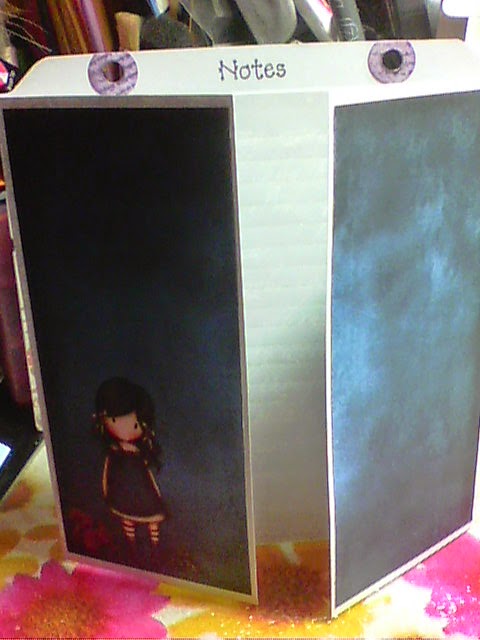
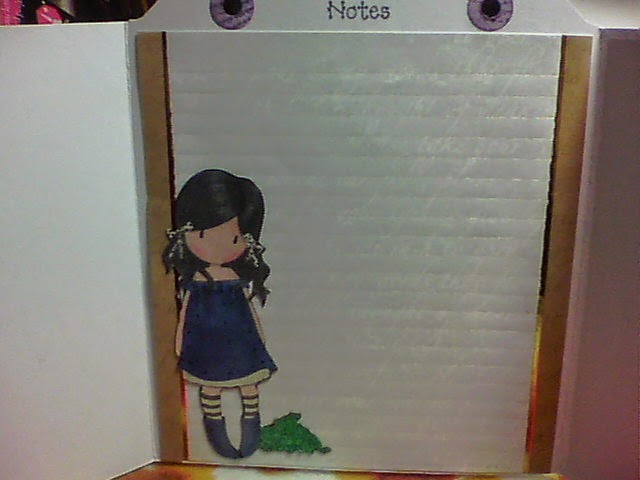
I made 14 gatefold cards out of A4 white cardstock and trimmed them down to 7" tall as I wanted the gates to be 6" by 3" and the inner panel to be 6" by 6" (ignoring the tabbed top) I used a WRMK envelope punch board to create the tab top and cut the excess card from the gates. I then used an ordinary two hole punch to punch out the holes for the Woodware book rings to go through.The hole reinforcers were plain white but I stamped over them using a script stamp and Distress inks then I blended the same ink over them once the stamped image was dry. I used Dusty Concord, Red Brick. Walnut Stain, Shabby Shutters and Tumbled Glass (I think) to stamp and blend over the various hole reinforcers. I added the altered hole reinforcers and trimmed them slightly down to size. I've had a Santoro notepaper set for absolutely years and it had 15 sheets of gold embossed paper with faded script in the background which is perfect for this project so I cut them down to size and added them to the inside of the gatefold as above. The front panels were decorated with Docrafts Santoro Simply Gorjuss 6" by 6" paper pack and were simply cut in half and trimmed slightly so that there was a small white border round each panel. I then stamped 15 Gorguss Girl stamps, coloured them in using promarkers and fussy cut round each image. I went round the images using a waterbased black marker (a black Promarker would just bleed into the image as I discovered on one of the images - I had to start again!) so the edges look more finished (think I may have missed a spot or two) and then the coloured images were added to the inner panels. To finish the gatefold "cards" I stamped the tabs with the relevant month using a calendar stamp set which I got free with Simply Homemade magazine last year and the front and back panel were stamped with notes and calendar notes. I thought these panels could be used for things like Easter which changes dates and for Christmas card lists. The front and back panel were cut to 6" by 7" and tabbed in the same way that the gatefold "cards" were but I used 350gsm hammered white cardstock instead of the 250gsm plain white cardstock that I used for the gatefolds. I decorated the front panel using more of the 6" by 6" paper and the On Top Of The World stamped image. I hand lettered some relevant book titles and "remember" on a piece of white cardstock which I stuck behind a metal book plate. I then fixed the book plate to the front page using two mini brads. Finally I added a length of "Remember" printed ribbon to one of the book rings and secured it using black waxed cord.

The paper gift bag was simply decorated using Santoro A4  butterfly paper cut to size - it's hard to tell from the photos but the butterfly paper is textured and feels like canvas. I added a Gorguss Girl Notelet (£3.00 for a pack of 12 assorted from Docrafts) to the centre, made a tag using kraft card and a Sizzix Tag#2 die and decorated with the cut off strip from the front panel then finished the whole thing off by adding some green gems (Hunkydory - total bargain from Goodwins in Bridlington at only £1.00 a pack!) and a length of printed ribbon. Because the paper bag is quite flimsy I added a sheet of kraft card cut to size to the back and a panel of mountboard to the inside of the back to reinforce the bottom.

Below are some more photos of the complete project. As always, if you have any questions please write them in the comments section and I'll get back to you ASAP. I got a birthday present from my lovely hubby today which I'll be sharing with you in the next few days, but in the meantime - keep crafting!

Love and crafty hugs,
Sarah xxxx


Tuesday, 23 September 2014

Pro-Marker colouring

Hello crafty peeps, welcome to my crafty nook. I've not done a lot since the last time I posted on this blog but I have been colouring in some images using Pro Markers. My favourite images to colour are DoCrafts Santoro Simply gorjuss stamps which I always stamp in Memento Tuxedo Black ink as it doesn't react to the alcohol.

This image is called "Black Star" and you may recognise it from the Pop Art inspired card from my Cardmaker of the Year Entry. Both these photos are of the same image I just changed the place where I took the photos.


If  you have any questions about the Pro Marker colours then please leave a comment below. I'm planning on doing a couple more Simply Gorjuss images in the next few days and I'll post them as I finish. Until then, keep crafting!

Love and crafty hugs,
Sarah x x x

Friday, 19 September 2014

*DRUM ROLL PLEASE* The Big Reveal...

Hello crafty peeps, welcome to my crafty corner! A little later than promised I'd like to share with you all my entry to the National Cardmaker of the Year 2014 competition.


My first card is a homage to pop art and is deceptively simple in design but I think it is rather striking. I used the docrafts Santoro's gorguss "The Black Star" stamp set and stamped the main image six times in different coloured inks (Tim Holtz Distress Inks in Dusty Concord, Peacock Feather, Salty Ocean, Scattered Straw, Fired Brick and Spiced Marmalade) then punched them out using a square Woodware punch. I cut out a piece of black card just large enough to hold the six images with a thin black border and stuck them down using tape runner as shown above. I stuck the panel towards the top portion of the 6" by 6" card blank because I wanted it to mirror an exhibition in a gallery and to help with that effect I stamped the "simply gorjuss" sentiment that comes with the Black Star stamp set in Memento Tuxedo Black ink on white card, and mounted it on foam tape before sticking it under the focal image on the right hand side in the manner of artist information at a gallery. I then rounded the bottom corners to add a little more interest.


My second card also features a Docrafts Santoro's gorguss stamp set, this time "The Fox". Because my first card is so colourful, I wanted to colour this image in a slightly different way so I decided to colour it in shades of grey using Pro Markers and then with an adapted spotlight technique, I coloured the fox ears and tail in using warm browns and orange Pro Markers. I highlighted the image using a clear Wink of Stella brush marker which is quite hard to see in these photos, but on the smaller image on the right you can just about see the shimmer on the tail, boots and also on the brown leaves. I cut the leaves out using three different X Cut punches (Docrafts) and used white card which I then coloured in using Pro Markers using autumnal shades. I fussy cut the foxy girl image and mounted it on a black card oval using foam squares then stuck the coloured leaves out round the edge using a Zig two way glue pen. I took a 8" by 8" scalloped edge card blank and after trimming a few centimetres off each side stuck down a sheet of striped paper taken from a DCWV "Travel" themed scrapbook stack. I then centred the main image and stuck it down with red liner tape. I decorated the inside and the envelope with the remaining punched leaves and stamped out a verse inside the card. I coloured some white pearls to match the leaves using Pro Markers and added them to the top left and bottom right of the panel.


I think I've left the best until last or at least the most unusual! My final card is a craft plastic gatefold card with belly band in a clockwork theme.


This card took me all night to make (about six hours) but was totally worth it. The hardest part about it was getting the craft plastic to score sufficiently enough to fold into the gatefold shape - I had to repeatedly score and fold on both sides of the craft plastic. I embossed two panels of holographic mirri board using a cuttlebug embossing folder called clocks (I think) which were mounted on the front panels using red liner tape. I then cut panels of the same holographic card to fit the inside of the panels to cover the fact that the tape was very visible from the outside panels - I kept miss-aligning it so in the end I cut a thinner strip of the same card then once that was lined up on one side added a strip of black holographic glitter card from the other, I stamped out some clock faces with different times and covered them with dome stickers so that they looked like pocket watches. I added these to the inside panels. I added another panel of the holographic card to the centre of the main inside panel and stamped out a greeting onto white card then stamped around and off this panel using clock faces and cogs. I then mounted this onto the holographic card. A further panel is mounted onto the back of the card so you can't see the red liner tape through the craft plastic. I stamped out a final clock face and added a dome sticker over it then mounted it onto a holographic circle. I stamped out a Teresa Collins happy birthday ticket sentiment and cut it our and secured it using the clock face. I made a belly band out of black card and added the circle embellishment over where I'd used the adhesive to secure the band. As the photos above show the belly band can be removed to allow the card to be displayed open or left on so the embossed panels are showing.

I hope you've liked sharing my creations, I'm hoping to make some more cards soon and in fact there are another two big card making competitions coming up shortly, both of which require two cards and a paper project. I'm a bit nervous about the projects as I'm primarily a card maker and a very occasional scrapbooker - projects are not my forte!

Please feel free to leave a comment if you have any questions about the cards shown or anything else and also please check out my little survey that's currently running - I'd love to know what you'd like to see in future blog posts.

Until then, keep crafting!

Love and crafty hugs,
Sarah xxx