Translate

Showing posts with label Papermania. Show all posts

Thursday, 5 February 2015

Acid Drops and Whatnots "Does my bum look big?"

Hello crafty peeps, welcome to my crafty nook! Nearly the weekend again, not sure where this week's gone. It's my hubby's best friend's birthday on the 10th and Chris asked me to make a card for him. The timing was perfect because this week's challenge on Passion for ProMarkers is "One For The Boys" (male themed makes). There isn't a lot of ProMarker colouring but it is there on the stamped image so I'm entering it in the challenge but plan on submitting a second entry once it's made.

Acid Drops and Whatnots card

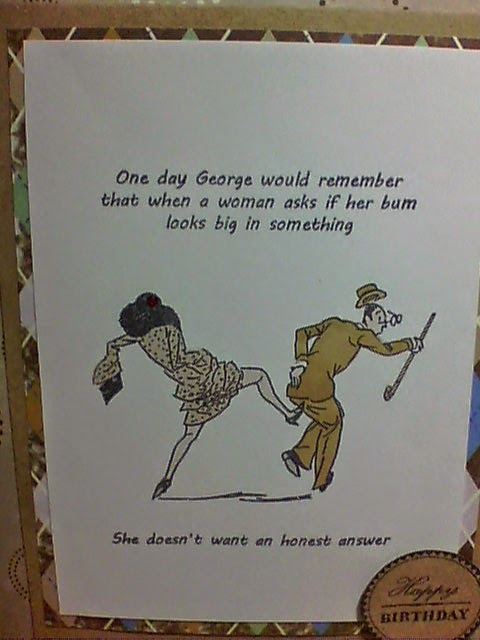
For this card I used a stamp set from one of my favourite company's - Acid Drops and Whatnots, I don't have a huge collection of the stamp sets but I try to purchase a couple or three sets every time they have a sale. The featured stamp is from their last sale (aciddropsandwhatnots.co.uk click on this link and then on the Sale Stamps and Topper Sets to purchase this stamp set for the reduced price of £6.99) and is one of my favourites as it's one of the few stamp sets I own which are suitable for men's cards. Because it's a vintage image I wanted to keep the colours muted (ProMarkers used are Caramel, Putty, Almond, Sandstone, Cool Grey 1 and Vanilla) and just added a splash of colour to the lady's hat by adding a small red gem. The papers are cut down from a Dovecraft 12" x 12" paper pack and I'm afraid I can't remember the name of it as I bought it 6 years ago and the front cover's gone walkabout - those pesky craft gremlins probably stole it! The card base and card layer are both Kraft card purchased from my local craft shop and I used a sentiment taken from a Kirstie Allsopp stamp set that came free with one of my craft magazines, probably Simply Homemade or Crafts Beautiful. I stamped it on a piece of scrap kraft card using my usual ink. The inside of the card is stamped using a sentiment taken from a Docrafts Papermania stamp set from the Heritage Press range. Here are a couple of additional photos.

Nice Aim Madam!

Inside of card.

I had a lot of fun making this card and I really hope Les (Chris's friend) likes it. If you'd like to follow along with this week's challenge click on the link promarkerchallenge.blogspot.co.uk/2015/02/week-282one-for-boys.html. As always if you have any questions or comments please leave in the box below or use the comments form in the side bar. Until next time - keep crafting!

Love and crafty hugs,

Sarah xxx

Friday, 23 January 2015

New Driver Card and haul from Every Craft's A Pound

Hello crafty peeps, welcome to my crafty nook! I can't believe it's already a week since my last post - I don't know where the time's gone. I hope you are all well and have something fun planned for the weekend -my plan is to hibernate or just hide in my crudy lol. I'm still (yes STILL!) sorting my crudy out and I've finally put away some Christmas stuff that got left on my desk after making Christmas cards last year, I thought I'd put it all away put I think it hides when I'm not looking. Because my crudy is very small I tend to have boxes stacked on top of each other and I don't have any work surfaces clear (when I'm crafting my free space is about the size of an A4 sheet of paper and when I use my trimmer it hangs off the edge of the desk) so I have to balance everything on my hip or on the floor when I'm tidying my stash (not much clear space there either) which makes putting things away turn into quite a production. Plus I'm a bit idle.

I literally have an A4 sheet of paper worth of space!

Just like last week I have my little crafty helper keeping an eye on things as I blog but instead of sitting on my head he's curled up on the pull out shelf of the computer desk - it's really sweet and he's keeping my wrists warm as they are resting on him! Only problem is I keep having to stop typing every couple of lines or so as Jinx gets fidgety if I don't stroke him regularly. Small price to pay to have a contented cat.

Passion for ProMarkers Blog Challenge week 280 - New Beginnings

New Driver card entry 

Click here to join in: promarkerchallenge.blogspot.co.uk/2015/01/week-280-new-beginnings.html

As always I'm doing the Passion for ProMarkers Blog Challenge which is called "New Beginnings", I've started this project three times so far, the first two attempts were for Shhh Baby Asleep Door signs as I wanted to do something a bit different than a baby card but I ended up scrapping them as I couldn't get them to look the way I had them in my head. Then I decided to do a car themed card as my nephew is taking his driving test soon and it would be good to have a card with a purpose this week. I've had two orders from "Every Craft's A Pound" this year and ECAP has started giving away a free gift with every order - stamps this time round. The first free stamp set I got was called Vroom Vroom and has a sleek sports car as it's main image and the second stamp set I got free was called Beep Beep and has the front grill of a car with number plate style greetings to stamp in the empty registration plate. I stamped the sports car out and coloured it with red poppy and red ProMarker but couldn't get it to look shiny so I decided to cheat and coated it with some Dovecraft clear 3D pearl effects (it's a bit like a clear raised glue or Glossy Accents and is AMAZING for sticking sequins to projects - once it dries those suckers won't shift!) unfortunately it dried streaky as I didn't put an even amount on the car. Stupidly I was being a bit stingy with it as I only have one bottle (did the same with Glossy Accents, never used it as it was nearly a fiver for a bottle and now it's gone yellow!) which is really daft as it only cost £1 in the first place (will definitely be buying more bottles assuming ECAP still sell it when I place my next order). So I scrapped that idea and instead settled on a cute Mini car image from a stamp set called "New Beginnings". I stamped the image onto a panel of white card stock towards the left hand side of the card using Memento Tuxedo Black ink then masked off the area above the bonnet using a heart shaped post it note (bonnet and post it note both curve slightly) and stamped a flower half on the bonnet in the same ink, then I stamped a different flower on the door of the Mini. Both stamps came from a set I got free from Crafts Beautiful magazine in 2011 which featured cupcakes and flowers. The wheels of the car were a little patchy so I stamped them again on a spare piece of card and fussy cut round them. I coloured all images using ProMarkers then stamped some hearts (stamp used from "Scientifically Speaking - Clearly Besotted) in red ink behind the back of the car so it looks like they are coming out of the exhaust and stamped more flowers using black ink which I then coloured in. I added a black road using Black Wink of Stella which I also added to the re-stamped wheels. The door handle, bumpers, wing mirror base and trim around the headlight were coloured in using ProMarkers Metallic silver marker. I added clear Wink of Stella to the windows, flowers and lights of the image. I added the new wheels using sticky foam tape so they are slightly raised on the car. I coloured the sky using Dovecraft Brights chalks then stamped W3LL DON3 from the Beep Beep stamp set and punched out a star from glitter card which I added to just under the sentiment. I glued some sequins onto the hearts and flower exhaust plume using the Dovecraft clear Pearl Effects. Once the sequins where dry I mounted the panel onto corrugated silver card and then matted it onto black card.  I made a card blank using tie dyed card from DCWV which I think ties in nicely to the hippy style of the mini.

Close up of topper

This car is probably a bit girly for my nephew but I couldn't resist making it pink and flowery. It's taken me a lot longer than usual to make a card for this challenge after all my false starts but I'm rather pleased with how it's turned out.

Haul from Every Craft's A Pound


I couldn't resist putting in an order to ECAP after I saw all the lovely Steampunk themed metal embellishments. I've just taken a photo of the complete box of goodies as many of them are multiples of the same thing - the quality is poorer than usual and I can't take another as I've put everything away so please bare with me. My order included Papermania Chronology Clock Faces, Cogs, Keys, book plates and clock hands though they are more like game spinners than hands. Four Urban background stamps (Chronology again) three bottles of Dovecraft 3D pearl effect in black, silver and cream and an embossing folder called Diamond Frame which matches the Docraft Art Deco release from last year. My final item was the free stamp set mentioned above. Check out the latest deals at ECAP here: www.everycraftsapound.co.uk - there are loads of Crafters' Companion goodies just in.

I hope you've enjoyed sharing my card and haul from ECAP. As always if you have any questions or comments please leave them below or in the comments form in the sidebar. I have a birthday card to make this weekend for Isobel's daddy which I'll post once I've made it (unless it's too hideous to share!) so until next time - keep crafting!

Love and crafty hugs,

Sarah xxx

Friday, 16 January 2015

Passion for ProMarkers Blog Challenge week 279 - Teddy Bears

Hello crafty peeps - welcome to my crafty nook! I can't believe it's nearly the weekend again - where has this week gone? I hope you've all had a good week and have lots of crafty plans for the weekend. My "crudy" still leaves a lot to be desired but one good thing has come from all this chaos - I've finally found the star dies that the craft gremlins had stolen inside a Amazon cardboard wrapper of all places (I save them in case I can think of a way to re-use them!), fingers crossed they'll put the water colour pencils in a place I'm going to look very soon too lol. Please excuse any typos that I may miss, my fur baby Jinx is being 'challenging' and keeps standing on the keyboard, in front of the screen or on my head! Not sure how he quite manages the last one as he is quite a big cat - I can only conclude that I have a giant head!!!

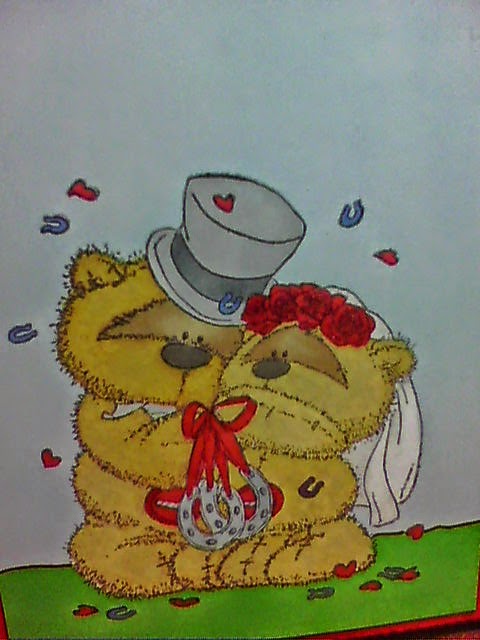
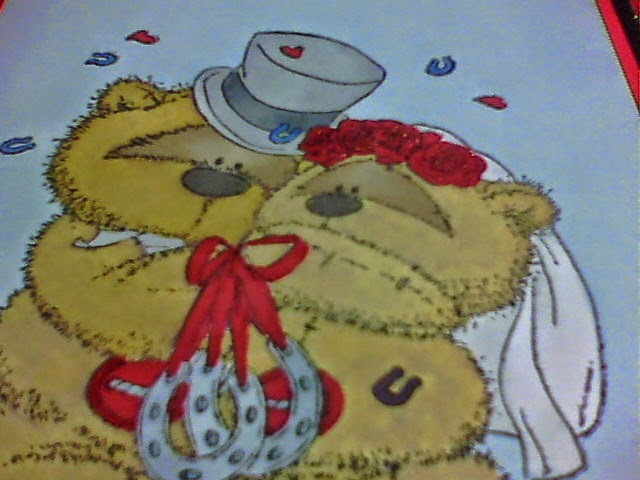
Anyway back to the main reason for this blog post - this week's challenge is Teddy Bears and one that I again found challenging (but not as challenging as Jinx!) not because I don't have the right supplies but because I have too many (what a lovely complaint to have, right?) and it was extremely difficult to chose which bear stamp to use. In the end I chose a Fizzy Moon stamp called Wedding Bells which I bought at the beginning of last year from my local craft shop. TBH I usually rigorously follow the coloured image on the packaging which is fine when it's something like "Tatty Teddy" or the "Forever Friends" bear where the images are well known but I think a little experimentation is good for images that don't have that brand recognition (saying that I haven't been in a card shop for about 10 years so I've no idea if Fizzy Moon is as popular as the two brands already mentioned - people may be horrified with the way I've coloured the two bears!) One of the reasons I've started to take part in the challenges on Passion for ProMarkers is to push myself out of my crafting comfort zone and not following the packaging of this stamp really did do that (babysteps still) saying that though the colouring isn't that different to the original. I've also tried a new way of colouring fur (new to me anyway) and instead of using pens in the same colour wave (yellows with yellows etc) I've actually blended mustard yellow with either caramel (Bride) or cinnamon (Groom) AND if that wasn't Avant Garde enough I scribbled the brown colours all over the images (obviously keeping inside the lines - I'm not that much of a rebel!) before going over it with the mustard! - Yes you did read that right, I SCRIBBLED!!! lol As usual my camera lets me down so you can't see how much texture this method gives the bears, they look all nubbly and worn in real life, just like the ted does that I've had since I was born. My husband and I married relatively late in life (we'll probably be pensioners when we celebrate our silver wedding anniversary) so I find the thought of middle aged bears getting married oddly comforting and I think other late bloomers would like it on their wedding card too.
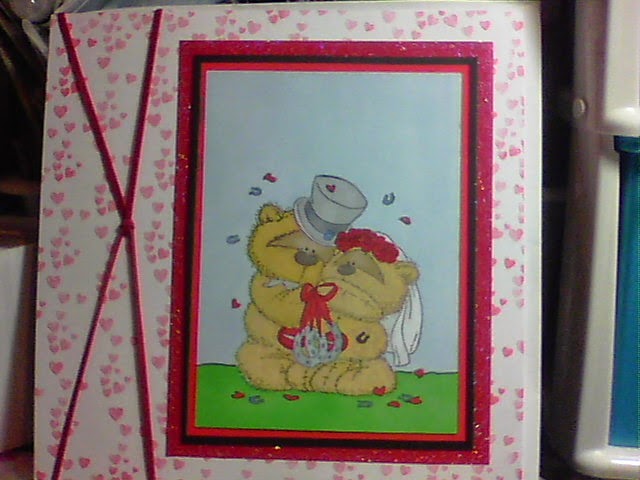
Fizzy Moon Wedding Bells 8" x 8" card
I stamped the card blank all over using a heart stamp from the Clearly Besotted range called "Love Chemistry" (I think) * I've checked and the Clearly Besotted Stamp set used is actually called "Scientifically Speaking", sorry about any confusion caused, the hearts are meant to bubble out of a test tube or beaker but I thought they'd be perfect to reduce the starkness of the white card blank. I layered the main image on red card, black card and then holographic paper from Paper Cellar. I originally made red paper roses to stick on the top right and bottom left corners of the card but couldn't bring myself to clutter the card up (now that would truly be a hard challenge for me - use lots of embellishments!) so I made a couple of red felt coiled roses which I still couldn't face using lol. Instead I off centred the stamped image and added two lengths of suede cord tied in a knot in the centre which I added to the left hand side of the card. I've just realised I've forgotten to add a sentiment - please pretend it's there.

Here are some close ups.


I couldn't resist adding some clear Wink of Stella to the roses, hearts and belly buttons on the bears.

I hope you like my new card, as always if you have any questions or comments please leave them below or in the comments form in the side bar if you want to say something not for public viewing.


A Few Sites You Might Like To Visit


click to enter teddy bear challenge

Every Crafts A Pound has got some FABULOUS new stock in including Papermania's Chronology metal embellishments and stamps - very steampunk and similar to Tim Holtz clock faces, cogs and spinners but only £1!!!!

Please let me know if you like having sites to visit on my blog and if you do I'll continue to link sites as appropriate on my posts. Until next time - keep crafting!

Love and crafty hugs,

Sarah xxx

Friday, 9 January 2015

Card Entry for Passion for ProMarkers Sketch Challenge week No:278


Hello crafty peeps - welcome to my crafty nook! Today I'd like to share my entry to the Passion for ProMarkers Sketch Challenge which is currently running on the Passion for ProMarkers Blog www.promarkerchallenge.blogspot.com (scroll down for sketch post). I've never followed a sketch before and found this one quite daunting because it features a circular card with multiple layers and I don't actually own any circle dies. I have a Fiskars shape cutter and circle templates but in all honesty I find it very difficult to use as the blade tends to skip away from the side of the circles and ruins the card stock and when I first used it I must have been holding it wrong because the blade would fall out as it cut! In the end after ruining 3 sheets of black card I decided to just use the shapes as templates and drew around them using a pencil then I cut them out. The result isn't as perfect as I would like but I've now run out of black card so it'll have to suffice.

Card using challenge sketch
Sorry the quality isn't very good, if you scroll down this post I've added some close ups of the main topper that are clearer. I used another Crafter's Companion Little Scruffy Cats stamp as my main image and coloured it with ProMarkers and highlighted the hearts, shoes and hair with clear Wink of Stella brush marker. The heart paper comes from an A4 paper stack from Do Crafts Papermania called Tilly Daydream - I love the cross stitch hearts on this sheet. The large flower was made using a stitch flower die and has a pearl centre. The smaller flowers came from the Works and I shaped them using an embossing ball tool and layered them together to make a more 3D flower, again I added a flat backed large pearl to each centre. I mounted my circular panel onto a scalloped 8 " by 8 " card blank because I don't have any circular cards in my stash. I've probably stuck a little too close to the sketch but as its my first one I wanted to follow it as near as possible (babysteps!) Below is a slightly better quality photo that I've just taken with my phone.

Slightly better photo quality! 
Here are some close ups...


I'm not happy with how the hair has turned out but the challenges on the Passion for ProMarkers blog are an excellent way for me to practice my colouring technique and they are allowing me to try new things and think outside the box craft wise.

I hope you like my latest card and as always if you have any questions or comments please leave them in the section below or if you look in the side bar I now have a "contact me" form. I'm still in the middle of re-arranging my "Crudy" (craft/study - crudy! lol) but the new oak sideboard is in place and looks FABULOUS!!!! lol nearly put my back out lifting the glass fronted cupboards onto the base though. I shall be working on the crudy reshuffle over the weekend and hopefully I'll have a new card share for you on Monday. Until then - keep crafting!

Love and crafty hugs,

Sarah xxx
p.s. I've just realised I forgot to mention the lace strip across the card front - I made this using the lace daisy punch by Martha Stewart. x Sarah x

Tuesday, 25 November 2014

Gardening Pocket card inspired by thefrugalcrafter - Lindsay Weirich

Hello crafty peeps - welcome to my crafty nook! Today I would like to share a card I've made for my friend Jean. It's her birthday at the end of the week and as she lives in the town I used to live in, it means I'm unlikely to see her on her actual birthday so I wanted to include a little gift with her card that wouldn't cost a fortune to post. Lindsay Weirich (thefrugalcrafter on YouTube) had a project a few days ago for making pockets to fill with paper and crayons to entertain the kids during Thanksgiving, I thought this was a fantastic idea to have as a card topper and fill with a few gardening goodies.

Gardening themed card using Lindsay Weirich's paper pocket technique
Please check out Lindsay Weirich's YouTube videos under thefrugalcrafter for instructions on how to make the double pocket, the only thing I would suggest is to stick the inside edges of the pockets with thin red liner tape as I found that the washi tape isn't strong enough to keep the edges closed. I used Docrafts Papermania Home to Nest papers to make the pocket and the green backing sheet which I stamped randomly with flowers and a butterfly stamp taken from a Katy Sue Simpler Times (sorry not sure which one I used) using Memento London Fog ink. I diecut the Happy Birthday sentiment using a few die from one of my magazine subscriptions using teal glitter card which I mounted on black card once diecut and I adhered it to the card using black foam tape (love this stuff it means if you put it a little too close to the edge it's not as noticeable as using white foam tape). I added two seed packets and a couple of plant ties and plant labels to the pockets then arranged the card as shown.

I hope you like what I've made and thanks to Lindsay Weirich for her original idea. If you have any questions or comments please leave them after this post. Until next time - keep crafting!

Love and crafty hugs,

Sarah xxx

Tuesday, 4 November 2014

Card for Isobel

Hello crafty peeps - welcome to my crafty nook! I would like to share with you the "welcome" card I've made for Isobel.

Little Star Welcome card for Isobel

I'm rather pleased with this card and of all the baby cards I've made in recent weeks it's got to be my favourite. I started off stamping a Baby on A Cloud stamp (can't remember who it's made by - sorry) using Memento Tuxedo Black ink onto 300gsm coated white card stock and while the stamp was out I stamped it onto a large post it note to make a mask. This stamp has a very thick outline so I cut it on it rather than just inside it to make the mask ready for some Distress Ink blending. I covered the stamped image with the mask and blended three Tim Holtz Distress inks all over the A6 card (I have a ready cut stock of A6 card so I can stamp as I want to and I renew this as it gets low.) I started with "stormy skies" and blended it all over the card being careful around the top of the mask as it didn't have any sticky on it. Then I added "chipped sapphire" and blended the two colours together until there was no blender marks - I really need to get my hands on the new round blenders. Finally I added "black soot" round the edges and blended it into the centre without adding more ink. I heat set the ink and tested the card surface with embossing powder to make sure it was dry enough to heat emboss without excess powder sticking to the surface (to test if a surface is dry just pour embossing powder over it and if loads stick you'll need to heat set it or use an anti static bag) Unfortunately I tested mine over the middle of the card and not the edges so some powder did stick, however it's a happy accident because I love the way it turned out! I got three magazines today through the post and one of them had a star stencil as it's cover gift. I used this stencil and an embossing ink pen to draw the stars then I added pinpoint dots all over the background (at this point the baby mask remains on the image) and sprinkled the card with Do-Crafts silver embossing powder which I melted with a heat tool until the  powder turned opaque and silver. I removed the paper mask from the image and once I shook out the embossing powder that had gathered inside I coloured the image using Pro-markers. I stamped "Little Star" from Fancy Pants Welcome Little Star stamp set on top of the clouds but it was really hard to read so I stamped over it using clear embossing ink and heat set silver embossing powder on the words. In all honesty it looked a complete mess so I stamped the baby image again, coloured it using Pro-markers, stamped the sentiment in clear ink and heat embossed using Rangers Blue Pearl embossing powder, then I fussy cut the image out. I added black foam tape to the underside and stuck it over the original image. I found the metal Lil Charms embellishment in my stash and attached  to the top part of the card with more of the black foam tape. Finally I stuck the whole card piece to a Papermania pink A6 card blank. I stamped "Welcome" inside and a sprinkling of stamped stars (also from the Fancy Pants stamp set) in the four corners of the inside panel. I also stamped these stars onto the outside of the envelope.

I've a few more cards I'd like to share but that's for the next blog post, so until then - keep crafting!

Love and crafty hugs,

Sarah xx