Translate

Thursday 23 June 2016

Emo/Goth Girl Card

Hello crafty peeps and welcome to my crafty nook! I hope you are all having a brilliant week so far and just think - it's nearly the weekend! It's a very important day here in the UK, finally after months of campaigning, back biting and uncool peeps hijacking tragedies (and entire campaigns!) to further their own political agendas, it's time for the British people to decide whether they want to stay in the EU or regain their independence and vote to leave. I'm not going to say how I'm voting (and I will be once this post is written!) because that's between me and the ballot box *wink* but I'd like to encourage my readers in the UK to go vote even if you are unsure at this point because the result of this vote is going to have a huge impact on all our lives whatever the result is. That's probably the most politics you'll ever see on this blog - apart from craft politics lol so lets get back to the important things in life - CRAFTS! *winks*

I'd like to share a card I made for my husband's cousin. This card is actually the second one I made (both similar designs) but I  put the first one in a 'safe' place so - of course- I couldn't find it when I needed to. The stamps are from Visible Image but unfortunately this set called 'Mollie Rules' is no longer available on the website though you can get it from www.thefruitpixie.co.uk  › Visible Image priced £12 which is a penny more than I paid for it BUT free P&P which makes it cheaper than when I got it - grr. A lot of the fantasy stamps no longer available at Visible Image are available at the Fruit Pixie which is handy to know. Well it looks like I'm having one of those days! I've just gone through my saved photos and I don't appear to have taken any of the card I made! However I've just taken a couple of photos of the original card so I'll show that one instead.


sorry it's blurry but I wanted to get a close up of the skirt :)
The barbed wire outline of the oval is actually a border stamp but because these stamps are made of acrylic you can shape them if you want to. I coloured the image with Flex markers and added some clear Wink of Stella highlights to the skulls and bows. Once the image was coloured in, I fussy cut around the barbed wire and then added it to the card as shown. The card I sent was the same image but didn't have the barbed wire shaped around it but had lines of it across two of the corners and I made my own back ground papers using some of the other stamps that are included in the set. I also decorated an envelope that I made using my WRMK envelope punch board.

Stamp set and very first attempt at colouring images

I thought it would be a good idea to show what you get in the stamp set, it isn't very big only 5" x 5" and comes in a CD sleeve which I like as it's more robust than the usual packaging you get, at £11.99 plus postage I do think it's rather pricey but as it's a quirky image I'm hoping I'll get lots of use out of it for teenage girl cards. 

I hope you like my card, I'm just sorry I couldn't show the card that was actually sent! Hopefully I'll have another card to share with you soon, I've been buying a few goodies recently (and this includes a guilt gift from my Hubby!) and I'm hoping to share what I come up with after I've had chance to have a play. As always if you have any questions or comments then please leave them in the usual places and until next time - keep crafting!

Love and crafty hugs,

Sarah xxx


Tuesday 21 June 2016

Tri Fold Shutter Card

Hello crafty peeps and welcome to my crafty nook! I hope you've all had a brilliant weekend and for those of you blessed enough to have a dad or father figure in your life, I hope you had chance to spend some time with them for Father's Day. I'm blessed to have a wonderful dad-in-law (and mum-in-law too!) and although I've not been very well this weekend I did make a couple of cards for him which I sent up with Chris. I've already shared the first card which was the pop up tool box but I wanted to make him a second card just in case he'd seen the first one online. I've noticed that tri shutter cards are becoming very popular again and this is a style of card that passed me by first time around probably because I didn't have a decent score board (I love my Hougie!) and I thought it would be perfect for a Father's Day card. I watched a couple of tutorials on YouTube and the one that seemed easiest to follow was by Lindsay Weirich AKA The Frugal Crafter https://www.youtube.com/watch?v=_UP1RFlovgQ please click this link for instructions on how to make a tri shutter card blank (and a few tips on how to decorate it). One of the reasons I choose to follow this tutorial is that as well as the instructions being easy to follow, the actual card can be made using a single sheet of A4 card, others I've seen require 12" x 12" card stock and I don't have a great deal of plain card weight 12" x 12" in my stash. This card isn't the easiest to make down to the two horizontal cuts that run across the card 1.5" in and down but that's down to the fact I have a Woodware trimmer which doesn't show exactly where the blade is going to cut, I did try using a scalpel but the reverse side of the card was ragged which I didn't like so I ended up nudging the blade very carefully when I was near the termination points for the cuts so I didn't over cut it. I'm not going to rehash how to make this card because Lindsay Weirich puts it much better than I can so please check out this tutorial and others over at YouTube.


I decorated the card blank with about half a sheet of double sided cardstock from a 12" x 12" paperstack from The Works called Vintage Experience (no longer in stock) and diecut the word out of silver mirror card and black card. I actually diecut the word 4 times in total because when I ordered the Spellbinders D-Lites dies from Craft Stash I misread the word RAD and thought it said DAD lol, with an extra bit of diecutting and a snip or two I was able to transform rad into dad as shown. The die was from one of the Hipster collections (1 or 2), the arrow was diecut using another Spellbinders D-Lites die 'Ornate Arrows'. The shields were stamped using a Mr Mister stamp set and coloured in using Flexmarkers, I don't have a matching die but they were easy enough to cut around using a pair of scissors. I added the shields to the panels using foam pads for a bit of height. I made a matching envelope using my WRMK Envelope Punch Board out of a sheet of 8" x 8" decorative paper. I thoroughly enjoyed making this card even if it a tad tricky cutting it.  Interactive cards are my favourite sort of card to give to men because the wow factor is in the construction rather than the decoration and as my husband is very fond of telling me "men don't like fussy cards!".

I hope this post hasn't been too long and boring for you - I've added a lot of photos just because the card looks so different depending on what angle you look at it from and I also wanted to show that word dies can be tweaked if you accidentally order the wrong one - at least it could in this case! I really like the Vintage Experience paperstack from The Works, their scrapbook papers are beautiful and very reasonably priced, I really hope that they'll bring this one back onto their website as I'd love to get some more at some point. The only thing I would possibly change is I'd like to see the paperstacks in the 8" x 8" and not just 12" x 12" and 6" x 6" as this is a more useful size for me.

I'll have another card to share in the next couple of days so until next time - keep crafting!

Love and crafty hugs,

Sarah xxx

Friday 17 June 2016

Rainbow Cupcake Card

Hello crafty peeps and welcome to my crafty nook! I hope you've all had a brilliant week, do you have any crafty plans for this weekend? I got a small order from The Works click and collect today so I'm looking forward to playing with my new Dovecraft dies. I'm not sure if you've seen but Dovecraft have brought out a range of basic dies including a really gorgeous painted style Happy Birthday which I really wish I'd ordered as I didn't see it on the website last time I looked. I ordered two sets - a cat with a paw print and a banners die, they only cost £3 each which I think is the usual price. I also got a pack of mirror card (£1 for 6 mixed sheets) and a pack of six different style and coloured holographic card. I've found most own brand cardstock to be of an excellent quality from The Works and this is no exception.

This week's challenge over at Passion For Promarkers is "Food and Drink". For more details and to check out what the design team have come up with please click on this link http://promarkerchallenge.blogspot.co.uk/2016/06/week-350food-and-drink.html .   I decided to use one of the Verity Rose stamps by Crafter's Companion - Cupcake for my card. I'll be totally honest, Cupcake was actually the last of the Verity Rose stamps that I bought because it's not an image that really thrilled me (unlike the others) but I've found it to be a really useful image to have because lots of people like cupcakes. Here is the card I came up with.

Rainbow cupcake card

Slightly better photo of the card

Close up of Cupcake image

I wish I could take a photo that actually shows how sparkly these cupcakes are!

Hello Cupcake!

In addition to the main Cupcake image, I used the companion stamp set and matching dies for the cupcakes. I found it easier to diecut the shape first then stamp the image onto it. I used the same cupcake stamp to decorate the black panel. I used clear Versamark ink to stamp the image on the black card then dusted over the watermarks with mica powders using a spare blusher brush (I don't wear blusher so it's always a brush that goes spare if I get any make up brushes given) I've not used this technique much before but I think that next time I'll use an anti static bag first before stamping as the powder is quite hard to get off the card (you can't really see in the photos but the black card has a thin coating of the mica powder all over it and not just on the watermarks as I wanted). I coloured all the images using Promarkers and added Dovecraft pink glitter glue to some of the cupcake toppings and Clear Wink of Stella and Glossy Accents to the rest. I also added the WOS and Glossy Accents to the gems in Cupcake's hair band. I should probably point out that I diecut the scalloped oval before adding the stamped image but that was only after I'd already finished one topper only to have the die shift as I was running it through the Big Shot and accidentally chopped the side of her face off. I really should have used more tape to stick it down! The scalloped oval dies are from Creative Dies. The paper layers are from an A4 paper pad I got from the Pound Land a few years ago. I've not added a sentiment to this card because I'm not sure who I shall give it to but I'm quite pleased with how it's turned out, I really like how the mica coated cupcakes almost change colour as they hit the light (another thing that's hard to show in photos) and it's definitely a technique I'd like to do more of.

I hope you like my latest creation, I need to practice doing brown eyes next as I'm tending to stick with greens or blues at the moment so hopefully I'll have a brown eyed beauty card to share with you soon. As always if you have any questions or comments then please leave them in the usual places. I hope you all have a brilliant weekend and until next time - keep crafting!

Love and crafty hugs,

Sarah xxx

Thursday 16 June 2016

Get Well Pop up Flower Box card

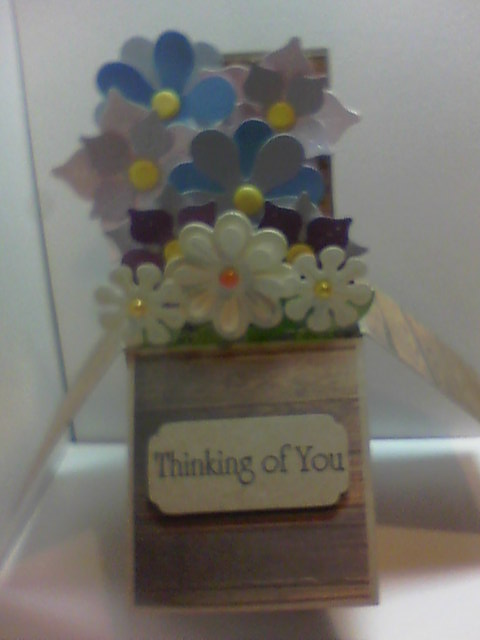
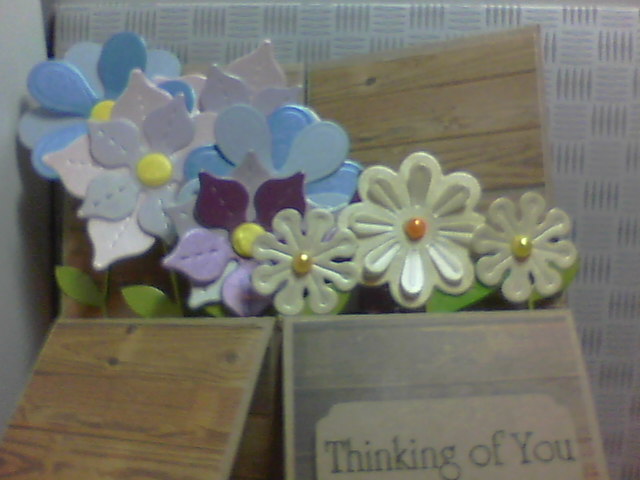
Hello crafty peeps and welcome to my crafty nook! I hope you are all well, it's nearly the weekend again which means even more time for crafting - yay. I'm still sort of missing my mojo but I have made some cards or at least started them. I'd like to share a get well/thinking of you card I've made for Chris's step-grandad. He came to visit recently and wasn't feeling well so my in-laws took him to the local hospital, unfortunately they managed to miss the fact that the poor man has an abscess on his appendix and he's now in St James' hospital being nursed back to enough health that he can be operated on for a second time (first time was keyhole to drain the abscess). I know a lot of hospitals in the UK have banned flowers from the wards so I decided to send Gramps a pop up box card filled with flowers (manly flowers of course!) to brighten up his bedside and to let him know that he's in our thoughts and prayers.


Envelope made using Mr Mister scrapbook double sided paper


Flowers are seen to be a feminine card item so I tried to make this card be more masculine by using Kraft card for the card blank and decorating it with wood plank printed paper panels from the Papermania Mr Mister double sided 12" x 12" scrapbook paperstack. I've used a different colour palette to the one I'd use for a female card and although there is a bit of pink amongst the flowers it's a special paper which changes colour as it is moved and the light hits it so I think it's gender neutral. I used a number of dies most of which came free with different magazines the exceptions being the two sizes of pointed ending petal flowers and the leaves.  The card was made in the usual way and the only real difference construction wise is that I used thicker widths of acetate than usual so that I had something to stick the leaves and flower heads to.

I'm hoping to have another card to share with you later on today or tomorrow - it needs to dry first before I can take any photos of it. As always if you have any questions or comments about the card featured in this blog post then please leave them in the usual places. Until next time - keep crafting!

Love and crafty hugs,

Sarah xxxx

Sunday 12 June 2016

Verity Rose Split Panel Birthday Card

Hello crafty peeps and welcome to my crafty nook! I hope you've all had a brilliant weekend - are there any other football widows out there? Chris my husband is very much into sports and he usually listens on his DAB radio because of his sight issues but he actually kicked me out of the lounge yesterday so he could watch the England match *yawns*. It meant I missed The Musketeers on BBC1 but that's love for you! Let's just say he'll be buying me lots of craft goodies for the next few weeks or so lol.

My craft mojo has upped and left me (just when I need it most!) so I've not actually finished anything new since my last blog post but as it's my auntie's birthday today I can finally share the card I made her.

Just My Cup of Tea Split Panel Card

Close up of Shaped topper

CC Verity Rose Cupcake image coloured with Sparkle pens

Cupcake themed envelope made with WRMK Envelope Punch Board

I used scraps of Crafter's Companion Kimono 8" x 8" paperstack for the decorated panels and coloured the CC Verity Rose 'Cupcake' image in using Promarkers for the skin and hair and Spectrum Noir Sparkle Pens for the rest of the image. I intended for the diecut panel to be straight on the right hand side and curved on the left but I didn't stick my card to the die and it shifted as I ran it through the Big Shot, to salvage the image I trimmed both sides straight so it had a curve top and bottom as shown. I added two strips of card coloured with one of the Sparkle pens  to tie the card together as it looked a bit bare with the wide spaces of white on the topper. I quite like how it turned out #happyaccident! I've made a lot of these cards so if you want the instructions then please check out the other blog posts (all this year so just click on this year's archive). One of the things I love about this style of card is that you can make two cards out of one sheet of A4 card and it's a good way to use up those smaller scraps of background paper. The envelope was made using the We R Memory Keepers Envelope Punch Board and a sheet of decorative paper that came from Pound Land a few years ago. The cupcake theme tied nicely into the card and I just added a plain label to the front for the address before I sent it - though the pattern is pale enough to probably get away with just writing straight onto the envelope.

I'm hoping my mojo comes back soon or I may have to resort to watching/listening to football with Chris! Hopefully I'll have something to add here soon. As always if you have any comments or questions then please leave them in the usual places, I'd love to hear from you and until the next time - keep crafting!

Love and crafty hugs,

Sarah xxx

Wednesday 8 June 2016

Starlet Circles Gatefold Card and A Handy Hint

Hello crafty peeps and welcome to my crafty nook! I hope you're all having a brilliant week, I've been making some cards for family birthdays which I can't share just yet so I decided to take part in this week's Passion for Promarkers Blog challenge. I haven't been able to take part since their anniversary blog challenge so I was really pleased when I saw that this week's theme is "anything but square" - though it's actually quite rare for me to make a square card so maybe it would be more of a challenge to make a square one lol. If you would like to join in this week's blog challenge or you are just curious about what the design team have come up with, then please click on the link http://promarkerchallenge.blogspot.co.uk/2016/06/week-349anything-but-square.html .

Starlet Circle Gatefold Card

 I don't have an occasion in mind for this card so I've used my current favourite stamp - CC Verity Rose 'Starlet'. I decided to make another circle gatefold card as it's about as far away from being a square as you can get plus I really enjoy making this style of card. I made the card blank first out of a sheet of Sheena's stamping card cut to 4 1/4" x 11". I scored it at 2.5", 4", 7", 8.5" and die cut it using my 4" Sizzix Bigz die - you really need a Bigz die if you are using card above 250gsm (you will need to run your thinner dies and card a couple of times as they have to cut through three thicknesses of the card to make this card blank). I die cut another piece of stamping card using the same die and also a black circle. I used the biggest of my large circles nesting dies by Spellbinders to turn the circle into a frame and used the waste circle for my right hand panel, I centred a Creative Dies nesting star die on this black circle and ran it through my Big Shot machine. I then die cut the same sized star out of silver mirror card. I die cut five small stars out of the silver card waste and put them to one side, then I die cut the next size up star out of another piece of silver mirror card. I stamped the 'Starlet' image out onto the stamping card circle and coloured her in using Flexmakers. I added the black circle frame over the stamped image using a Stick It! Glue pen then went around the edge with a black marker to cover up any white areas showing. I placed the silver star into the die cut space inside the smaller black circle and stuck a white card circle to the back so the star wouldn't fall out or show when the card's open and added it to the right hand half circle panel of the card blank. You have to add this piece first before the main image. I closed the card blank so the star circle was centred over both halves and added a thin line of glue around the circle panel of the left hand half circle then added the main topper to this glued area. You need to hold it in place for a few minutes until the glue sets firmly. I tucked the inner right hand panel behind the front panel in the 'pocket' that was formed by only gluing the outside part of the topper to check that it was placed correctly. I added the silver single star to the black star with glue then added this double star to the middle section of the card blank. I added the five small stars around the large silver as shown.

Close up of the left panel

Open Circle Gatefold Card

Right hand 'gate' with inset star and raised mini stars

Centre double star

I really enjoyed making this card, there was a lot of die cutting but my job was made a lot easier using this:-

Not just a tool holder!

You're probably wondering why I decided to share my tool caddy and the reason is those two black strips on the front of the plastic pot. The strips are actually magnetic tape and I use them to keep my dies safe while I'm die cutting. The tape is self adhesive but I added Scotch Glue to the back because the strips kept falling off to begin with but since I've stuck them with glue, they've not shifted. Sizzix have recently come up with a tool caddy that attaches to the side of Big Shot machine - I think it's partly magnetic but it inspired me to make my own magnetic storage for when I'm die cutting. My machine isn't on my desk as I don't have room for it so I line my dies up at my desk then take the pieces to be die cut at the machine. It made sense for me to have the tape on my desk so I can put the dies I'm not using straight away on the strips to keep them safe for when I do want to use them.  Here are the magnetic strips in action.

No more losing dies for me!

Since taking these photos I've added a third strip of magnetic tape so it can hold bigger/more dies. I bought the magnetic tape from Amazon and it was very cheap - I would recommend adding a stronger adhesive to the back of it if you use this idea as it it rather annoying for the strips to fall off with the dies attached (and defeats the purpose!) I'd love to see what you come up with if you make your own so please leave a link in the comments section if you do. As always I'd love to hear from you so please leave any questions or comments in the section below and until next time - keep crafting!

Love and crafty hugs,

Sarah xxx

Sunday 5 June 2016

Do the Robot

Hello crafty peeps and welcome to my crafty nook! I hope you are all enjoying the weekend, it is glorious here in Bridlington though a little chilly out of the sun. It's my great-nephew's birthday later on this month so I've made him a card - aren't I organised (lol, not really). I got some Dovecraft small stamp sets from Craft Stash recently and one of them was a robot. which reminded me of another robot stamp I own and haven't used called "Roger Robot" by Woodware. The robot stamp is in parts which makes it perfect for making a movable robot card and that's what I've made.

Roger doing the Robot

I stamped the robot parts onto super smooth card and coloured it the images in with Flex Markers then fussy cut them all out. I used a pokey tool to put holes through the parts and added the head and limbs to the body using grey brads. I added Glossy Accents to the eyes and red elements on the robot and left it to dry. I embossed a piece of purple pearlised metallic card using the CC Just For Men Signature Collection by Sara Davies Pop Dotty embossing folder and went over the embossing with a silver gilding wax. I adhered this to a panel of black card and made a card blank out of more super smooth white card. I added the panel and decorated the inside of the card with a Dovecraft sentiment and Robot stamp. I coloured them both in with Flex Markers. Once the Glossy Accents were dry, I added the Robot to the front using foam tape on the torso only so that the arms, legs and head can be moved. Here are some more photos including the decorated handmade envelope.


The star and the "sending smiles across the miles" stamped images were made using Jillibean Soup stamp set "Flying High" which I also got in my Craft Stash order.

I hope you like my latest card, I really like Roger's movable parts and I hope my Great-Nephew likes it too. Hopefully I'll have some time later to make a few more cards. As always if you have any questions or comments then please leave them below and until next time - keep crafting!

Love and crafty hugs,

Sarah xxxx

Thursday 2 June 2016

Fifteen Shades of Grey

Hello crafty peeps and welcome to my crafty nook! I hope you are all well and looking forward to the weekend. It's hard to believe it's June already, it doesn't seem like five minutes ago we were celebrating the start of 2016 and now we're nearly halfway through. Talking about 'June' I lost the month of June stamp from one of my Kaisercraft stamp sets (which as it was a calendar stamp set made it a bit useless) last year and I finally found it yesterday! I only have to find my Cat's Pyjamas Villain-esque moustache die and I'll been as happy as a cat in PJ's (which probably isn't that happy really when you think about it lol). It's even smaller than the June stamp so I'm not going to hold my breath.
Sorry the image isn't very clear - I think the camera is sulking.

Today's card features my beloved 'Starlet' from the Crafter's Companion Verity Rose range. I'm not sure what it is about Starlet that's captured my imagination but I'm really loving colouring her in different ways at the moment. Today I've coloured in Greyscale and as the title suggests I've used 15 shades of grey to colour her in! I used Promarkers Warm Greys 1 - 5, Cool Greys 1 - 5 and Ice Greys 1- 5. I stamped the image using Memento Tuxedo Black ink onto Sheena's stamp card and there was a little bleeding outside the outside edge of the image when I coloured her in but not too much. Once I'd coloured the image I added white highlights to her eyes and pearl necklace using a while gel pen and added some Spectrum Noir clear Sparkle brush marker to her hair gem then covered it with a thin layer of Glossy Accents. I used a ticket corner punch to remove the corners and mounted the topper onto a piece of black card stock. I layered this onto a piece of silver glitter card. I cut a sheet of A4 black card down to 28cm and scored it in half at 14cm. Using a score board I dry embossed two lines down each side of the card front and three top and bottom of the card for added interest and then added some thin strips of glitter card between the embossed borders. I added the topper panel to the card leaving a larger space below so I can add a sentiment at a later date. I decided the silver glitter strips were a bit 'in your face' so went over them with a black marker so that the card appears a slate grey. Unfortunately as I was colouring the strips in I managed to smear black marker ink all on the topper - I nearly cried! Luckily I remembered it was alcohol based so used my Promarker blender pen all over the outside lines of the stamped image paying special attention to the smudge marks. I'll be honest with you, to begin with the blender pen made the marks look worse but I decided to let the piece dry and see what happened before panicking. I watched a couple of programmes on TV then when I went back in to my crudy I found that the marks had practically vanished.

Here are a couple more photos.

A close up of the Starlet 15 shades of grey card

Can you spot where the smear marks were??

I really enjoyed making this card today even if I did nearly ruin it with smudge marks *note to self - remember to wipe your hands in future*. I got a couple of small orders in the post today (both from Craft Stash - a Let's Celebrate stamp and an emoji die by Spellbinders) so I'm hoping to have a play with them over the weekend. I'd also like to colour one of the Verity Rose images in browns so it looks sepia. I've never tried that before but I think the images would suit that style. As always if you have any questions or comments then please leave them in the comment section below. I hope you all have a brilliant weekend, hopefully the weather will improve and it won't be quite so cold! Until next time - keep crafting!

Love and crafty hugs,

Sarah xxx