Hello crafty peeps and welcome to my crafty nook! I hope you are all have a good week so far. I'm just writing to let you know that I may be MIA for a while. We had the gas engineer come today to inspect the boiler and our gas cooker and to be honest I was half expecting him to condemn our cooker which is rather old and has developed a few small holes in it's base inside the oven (so convinced was I that this would happen, I went and ordered a mini oven from Aldi so if the worst came to the worst, I'd still be able to make some kind of Christmas dinner in a few months time!) however what I wasn't expecting was for the boiler to be condemned in it's place. In it's self that's not a bad thing in fact it'll be great to actually have boiling water without having to waste 20 litres of water before it even gets warm and if the boiler had to be replaced now while the weather is still relatively warm is a good time to do it but unfortunately the boiler isn't the only thing that's going to be replaced, the entire heating system is going to be. That means every radiator in the flat has to be easily accessible and an asbestos survey has to be carried out prior to that. That probably doesn't sound like a big deal but we have a heck of a lot of stuff in a fairly smallish flat with very little storage - in fact the one room that does have the storage space is the utility room where the boiler is located. I have two days to get all the radiators accessible ( at present there's the one in the bathroom free and that's it - even the hall one has the laundry bin in front of it!). The kitchen's not too bad, all I've got to do is move the table from one side of the room to the other (and clear any crap that's hidden itself underneath there - not literal crap, I'm not that BAD a housewife!!), the hallway stuff can go in the bath for now but the two biggest challenges are the two bedrooms. My side of the bed is currently covered with the contents of the airing cupboard which I'll transfer to the sofa for now, but the radiator is under the window at Chris's side and that's going to involve some serious furniture humping and trying to figure out where it can all go (on the communal landing is one option - our next door neighbours certainly have enough stuff out there!) but the worst room is going to be the second bedroom, my craftroom AKA The Crudy! I've been crafting for many years and I'm a craft hoarder - I have a heck of a lot of stuff and it's all crammed into a space barely big enough to fit a single bed and a set of drawers in. I have stuff in boxes stacked on top of other boxes and I really don't know where I'm going to put it all and still leave the radiators exposed. So instead of spending my birthday crafting, watching DVDs and having a home pamper session like I'd planned, I will be running myself ragged more than likely with not even a nice birthday meal or even cake to look forward to.
The asbestos survey is on Friday between 9am and 11am (originally they wanted to do it TOMORROW!!!) and the gas fitters are also coming to measure up the radiators etc at some point on Friday too. I'm not sure how long everything is going to take (if they find asbestos we may have to move out for a bit - I'm praying hard that they don't!) and even once the work's been completed there's all the aftermath to take care of, we might need to re-decorate some rooms depending on how much damage is caused by them replacing the radiators and pipes which will mean even more delays. It's not really practical to try crafting with my supplies scattered to the four corners of the flat so I'm not sure when I'll be making stuff again. It's a real possibility that I won't be able to take part in this month's challenge but I will blog Michele's makes if she's agreeable.
I hope you'll stick with me and keep visiting my blog for any updates. Not sure when I'll blog next but until next time - keep crafting!
Love and crafty hugs,
Sarah xxx
Tuesday, 24 October 2017

Monday, 23 October 2017
A couple of cards to share
Hello crafty peeps and welcome to my crafty nook! I hope you are all well and have had a good weekend - it was very blustery here but it's calmed down now thank goodness. It's been a couple of weeks since my last post but I've not been up to a great deal craft wise. One of my niece's celebrated her 19th birthday on the 16th and my lovely crafty friend Michele sent me some gorgeous planner stamps and sticky note sets through the post which was a wonderful surprise and I'm still at the stroking and smiling stage (I can't be the only one who takes forever to use new goodies because if you use them they won't be new anymore??) and haven't used them yet though I'm 'planning' on using them soon! I made Michele a thank you card which I'll be sharing in this post. First of all let me apologise if any typos slip through, I'm writing this in the early hours of Monday and my beloved cat has decided that he can't sleep anywhere but in my arms which makes typing very challenging - still it makes a change him sleeping this close to the floor as he's taken to jumping on top of the lounge door and going to sleep up there. It would be cute if it wasn't for the fact that he's 16 years old and sleeps very deeply - the daft thing keeps going into a deep sleep then falling off the door which is rather scary and I'm terrified he's going to break something! I'm sure the only reason he goes up there is so he can look down on his inferior humans (cats rule!)
Anyway enough of high Jinx *winks* let's get back to crafting! The first card I'd like to share is the one I made for my niece. I wasn't really sure what to make her as 19 is one of those between ages if you know what I mean plus she's going to have a baby in December and a lot of the teen stamps I own just didn't seem suitable. In the end I decided to use some Forever Friends papers which included some cute cut apart images in the A5 paper pack.
The front of the card seemed a little 'meh' so I added some Autumn sequin mix from Craft Stash, where I was a bit messy with the glue I added blobs of Dovecraft glitter glue in Rose.
Here is the Thank you card I made for the wonderful Michele.

I really like the stamp set, it's an unbranded one from eBay and has some sweet sentiments with it as well as the two large floral stamps used on this card. Although it looks great just in black and white, I wanted to 'bling' it up a bit so added some highlights using Kuretake Gansai Tambi Starry Colors (sic) paints - I think I used the third from the left out the six gold paint pans. It's a very pigmented water colour and adds just the right touch of glitz to the front. I had some left on the paint brush so painted a couple of die cut scribble stars to add to the inside as shown. I stamped everything using Versafine black ink which is waterproof but more importantly, a really dark black.
I've had a bit of lovely crafty news this week but I'm not sharing it until after Christmas (aren't I a craft tease! lol) Hopefully I should have a few cards to share with you later in the week, one unfortunately is a sympathy card but the other will be a cute card for a three year old as it's my youngest niece's birthday on Friday. I may even have a few craft goodies to share as it's my birthday on Wednesday and I'm hoping for some birthday money (I've already been lucky enough to be given some from my lovely mum) I'm torn between getting some Nuvo alcohol ink pens which are exceedly cheap at Craft Stash or buying a couple of items from the new Christina Griffith Card Making Magic Collection which is gorgeous and exclusively available at Craft Stash. I've already got my present from my wonderful hubby (a new Sizzix Big Shot machine which I don't want to use until Wednesday!) and I'm very grateful for it because my old one is really hard to use (it doesn't cut through in places unless I use shims). If you have any questions or comments then please leave them in the usual places and until next time - keep crafting!
Love and crafty hugs,
Sarah xxx
Anyway enough of high Jinx *winks* let's get back to crafting! The first card I'd like to share is the one I made for my niece. I wasn't really sure what to make her as 19 is one of those between ages if you know what I mean plus she's going to have a baby in December and a lot of the teen stamps I own just didn't seem suitable. In the end I decided to use some Forever Friends papers which included some cute cut apart images in the A5 paper pack.
 |
| Love the Rose Gold Foiling that's on the cut aparts. |
 |
| Forever Friends cut apart and backing paper with added bling |
 |
| Inside of the card with die cut Special sentiment - stamps are CC |
 |
| The back of the card featuring another of the cut apart images and a handstamped warning lol |
 |
| Envelope made with Trimcraft Pick n Mix papers and WRMK envelope punch board |
The front of the card seemed a little 'meh' so I added some Autumn sequin mix from Craft Stash, where I was a bit messy with the glue I added blobs of Dovecraft glitter glue in Rose.
Here is the Thank you card I made for the wonderful Michele.
 |
| Love this stamp set from eBay but it needs some bling! |
 |
| Blinged up using Gold paint and a very small brush! |
 |
| Isn't that a lovely sentiment? |
 |
| Michele is a star so I added some to the inside |
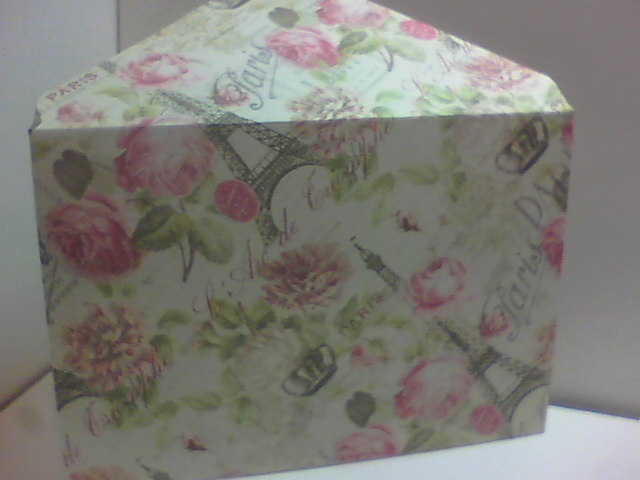 |
| Envelope made using the WRMK envelope punch board and Trimcraft Sweet Paris paper |

I really like the stamp set, it's an unbranded one from eBay and has some sweet sentiments with it as well as the two large floral stamps used on this card. Although it looks great just in black and white, I wanted to 'bling' it up a bit so added some highlights using Kuretake Gansai Tambi Starry Colors (sic) paints - I think I used the third from the left out the six gold paint pans. It's a very pigmented water colour and adds just the right touch of glitz to the front. I had some left on the paint brush so painted a couple of die cut scribble stars to add to the inside as shown. I stamped everything using Versafine black ink which is waterproof but more importantly, a really dark black.
I've had a bit of lovely crafty news this week but I'm not sharing it until after Christmas (aren't I a craft tease! lol) Hopefully I should have a few cards to share with you later in the week, one unfortunately is a sympathy card but the other will be a cute card for a three year old as it's my youngest niece's birthday on Friday. I may even have a few craft goodies to share as it's my birthday on Wednesday and I'm hoping for some birthday money (I've already been lucky enough to be given some from my lovely mum) I'm torn between getting some Nuvo alcohol ink pens which are exceedly cheap at Craft Stash or buying a couple of items from the new Christina Griffith Card Making Magic Collection which is gorgeous and exclusively available at Craft Stash. I've already got my present from my wonderful hubby (a new Sizzix Big Shot machine which I don't want to use until Wednesday!) and I'm very grateful for it because my old one is really hard to use (it doesn't cut through in places unless I use shims). If you have any questions or comments then please leave them in the usual places and until next time - keep crafting!
Love and crafty hugs,
Sarah xxx
Monday, 9 October 2017
News and a couple of cards.
Hello crafty peeps and welcome to my crafty nook! I hope you've all had a brilliant weekend - it was International Card Making Day on Saturday - did you make any cards? I didn't actually make any on the day but I did have an overnight crafting session last night.
First a couple of bits of good news, to start with my card featured in the last post was shortlisted for the competition I made it for. I didn't win but I'm absolutely thrilled to bits that it was shortlisted as there were some really good entries. My second piece of good news is that my lovely wonderful husband has treated me to a brand new Sizzix Big Shot machine (£55 from Amazon) and it arrived today!! I am very excited and looking forward to finally being able to use my intricate dies without having to shim it to death! It's a different colour to my original machine and has a tabbed extended platform rather than the solid platform with a removable plastic shim which might take some getting used to, I'm going to try and mend my old machine and see if my mum in law would like it, she's not a papercrafter as such but likes to sew and make things for a doll's house that my dad in law has made for her. I know you can get dies to make quilting shapes and other stuff which might make her life easier otherwise I might get some replacement cutting plates and offer it to a craft group/charity in the area who may be able to use it. I am really grateful to my husband for getting it for me, it was £55 which doesn't sound like a lot but is probably more than we spend on electricity in a month and we don't have a lot of spare money especially at this time of year. #feelingblessed
Apologies for the long delay in adding the last blog challenge cards - Michele sent me photos of hers weeks ago but I've had real trouble making the cards this time round, part of it was my usual procrastination but part of it was down to things going wrong with my projects. I decided to colour the Gnomes in with a combination of alcohol markers and Spectrum Noir Shimmer pens and I had a lot of bleeding outside the stamped outlines even though I was extra careful and used a card suitable for both mediums then I'd make a card and absolutely loathe it so had to start again about a dozen times.
Here are Michele's gorgeous creations.


Aren't they fantastic? I love the way Michele spelt out XMAS by nestling the letters in the Gnomes' beards and the Anniversary card is so sweet! I really like the heart shaped tree slice in the background.
Here are my cards.


 I hope you like my cards, again apologies for the delay in getting them made and up. If you want to know how my card was made please leave a comment below. This month's blog challenge is to use the card kit that came free with issue 175 Cardmaking & Papercraft magazine to make as many items from it as possible. You can use additional card stock from your stash and any dies, embossing boards, embossing folders as you want to make tags, ATCs, boxes, bags and of course cards! You can also use other embellishments like ribbon and twine etc to give the items a finished look but the challenge is to be left with only tiny scraps by the end. Because this is a big challenge it's running until the 31st October and as always please feel free to join in - there's no prize apart from the satisfaction of having done a job well done and freeing up a tiny bit of space in your crafty nook! I'm really looking forward to seeing what Michele comes up with this time and I'd love to see your creations too. As always if you have any questions or comments then please leave them in the usual places and until next time - keep crafting!
Love and crafty hugs,
Sarah xxx
First a couple of bits of good news, to start with my card featured in the last post was shortlisted for the competition I made it for. I didn't win but I'm absolutely thrilled to bits that it was shortlisted as there were some really good entries. My second piece of good news is that my lovely wonderful husband has treated me to a brand new Sizzix Big Shot machine (£55 from Amazon) and it arrived today!! I am very excited and looking forward to finally being able to use my intricate dies without having to shim it to death! It's a different colour to my original machine and has a tabbed extended platform rather than the solid platform with a removable plastic shim which might take some getting used to, I'm going to try and mend my old machine and see if my mum in law would like it, she's not a papercrafter as such but likes to sew and make things for a doll's house that my dad in law has made for her. I know you can get dies to make quilting shapes and other stuff which might make her life easier otherwise I might get some replacement cutting plates and offer it to a craft group/charity in the area who may be able to use it. I am really grateful to my husband for getting it for me, it was £55 which doesn't sound like a lot but is probably more than we spend on electricity in a month and we don't have a lot of spare money especially at this time of year. #feelingblessed
Apologies for the long delay in adding the last blog challenge cards - Michele sent me photos of hers weeks ago but I've had real trouble making the cards this time round, part of it was my usual procrastination but part of it was down to things going wrong with my projects. I decided to colour the Gnomes in with a combination of alcohol markers and Spectrum Noir Shimmer pens and I had a lot of bleeding outside the stamped outlines even though I was extra careful and used a card suitable for both mediums then I'd make a card and absolutely loathe it so had to start again about a dozen times.
Here are Michele's gorgeous creations.


Aren't they fantastic? I love the way Michele spelt out XMAS by nestling the letters in the Gnomes' beards and the Anniversary card is so sweet! I really like the heart shaped tree slice in the background.
Here are my cards.


Love and crafty hugs,
Sarah xxx
Saturday, 30 September 2017
No, Not Another Hover Card...
Hello crafty peeps and welcome to my crafty nook! I hope you are all having a wonderful weekend, it is a glorious day here on the Yorkshire coast and I'm spending it catching up on housework while my hubby is out with his family for lunch and a catch up. It's strange but I'm a lot more productive when he's out of the flat then when he's at home - it could be that subconsciously I'm resentful that I'm doing the work while he's sitting/laying listening to his book or sport on the radio and drag my feet as a result which is very passive aggressive of me! I wonder why I'm not equally PA about it when he's out enjoying a nice meal?? I shall blame my inner child - she can be a bit of a brat sometimes and quite frankly needs a bit of a spanked bottom! lol Well I hope you all enjoyed that little insight! Let's get back to the important stuff in life - crafting! (btw I'm writing this in 15 minute bursts, I do some chores then add a paragraph or two, then get back to the housework.)
I was planning on sharing my revamped Hover Card design but to be honest I haven't got around to making it, it's been one of those weeks plus Papercraft Magazines and Craft Stash UK have been running a card competition on Facebook to celebrate Thinking of You Week. The first competition closed on Friday at 12pm and was a thinking of you card with a sweet sentiment as the theme and there's also a second competition that needs to be a 'say it with nature' card - the competition closes on Sunday. I was planning on combining the hover card with the sweet sentiment card but when I'd coloured the image I wanted to use I realised that the topper was far too big and would make the card topple over. I made this card instead.


The main image is a 'The World of Tatty Buttons' stamp and the side panel sentiment is a Kaisercraft stamp. The inside sentiment is a Katy Sue Designs stamp. I used 300 gsm Sheena's Stamping card for the stamping and the card blank and the paper is from a Dovecraft 8" x 8" paperpack called 'Sweet Paris', The gold photo corners are by Scrapbook Adhesive. I used a combination of Promarkers and Spectrum Noir Shimmer brush markers to colour the images. I added a layer of Glossy Accents to the umbrella, rain drops, puddles and Tatty's button on her dress.
I hope you like my latest make, hopefully I will get around to making the revamped hover card and the challenge card for the craft stash/papercraft magazines Facebook competition. *Shock Face* I've just noticed the date so I'll also be sharing the cards Michele and I came up with using the Enchanted Garden stamp and die set in the next couple of days. As always if you have any questions or comments then please leave them in the usual places and until next time - keep crafting!
Love and crafty hugs,
Sarah xxx
I was planning on sharing my revamped Hover Card design but to be honest I haven't got around to making it, it's been one of those weeks plus Papercraft Magazines and Craft Stash UK have been running a card competition on Facebook to celebrate Thinking of You Week. The first competition closed on Friday at 12pm and was a thinking of you card with a sweet sentiment as the theme and there's also a second competition that needs to be a 'say it with nature' card - the competition closes on Sunday. I was planning on combining the hover card with the sweet sentiment card but when I'd coloured the image I wanted to use I realised that the topper was far too big and would make the card topple over. I made this card instead.


The main image is a 'The World of Tatty Buttons' stamp and the side panel sentiment is a Kaisercraft stamp. The inside sentiment is a Katy Sue Designs stamp. I used 300 gsm Sheena's Stamping card for the stamping and the card blank and the paper is from a Dovecraft 8" x 8" paperpack called 'Sweet Paris', The gold photo corners are by Scrapbook Adhesive. I used a combination of Promarkers and Spectrum Noir Shimmer brush markers to colour the images. I added a layer of Glossy Accents to the umbrella, rain drops, puddles and Tatty's button on her dress.
I hope you like my latest make, hopefully I will get around to making the revamped hover card and the challenge card for the craft stash/papercraft magazines Facebook competition. *Shock Face* I've just noticed the date so I'll also be sharing the cards Michele and I came up with using the Enchanted Garden stamp and die set in the next couple of days. As always if you have any questions or comments then please leave them in the usual places and until next time - keep crafting!
Love and crafty hugs,
Sarah xxx
Monday, 25 September 2017
Hover Card
Hello crafty peeps and welcome to my crafty nook! I hope you all had a brilliant weekend - we've had some very lovely weather the last couple of days with lots of sun and high temperatures, a great start to autumn.
I'd like to share a new card style today, something called a hover card (I think that needs a bit of work!) so called because the topper 'hovers' when you open the card. In all honesty it doesn't so much hover as hang there limply but I've a twist in mind which might make topper at least move with a bit more enthusiasm (if a piece of card can be enthusiastic lol) then it does at present but that is a card for next time.
https://www.youtube.com/watch?v=CizLzGWsLKM If you click this link it will take you to the video on youtube that showcases this new technique - I feel it's superfluous to write blog instructions if I'm just repeating what I've already watched (unless I tweak the recipe as it were) which is why I tend to link the original video tutorial rather than writing one (I'm not being lazy - honest!)


Originally I was planning on giving this card to my niece who turns three a couple of days after my birthday but I'm ever so slightly creeped out by the panda's expression - I feel like the panda belongs on a bear version of 1984 (big panda is watching you!) - so I'm not sure if it's suitable for a three year old. I've also managed to get a dirty mark on it thanks to my 'dear' cat Jinx who likes to go to sleep on my cards and craft supplies so I'll have to make a new one in any case hopefully sans the sinister expression lol. I used a bear face die to make the panda and coloured all the black areas and shapes with a Spectrum Noir black shimmer brush marker, I'm not positive but I think it was with the silver and gold pen set (3 colours in a pack £12.99). The gorgeous pink heart paper is from a Trimcraft 6" x 6" Whizz Kids paper pack and has an embossed finish to it.
I hope you like my latest make, apart from having to die cut the face three times, it's quite an easy card to make and the 'hovering' element is certainly fun. Like I wrote earlier I have an idea in my head that may make the hovering part more impressive and I will be sharing the card I make in a day or two - assuming it works of course lol. As always if you have any questions or comments then please leave them in the usual places and until next time - keep crafting!
Love and crafty hugs,
Sarah xxx
I'd like to share a new card style today, something called a hover card (I think that needs a bit of work!) so called because the topper 'hovers' when you open the card. In all honesty it doesn't so much hover as hang there limply but I've a twist in mind which might make topper at least move with a bit more enthusiasm (if a piece of card can be enthusiastic lol) then it does at present but that is a card for next time.
https://www.youtube.com/watch?v=CizLzGWsLKM If you click this link it will take you to the video on youtube that showcases this new technique - I feel it's superfluous to write blog instructions if I'm just repeating what I've already watched (unless I tweak the recipe as it were) which is why I tend to link the original video tutorial rather than writing one (I'm not being lazy - honest!)


Originally I was planning on giving this card to my niece who turns three a couple of days after my birthday but I'm ever so slightly creeped out by the panda's expression - I feel like the panda belongs on a bear version of 1984 (big panda is watching you!) - so I'm not sure if it's suitable for a three year old. I've also managed to get a dirty mark on it thanks to my 'dear' cat Jinx who likes to go to sleep on my cards and craft supplies so I'll have to make a new one in any case hopefully sans the sinister expression lol. I used a bear face die to make the panda and coloured all the black areas and shapes with a Spectrum Noir black shimmer brush marker, I'm not positive but I think it was with the silver and gold pen set (3 colours in a pack £12.99). The gorgeous pink heart paper is from a Trimcraft 6" x 6" Whizz Kids paper pack and has an embossed finish to it.
I hope you like my latest make, apart from having to die cut the face three times, it's quite an easy card to make and the 'hovering' element is certainly fun. Like I wrote earlier I have an idea in my head that may make the hovering part more impressive and I will be sharing the card I make in a day or two - assuming it works of course lol. As always if you have any questions or comments then please leave them in the usual places and until next time - keep crafting!
Love and crafty hugs,
Sarah xxx
Friday, 22 September 2017
Review on The Works Make and Create Mini Die Cutting Machine - UPDATED
Hello crafty peeps and welcome to my crafty nook! I hope you've all had a good week and if you haven't *huge hug better* and just think it's nearly the weekend!! This review is a little bit later than planned because I've been waiting for Customer Care from The Works to get back to me - it's now nearly 10 days since I emailed them but they've not responded so I shall review the machine accordingly.
SOME INFO AND A HOW TO USE GUIDE FOR BEGINNERS
The Make & Create Mini Die cutting machine is available at The Works priced at £30 and because it's over £20 you get free delivery plus 450 rewards together points if you've registered your card and remember to log into your account before buying! https://www.theworks.co.uk/p/craft-essentials/mini-die-cutting-machine/5052089215177?cm_mmc=GooglePPC&gclid=CjwKEAjw6ZLOBRCLyNXAwfCPmlQSJADHPIJb9-wLEhIKkwFaIKJwXtf9NvZnCACrNlh26rUr-1933hoCqTnw_wcB please click the link if you are interested in purchasing the machine though I'd wait until the end of the review before buying if I was you! For £30 you get the machine and one set of plates but no dies or extras. There is no assembly required (unlike the Big Shot for example which requires it's handle being screwed on before first use) and it doesn't really have any instructions apart from three photos on the packaging but it's extremely easy to use so doesn't really need any. Once the machine is removed from the box it looks like the first photo below. To use it you just need to pull each side down where the carrying handle is to form the platform, the handle can be used either side, just turn the machine so the handle is on your desired side (I'm actually left handed but use the machine with the handle on the right).
When the platform is in the correct position, it looks like the photo below.
Now all you need to do is add one cutting plate to the platform, then add your card and die to it facing down. Add the second plate so it covers the first and crank the handle - make sure the cutting plates are in far enough or the rollers can't grab them and move them through the machine. Crank the handle until the die has gone completely through the machine, it's quite common to hear a cracking noise - don't panic it's just the metal die crunching into the cutting plate. WARNING IF YOU HAVE ANY RESISTANCE DO NOT TRY TO FORCE YOUR PLATES THROUGH BECAUSE THIS MAY DAMAGE YOUR MACHINE. Your die should have cut it's way through the card but if it hasn't just run it through again and if necessary add a small piece of copy paper over the parts that haven't cut through to act as a shim. Remove the cutting plates from the machine and use a pokey tool or a pin to push the die cut out of the die. I would recommend using one plate to cut into and leave the other pristine so that it doesn't mark your card stock as you die cut. As you cut your dies it also cuts into your cutting plate leaving an impression and sometimes thin slivers of card embedded into your cutting plate and after time the plate will warp and bend, this will make your machine less effective. The life of your cutting plates can be extended if you flip them over for each use and as stated earlier if you keep one exclusively for cutting. You might also run the plate you use to cut into under a hot tap and scrub it with an old toothbrush to dislodge the card slivers from time to time but that's not a necessity. The cut marks will emboss onto any card run through the machine which is the main reason I suggest keeping the top plate pristine because it is frustrating to spend the time die cutting a shape only for it to be ruined by having marks embossed into it.
MY REVIEW
This is actually a great machine with a generous cutting area of 3" wide by 6", it compares favourably with other machines and in fact is superior to the Diamond Press machine that's available from Crafter's Companion. I bought it to replace my much loved and now sadly kaput Sizzix Sidekick and it's the perfect size to go on my very cluttered desk to cut mini (and not really that mini) thin dies. I've only tried unbranded dies in it so far and for the most part they've cut beautifully - for those that haven't I've just added a small piece of paper and run it through again and that's usually solved the problem. One thing I did notice is if you don't line the plates up perfectly before running them through the machine, it can result in one of the sides of the machine (the one opposite to the handle) popping out slightly but once your plates have run through it pops right back into place if you push on it. I'll add a couple of photos beneath the review to show what it looks like popped out and closed. I think this is an actual design feature which is brilliant because I will admit to having damaged my plates in the past by not lining them up correctly. These extra few millimetres means your plates run through without damaged themselves or the machine.
The machine is very sturdy and feels well made - if you read the reviews on The Works website (see above for the link), a few people mention the fact that the Tattered Lace mini machine "The Baby Blue" feels a lot flimsier compared to this machine (which is priced anywhere from £30 up to £50). I've not used the TT machine so I can't really comment, but I do prefer a die cutting machine that has a solid platform base like the Make & Create machine rather than a machine without a platform like the Baby Blue or the Diamond Press machines. Once you factor in the plates that most machines use (the Diamond Press has flimsy folders that I hate!) the Make and Create machine doesn't actually take up that much more room than a non platform machine but feels a lot sturdier and doesn't require suction to hold it down (none of the three machines that use suction that I personally own actually stick to my desk which is very frustrating!) and once it's closed the machine is probably a little smaller than the Baby Blue.
As much as I love this machine it does have a major flaw - it's cutting plates. As you'll be aware either by reading the how to use instructions above or through experience, cutting plates warp and crack after repeated use. That normally wouldn't be a problem but The Works doesn't sell replacement plates and though I've emailed the customer care team to find out where replacement plates can be purchased, I've not been able to find out where to purchase them from (customer care haven't bothered to get back to me and it's been nearly ten days since I emailed them!) I've had my machine less than two weeks and because I do a lot of die cutting, my bottom plate is already badly etched - far too scratched to return to The Works as I'm rather inclined to do due to the fact that once the plates are too warped to use I'm going to be left with a useless machine (at the rate I'm die cutting that could be in 6 months time!) and I can't afford to fork out another £30 a few months down the line just so I can die cut at my desk. If replacement plate were readily available I wouldn't hesitate to recommend this machine for both beginners and the more experienced crafter but as things stand in all conscience I can't.
I hope you've found my review useful, if the cutting plate become available then I will update this blog with the relevant information. All products have been purchased by me personally and I have not been paid to write this review (as you can probably tell, though even if I had my review would remain the same). I hope you've enjoyed the review and it's been useful. If you have and would like more reviews (I am on a very limited budget so I can't buy considered purchases such as this very often) please let me know in the comments section or via the comments form in the sidebar. I hope you all have a brilliant weekend and until next time - keep crafting!
Love and crafty hugs,
Sarah
*UPDATED INFORMATION*
Not sure how long it's going to be at this amazing price but the mini diecutting machine is only £20 and you'll still get free shipping!!! Here's the link https://www.theworks.co.uk/p/craft-essentials/mini-die-cutting-machine/5052089215177 - they have also included a link to replacement plates from Amazon which I've subsequently bought and they work with the machine. Enjoy!
SOME INFO AND A HOW TO USE GUIDE FOR BEGINNERS
The Make & Create Mini Die cutting machine is available at The Works priced at £30 and because it's over £20 you get free delivery plus 450 rewards together points if you've registered your card and remember to log into your account before buying! https://www.theworks.co.uk/p/craft-essentials/mini-die-cutting-machine/5052089215177?cm_mmc=GooglePPC&gclid=CjwKEAjw6ZLOBRCLyNXAwfCPmlQSJADHPIJb9-wLEhIKkwFaIKJwXtf9NvZnCACrNlh26rUr-1933hoCqTnw_wcB please click the link if you are interested in purchasing the machine though I'd wait until the end of the review before buying if I was you! For £30 you get the machine and one set of plates but no dies or extras. There is no assembly required (unlike the Big Shot for example which requires it's handle being screwed on before first use) and it doesn't really have any instructions apart from three photos on the packaging but it's extremely easy to use so doesn't really need any. Once the machine is removed from the box it looks like the first photo below. To use it you just need to pull each side down where the carrying handle is to form the platform, the handle can be used either side, just turn the machine so the handle is on your desired side (I'm actually left handed but use the machine with the handle on the right).
 |
| The mini machine with the cutting area folded for storage |
When the platform is in the correct position, it looks like the photo below.
 |
| Once open, the machine is around 30cm or so long |
MY REVIEW
This is actually a great machine with a generous cutting area of 3" wide by 6", it compares favourably with other machines and in fact is superior to the Diamond Press machine that's available from Crafter's Companion. I bought it to replace my much loved and now sadly kaput Sizzix Sidekick and it's the perfect size to go on my very cluttered desk to cut mini (and not really that mini) thin dies. I've only tried unbranded dies in it so far and for the most part they've cut beautifully - for those that haven't I've just added a small piece of paper and run it through again and that's usually solved the problem. One thing I did notice is if you don't line the plates up perfectly before running them through the machine, it can result in one of the sides of the machine (the one opposite to the handle) popping out slightly but once your plates have run through it pops right back into place if you push on it. I'll add a couple of photos beneath the review to show what it looks like popped out and closed. I think this is an actual design feature which is brilliant because I will admit to having damaged my plates in the past by not lining them up correctly. These extra few millimetres means your plates run through without damaged themselves or the machine.
The machine is very sturdy and feels well made - if you read the reviews on The Works website (see above for the link), a few people mention the fact that the Tattered Lace mini machine "The Baby Blue" feels a lot flimsier compared to this machine (which is priced anywhere from £30 up to £50). I've not used the TT machine so I can't really comment, but I do prefer a die cutting machine that has a solid platform base like the Make & Create machine rather than a machine without a platform like the Baby Blue or the Diamond Press machines. Once you factor in the plates that most machines use (the Diamond Press has flimsy folders that I hate!) the Make and Create machine doesn't actually take up that much more room than a non platform machine but feels a lot sturdier and doesn't require suction to hold it down (none of the three machines that use suction that I personally own actually stick to my desk which is very frustrating!) and once it's closed the machine is probably a little smaller than the Baby Blue.
As much as I love this machine it does have a major flaw - it's cutting plates. As you'll be aware either by reading the how to use instructions above or through experience, cutting plates warp and crack after repeated use. That normally wouldn't be a problem but The Works doesn't sell replacement plates and though I've emailed the customer care team to find out where replacement plates can be purchased, I've not been able to find out where to purchase them from (customer care haven't bothered to get back to me and it's been nearly ten days since I emailed them!) I've had my machine less than two weeks and because I do a lot of die cutting, my bottom plate is already badly etched - far too scratched to return to The Works as I'm rather inclined to do due to the fact that once the plates are too warped to use I'm going to be left with a useless machine (at the rate I'm die cutting that could be in 6 months time!) and I can't afford to fork out another £30 a few months down the line just so I can die cut at my desk. If replacement plate were readily available I wouldn't hesitate to recommend this machine for both beginners and the more experienced crafter but as things stand in all conscience I can't.
 |
| This happens if the cutting plates aren't aligned properly |
 |
| But it clicks back into place if you push on the side |
I hope you've found my review useful, if the cutting plate become available then I will update this blog with the relevant information. All products have been purchased by me personally and I have not been paid to write this review (as you can probably tell, though even if I had my review would remain the same). I hope you've enjoyed the review and it's been useful. If you have and would like more reviews (I am on a very limited budget so I can't buy considered purchases such as this very often) please let me know in the comments section or via the comments form in the sidebar. I hope you all have a brilliant weekend and until next time - keep crafting!
Love and crafty hugs,
Sarah
*UPDATED INFORMATION*
Not sure how long it's going to be at this amazing price but the mini diecutting machine is only £20 and you'll still get free shipping!!! Here's the link https://www.theworks.co.uk/p/craft-essentials/mini-die-cutting-machine/5052089215177 - they have also included a link to replacement plates from Amazon which I've subsequently bought and they work with the machine. Enjoy!
Sunday, 17 September 2017
A couple of cards to share
Hello crafty peeps and welcome to my crafty nook! I hope you are all well and are enjoying the weekend. Since I last wrote a few wonderful things have happened - my husband and I celebrated our 6th wedding anniversary and I became a great-auntie for the fourth time! My eldest niece had her third daughter about a week ago and she's called Grace which I think is a beautiful name.
Here is the card I made for Beth and her partner Tom.


I was a little late making this card because my little die cutting machine (Sizzix Side Kick) has been playing up and my full sized machine (Sizzix Big Shot) is pretty much kaput as well so I've been waiting for a replacement machine to arrive from The Works (a review on the machine to follow). This card is a top folding US A2 sized card so 4 1/4" x 5 1/2". For the life of me, I can't remember what paper pack I used for the background paper and envelope - I must be having a senior moment! The pram die, double heart and baby bottle (on the envelope) were die cut out of pink Centura Pearl card stock and I went over the metallic areas with a silver metallic Pro-Marker and the inlaid pieces were coloured with a Lavender Spectrum Noir Shimmer brush marker. I added hot pink flat backed pearls to the wheels of the pram and around the heart (on the latter to hide some glue that had oozed out). The baby girl sentiment was stamped onto white card stock, coloured with Baby Pink and Pale Pink Pro-Markers and then fussy cut out. The stamp set used was a Crafter's Companion Sara's Signature Collection stamp set called Little Angel. They were added to the card front using sticky pads. I added some sheer pink ribbon to the top and layered some crochet trim over it as shown. The matching envelope was made using my WRMK envelope punch board.
My next card is the one I made my husband for our wedding anniversary.


I used Forever Friends Opulent A5 Paper Pack for the background paper, I love the combination of the dark blue and warm copper foil. The world stamp came from an unbranded stamp set purchased from eBay and is a brilliant set for masculine or travel themed cards. It comes with the globe stand and a number of different globes showing various areas of the world - I chose the most well known one that features Europe and Africa etc but there are stamps that show the Americas, Asia and Australia and one that I'm afraid I couldn't identify as geography isn't my strong suit. There's also quite a few sentiments and small add on images such as map pins, a paper airplane and hearts perfect for building up the card. I chose the sentiment And i think to myself, what a wonderful world (little i is how it's written on the stamp) as it's one of my husband's favourite songs. I used another unbranded stamp for the There is no greater love than ours sentiment and the Happy Anniversary stamp is one from a Crafter's Companion Love sentiments stamp set. I felt that the inside was lacking somewhat after I took the original photos so added some sparkly gold foam star strips to the edges of the inside to finish it off. Chris absolutely loved his card and I'm very pleased with how it turned out. It doesn't scream wedding anniversary on the outside but has a nice metallic feel to it which is the look I was going for.
I hope you like my latest creations, I hope to have a product review on the Make and Create die cutting machine up in a few days, I'm just waiting to hear back from The Works Customer Care team as I need to know where replacement cutting plates can be purchased as the machine will be pretty useless in a year or two without them and The Works doesn't sell them on their website as far as I can see. As always if you have any questions or comments then please leave them in the usual places and until next time - keep crafting!
Love and crafty hugs,
Sarah xxx
Here is the card I made for Beth and her partner Tom.


I was a little late making this card because my little die cutting machine (Sizzix Side Kick) has been playing up and my full sized machine (Sizzix Big Shot) is pretty much kaput as well so I've been waiting for a replacement machine to arrive from The Works (a review on the machine to follow). This card is a top folding US A2 sized card so 4 1/4" x 5 1/2". For the life of me, I can't remember what paper pack I used for the background paper and envelope - I must be having a senior moment! The pram die, double heart and baby bottle (on the envelope) were die cut out of pink Centura Pearl card stock and I went over the metallic areas with a silver metallic Pro-Marker and the inlaid pieces were coloured with a Lavender Spectrum Noir Shimmer brush marker. I added hot pink flat backed pearls to the wheels of the pram and around the heart (on the latter to hide some glue that had oozed out). The baby girl sentiment was stamped onto white card stock, coloured with Baby Pink and Pale Pink Pro-Markers and then fussy cut out. The stamp set used was a Crafter's Companion Sara's Signature Collection stamp set called Little Angel. They were added to the card front using sticky pads. I added some sheer pink ribbon to the top and layered some crochet trim over it as shown. The matching envelope was made using my WRMK envelope punch board.
My next card is the one I made my husband for our wedding anniversary.


 |
| Sorry this photo is on it's side, I wanted to show the star borders that were added later |
I hope you like my latest creations, I hope to have a product review on the Make and Create die cutting machine up in a few days, I'm just waiting to hear back from The Works Customer Care team as I need to know where replacement cutting plates can be purchased as the machine will be pretty useless in a year or two without them and The Works doesn't sell them on their website as far as I can see. As always if you have any questions or comments then please leave them in the usual places and until next time - keep crafting!
Love and crafty hugs,
Sarah xxx
Subscribe to:
Posts (Atom)