Hello crafty peeps and welcome to my crafty nook! I hope you've all enjoyed the weekend, we've had really beautiful weather here in Bridlington and the trees on the street have burst into blossom practically overnight. I've only one card to share with you today, as I mentioned in my last post I thought it was possible to make a shaped gatefold card with a 300gsm card stock if you used a Bigz die and I was right. I don't own many Bigz dies at least not ones that cut solid shapes but I do have a 4" circle Bigz die and I have a set of Spellbinders layering circle dies so I thought I'd give it a go. The card is made exactly the same way as the the gatefold card on my last blog post so please read the next blog post and check out Dawn's video on how to construct the basic card. The main difference is because Bigz dies are solid you need to mark the centre of the edges of the dies so your piece of card lines up, you only need to cut the card to 4 1/4" by 11" as well which makes it a bit easier to centralise your card base before you cut and it's a good idea to stick the "gates" of your card down so they don't slip while you run it through the die cutting machine. I used Adorable Scoreable card stock for my layers along with my usual 300gsm super smooth card stock which I also used to make the card blank. I had planned on using stamped images on the card but nothing really gelled so in the end I used some beautiful dies from the Crafter's Companion Sara's Signature Collection.
 |
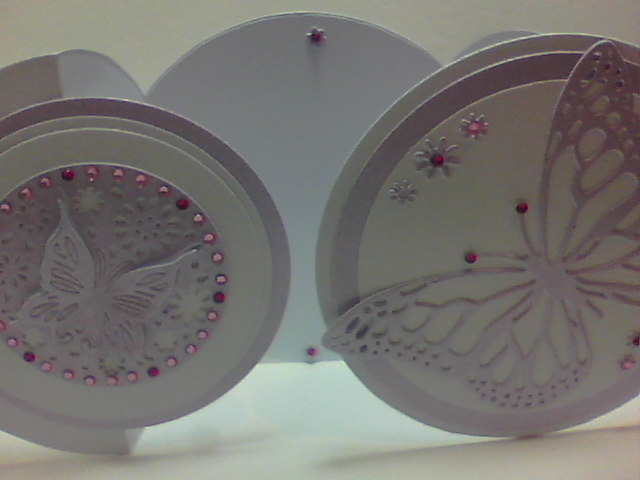
| Front of closed circle gatefold card |
 |
Close up of card front
|
 |
| Open Circle Gatefold card |
 |
| It took ages to add the gems to the diecut holes round the edge of the panel! |
 |
| Close up of open card - the inside has been left blank |
This wasn't the easiest card to make not helped by the fact that I added the large die cut butterfly on the front with the card shut and when I opened it I realised it was on upside down. I ended up cutting another white panel of card and layering it over the top of the original 3D die cut butterfly, rotating the card 180 degrees and adding a second diecut 3D butterfly panel on the left side instead of the right hand panel. The only good thing was as a result of the second die cut panel, I had a few more extra flowers from the waste so I added them to the card as shown. It is possible to make this card with nesting dies alone but as I mentioned on my last post you can only cut through a maximum of 250 gsm for the first cut through the folded card which can make the central panel a bit flimsy. To be honest it probably wouldn't be too much of a problem for a circle gatefold card as it has plenty of bottom to balance on unlike my labels cards.
I hope you've enjoyed my latest card and if it inspires you to make your own version then please leave a link in the comments section as I would love to see what you come up with. Hopefully I should have a new card to share with you soon. Until next time - keep crafting!
Love and crafty hugs
Sarah xxx


No comments:
Post a Comment
I value your feedback and questions about this blog so please leave me a comment - let's spread the crafty love...
Sarah xxx