Translate
Sunday, 23 September 2018
Cardmaker of the Year 2018 Competition Entry.
Hello crafty peeps and welcome to my crafty nook! I hope you've all had a great weekend, it's not been too bad here but you can tell the seasons have changed and there's a bit of a nip in the air especially in the morning. I hope whatever the weather, you've managed to get some crafting done.
The closing date for the CMOTY competition was the 14th September which was a good week or so ago and I think it's about time I shared the three cards I sent in as my entry. I'll be quite honest with you, I was in two minds about entering the competition because although I had a lot of ideas and had made a few things towards the cards, I didn't really have anything completed before Jinx fell ill then passed away. As you will know his death has really hit me hard and I've not felt up to doing much apart from housework (mindless distraction)which is pretty much a reversal of my usual inclinuation. Making a wedding card for our neighbours gave me the creative jolt I needed and I liked the card I made so much I decided to replicate it as one of the three cards needed, two thirds of the second card was diecut out and just needed assembling, once those two cards were made I just needed to come up with a third card. After a lot of failed attempts I finally decided to make an acetate flip circle card using the dies my lovely husband bought me for Valentine's Day this year. I love making acetate cards and after a quick internet search failed to come up with any acetate flip circle cards on Pinterest etc I decided to have a go at making one. I will say that acetate can be quite challenging to work with, it doesn't diecut smoothly and you get white lines where you score but I still think it gives a card a real wow factor especially when teamed with kinetic elements. I wanted to deliver a more professional entry this year so made bespoke envelopes for each card and a matching tag in an attempt to stand out from the other entries - I don't know if I've succeeded and I probably haven't even placed but I'm rather proud of myself for even entering at a very challenging time. Anyway enough blathering, as is the norm at the moment I'm adding this blog post using my phone so the photos will appear after the text and all the paragraphs I've stringently added will vanish without a trace once this post goes live so apologies for that. Hopefully the photos will be consecutive and not mixed up like they have been the last couple of posts.
As always if you have any questions or comments please leave them in the usual places and until next time - keep crafting!
Love and crafty hugs,
Sarah xxxxxx
Wednesday, 19 September 2018
Copper Wedding Anniversary card share
Hello crafty peeps and welcome to my crafty nook! Sorry it's been a while since my last post, Chris and I celebrated our 7th wedding anniversary last week. Chris bless him came down with a head cold the weekend before which I hoped I'd avoided only to wake up on our special day feeling dreadful. In one way I've been quite fortunate because the initial cold symptoms only lasted for a day or two (yay for avoiding turning into a snot goblin!) Instead I've just had a hacking cough which is worse at night so I've not had a lot of sleep for the past week, not only does it keep me from going to sleep but I wake up a few hours later needing to cough up stuff - sorry to be gross, sharing is caring lol. Upshot is I'm exhausted and in a lot of pain so I've not done a great deal of crafting even though I really want to, I just don't have the energy right now.
I did manage to get a couple of cards made, the first was an anniversary card for Chris, the second was an anniversary card from Chris - yes you read that right, because he started with man flu on the Friday before our anniversary and he always leaves things to the last possible minute, my beloved husband didn't have a card for me on our anniversary so rather than go without, I made my own for him to sign. I didn't mind too much because Mixed Up Craft shared a reverse easel card on YouTube and I thought it would look pretty cool made out of acetate. I wanted to make him a card with a copper heart and that's what I ended up making him though there were a few trial runs first before I settled on the version shown later in the post. I tried wrapping copper wire around a black chipboard heart but it looked dreadful, I tried painting diecut hearts using metallic copper SparkleIT Brusho powders but even when dry the resulting paint is highly water reactive and I couldn't get it to form a smooth layer of colour so that was another idea out the window. I then decided to cover a thick diecut heart (I layered 8 diecut black hearts together to make an extra thick heart) with copper embossing powder and heat set it to make a copper heart embellishment which is what I ended up using. It took about four layers of embossing powder to get a smooth finish and I'm not totally happy with the results because there are dips where I held it with a pair of reverse tweezers while it was being heated and the embossing powder isn't the bright copper Kettle colour I'd hoped for instead it's more a bronze colour. I have a sheet of copper circle outline stickers in my stash that I've owned but not used for over ten years, these are a gorgeous bright copper so I used them to make my own backing paper, I tucked some under the heart and had others hanging off the edges which I carefully cut away so I could use them to fill in any bare parts on the edges. I added a strip of copper embossed card to the side to tie in the copper heart and stamped a with love sentiment on the bottom right hand side.
The second card is an acetate reverse easel card with a dry embossed copper heart layered onto a black heart, I used 7 mini copper hearts as the stopper. I was hoping to use more copper on this card but discovered I only had a single sheet of copper foiled card stock so I had to be frugal with what I had. If you want to know how to make a reverse easel card then check out Mixed Up Craft's YouTube channel for her tutorial. It's a very easy card to make with only one fold different to a regular easel card.
As I'm writing this on my phone, I shall add the photos under the main text as I can't get it to be part of the main post, some of the photos may become a little out of sequence but hopefully they should still make sense.
As always if you have any questions or comments please leave them in the usual places and until next time - keep crafting!
Love and crafty hugs,
Sarah xx xx
Wednesday, 29 August 2018
Still sad but life goes on....
Hello crafty peeps and welcome to my crafty nook! I hope you've all been enjoying the recent hot weather, it's freezing in comparison today, in fact it's been on the chilly side all weekend. It makes a pleasant change though, so I'm not really complaining. The cooler temperatures have given me an opportunity to get some crafting done. Our neighbours got married about ten days ago and I made them a gold and black easel card, it was my niece's birthday a couple of weeks ago and my husband's birthday last week so I'll be sharing the cards I made for all three occasions. I'm writing this post on my phone and it won't allow me to add the photos within the text and I can't see in which order the photos come out in until I add the post to the blog (it just has a load of code showing instead of the photos) so the photos will follow the text like the last couple of posts.
The wedding card was made using a Sizzix Thinlets die set. The cake was die cut four times out of different card and I added gold details with some thick gold paint, this paint was thinned down to add splatters to the cake and to the black card pieces that make up the easel card and topper layer.
The card for my niece was made using a mermaid die set, I diecut the mermaid and coloured it in with Pro-Markers, I gave her red hair because my niece has red hair and I coloured her tail in a variety of Blues as blue is her favourite colour. I coloured the fish in rainbow colours with extra blues to make the fish numbers to nine (she turned nine). The mermaid is mounted on to a circle piece because she actually slides up from the rocks up to the fish using a slider channel. I added a uple of yellow fish to the inside along with a sentiment.
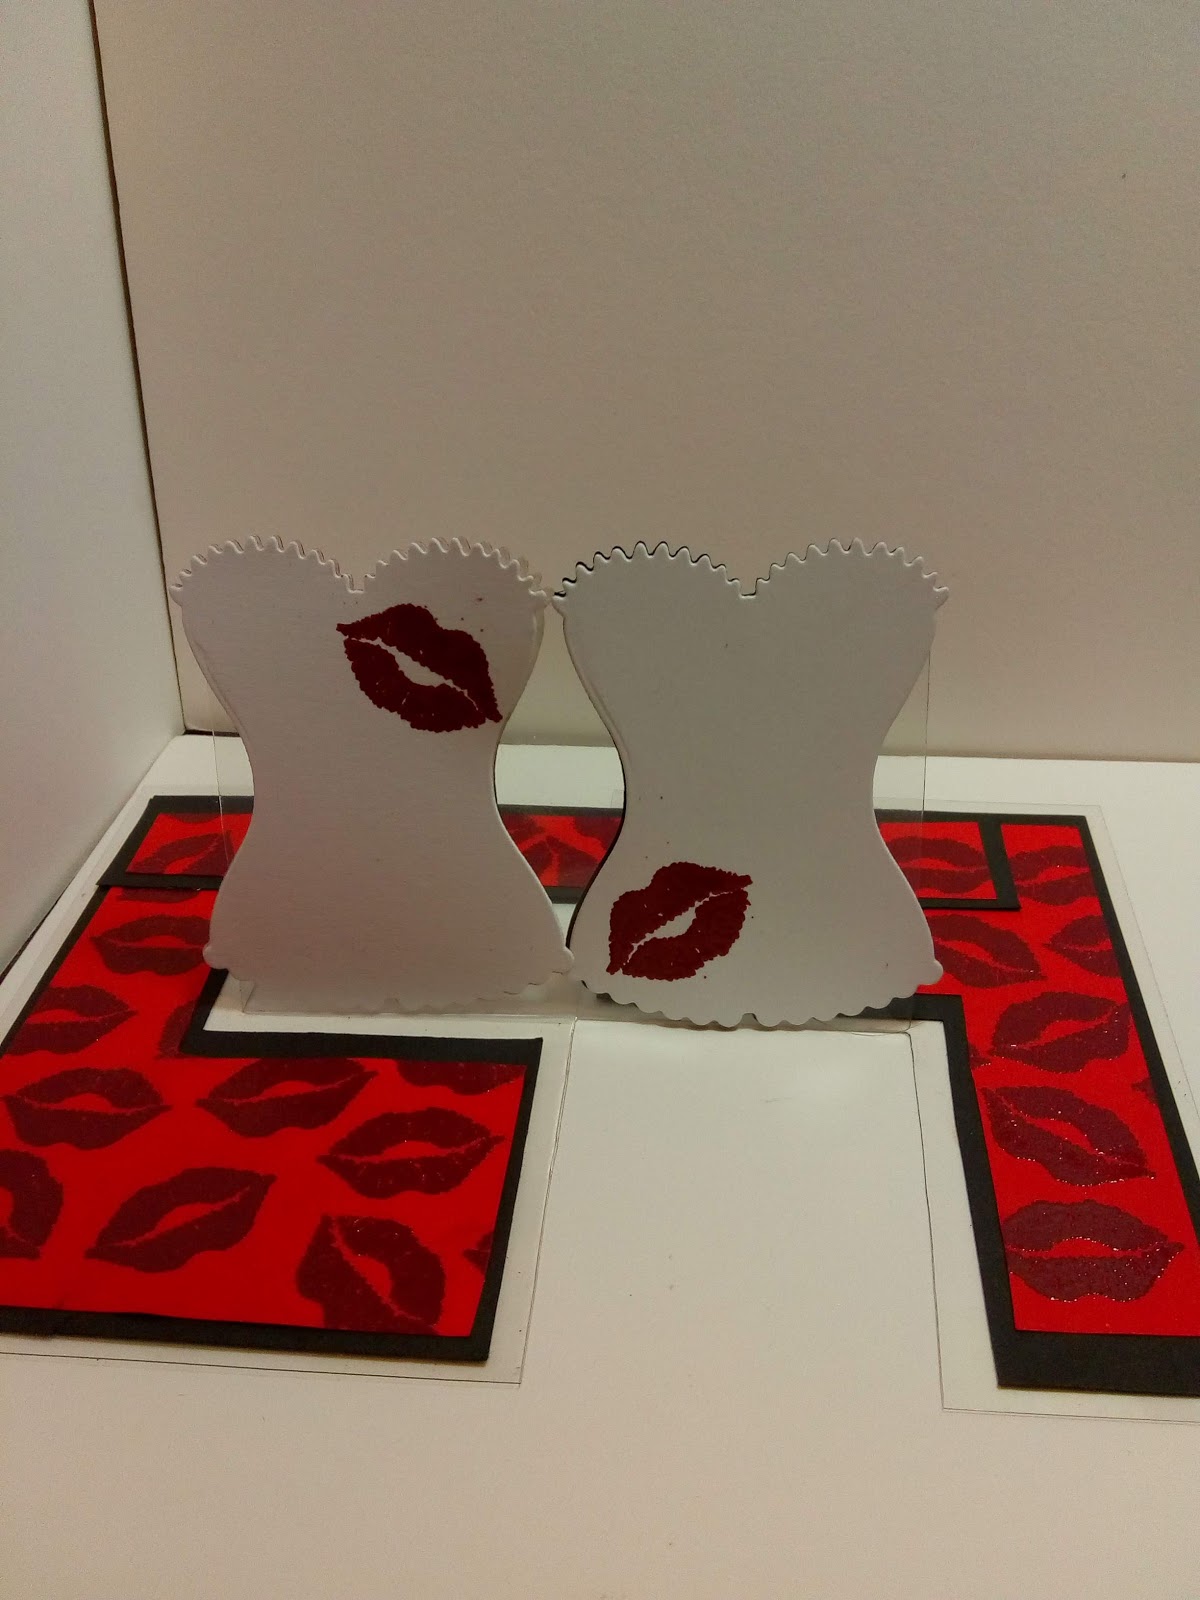
The Last card I made was a floating or invisible impossible card featuring a couple of saucy corsets 😉. I made this card using an acetate sheet cut to 5"x7" and scored and folded in the usual way, I was inspired by as recent YouTube tutorial by Sam AKA Mixed Up Craft who made a couple of acetate impossible cards and it reminded me of how much I'd enjoyed making the steampunk one a few months ago. The corsets were diecut out using a couple of dies from my stash, the black layer of the red and black corset has gold speckles on it because I used some of the card I had left from making the wedding card - I try to keep all my scraps of black card no matter how small because it's hard to get a true black card of a decent GSM and I don't have a huge amount of it in my stash. I made the red card layering pieces by stamping a lips pattern in versamark ink and heat embossing them with a crimson embossing powder. The sentiment was one from my stash.
I hope you like my latest makes, I'll try to add the last blog challenge which is now severely delayed soon but I really need to get my entry for the Cardmaking of the Year competition finished - I liked the wedding card so much that I've duplicated it as one of the entries, I've also half made a fence box card which I'm planning on turning into a get well card so I need to complete that and make a third card to complete the entry. The closing date is the 7th (I think!) September so I haven't got a great deal of time to complete them. Once that's completed and sent off, I hope to get on track with blogging on a more regular basis, saying that Practical Publishing magazines haven't had their Papercrafter of the Year competition announced yet and usually the two competitions overlap and that requires a project (always my Achilles heel) and two cards so that will take up quite a bit of time assuming they have the competition this year.
That's pretty much everything caught up, if you have any questions or comments please leave them in the usual places and until next time - keep crafting!
Love and crafty hugs,
Sarah xxxxxx
Sunday, 12 August 2018
Sad News.
Hello crafty friends, I want to apologise for the blog challenge post not being up as planned. Half of it is written but I haven't added any photos or anything. I'm not sure when it will be added.
My beloved cat Jinx passed away this morning and I'm feeling too sad to write about crafting. I'm going to have a short break from crafting/blogging, I need to grieve, I've had Jinx in my life for over 17 years, I watched him take his first breath and I was with him when he took his last. He's been such a huge part of my life and I can't imagine what I'm going to do without him, his passing has ripped my heart in two. I don't even have many photos of him, like a lot of people most of my photos are in digital form and mine (over 600)were saved on a memory card inside my old phone, when I transferred the card to this phone it automatically reformatted the card erasing all my folders including the one containing all of Jinx's photos. All I have are a few photos I've taken since getting my new phone and I'd like to share a few here.
Subscribe to:
Posts (Atom)