Hello crafty peeps and welcome to my crafty nook! I hope you all had a brilliant Bank Holiday weekend. It's a wet and windy Tuesday here on the East coast - definitely staying inside and crafting weather. I was up most of the night unable to sleep due to the wind (and Jinx was hogging the bed!) so I've made a couple of cards to share with you today. I actually started quite a few more but they weren't going the way I'd hoped for so I'll put them away until another day and I'll try to salvage them then.
If you are a regular reader of this blog then you've probably noticed that I usually have a hand coloured image so I thought I'd challenge myself to make a couple of cards which have little or even no stamping on at all, instead I've used dies and embossing folders to embellish my cards. I wanted to make two cards using circle dies as I really like circles and I have a set of Spellbinders large nesting dies and a 4" Sizzix Bigz die. I have used both for these cards.
 |
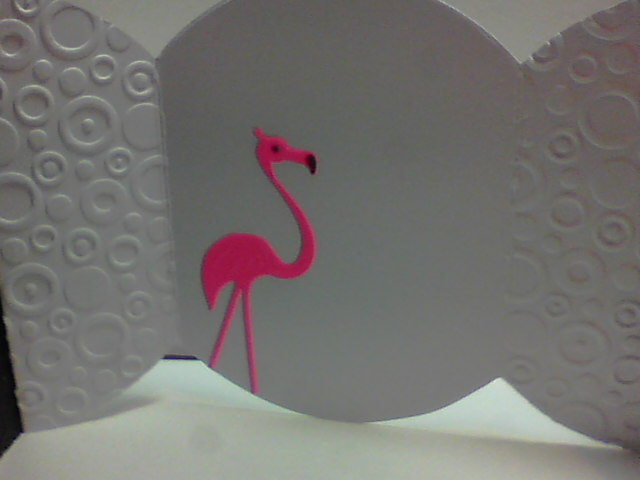
| Flamingo Circles Gatefold Card |
 |
| Close up of card front with hot pink vellum flamingo |
 |
| Circles gatefold card - open |
 |
| Sentiment from Verity Rose 'Cupcake' stamp set |
 |
| Inside of card with embossed side panels |
 |
| Close up of Vellum flamingo inside open card |
 |
| Clock Circle Easel Card |
 |
| Close up of Easel topper |
 |
| Easel card shut for posting |
 |
| Decorated base with raised gear stopper |
I love the way you can take the same items and yet make two very different cards with them. The flamingos were die cut out of neon hot pink vellum using a die from the Crafter's Companion Verity Rose 'Sunbeam' collection. While the vellum was still in the die, I placed it on a piece of funky foam with the die face down and embossed all the open areas with an embossing tool, I flipped the die over and added some detail to the eye and the beak using an alcohol marker. I die cut a simple heart shape out of the pink vellum scraps. For the instructions on how to make a circle gatefold card, please click on this link
http://smwcraftynook.blogspot.co.uk/2016/05/circle-gatefold-card.html - I used a super smooth 300gsm cardstock for the base and embossed the front panels and the two side panels using Crafter's Companion Just For Men Signature Collection by Sara Davies 'Pop Dotty' embossing folder. I die cut a number of circles using the Spellbinders Nestabilities dies out of black and white card and embossed them as shown. I love the quirky sentiment from the CC Verity Rose 'Cupcake' stamp set and thought it was perfect for the flamingos as I personally think they are both "graceful and silly".
I used similar supplies to make this circle easel card but I used Sheena's Stamping card for the base as it's more sturdy than the super smooth card that I used for the flamingo card. I cut my card to 8.5" x 4.25" and scored it 4.25" using a scoreboard. I carefully lined the the square card blank so most of the circle of the Bigz die was covered but a little of the circle die was visible above the folded edge of the card - this is so the card appears to be a circle but remains joined together at the top to form a circle card blank. Using the scoreboard I scored the top part of the card in half (at 2" as my die is 4"), this becomes the mechanism for the easel. I die cut another circle of card using the same die out of white card then black. I die cut another circle out of the black piece so it formed a frame shape as shown using one of the Spellbinders Nestabilities circle dies. I put the spare black circle to one side for later use. I put a small piece of white card into a CC Just For Men Signature Collection by Sara Davies 'Time Piece' embossing folder and ran it through my Big Shot, once embossed I lined up a circle die around the embossed clock face and die cut it out. I then very carefully went over the hands etc of the embossed clock with a black gel pen. I die cut a gold circle out using a die and matted the clock face onto it as shown. I added foam squares to the back of the black frame and thicker foam tape to the layered clock face then die cut a lot of gears using CC Just For Men Signature Collection by Sara Davies 'Cogs and Gears' Dies out of gold mirror card. Once these were cut I added the clock face to the centre of the large white die cut circle and stuck the gears and cogs down as shown with wet glue. I added one of the circle centres from a gear onto the middle of the clock face as shown and once the gears were well stuck down I added the black frame over the edges of the cogs lining it up with the edge of the white circle. I added wet glue to the lower half of the finished panel and stuck it firmly to the easel mechanism of the card. I then die cut even more cogs and gears for the base. I cut the large gears in half both under the clock face and on the card base as the whole gear wouldn't show. I sketched around the black card circle that I'd put aside previously with a pencil and filled in the outer part of the card base with gears and cogs being careful that the edges of the halved ones were well inside the pencil circle. Once the edge was filled with gears and cogs, I added the black circle over them so that the cut edges were covered but there was still plenty of the gears etc showing. I made a stopper for the easel out of spare gears as shown.
Sorry this has been such a long blog post but I wanted to have both cards on the same post to demonstrate how you can get two very different cards using similar supplies. I really enjoy working with the Signature Collections especially the Just For Men collection. I've only got a couple of dies and the embossing folders so far but I've found them to be very versatile and not just for men as the flamingo card demonstrates! I look forward to adding to my collection soon. I hope you've enjoyed this blog post, as always if you have any questions or comments then please leave them in the comment section below. If this weather persists then I'll have some more cards to share with you soon, until then - keep crafting!
Love and crafty hugs,
Sarah xxx