Translate

Showing posts with label Mail Art Envelope. Show all posts

Saturday, 25 March 2017

Double Z-Fold Mother's Day Cards

Hello crafty peeps and welcome to my crafty nook! I hope you are all well and enjoying the first week of spring (at least here in the UK). The weather's been very mixed with bright sunny days and very rainy days too - typical British weather, no doubt it will be snowing by Easter lol. It's Mothering Sunday this weekend and I've invited my mum over for Sunday lunch - if all goes to plan I shall be making roast pork with stuffing, apple sauce (might even make it fresh *shock face*), mash potato, roast potatoes, carrots and cauliflower cheese. It's taken me a long time to realise that even though I don't particularly enjoy it, I'm actually a good cook and one of my latest dishes is cauliflower cheese - I've decided I'm going to try my hand at macaroni cheese next because strange as it might sound I've never had homemade before and if it's as tasty as cauliflower cheese then it's going to be pretty good (I think the secret is to add freshly ground nutmeg to the cheese sauce). Anyway enough of cooking, let's get on to something I do enjoy - crafting! In my last post, I shared the invite I made for my mum and this time I'd like to share the cards I've made for my mum and mum-in-law.


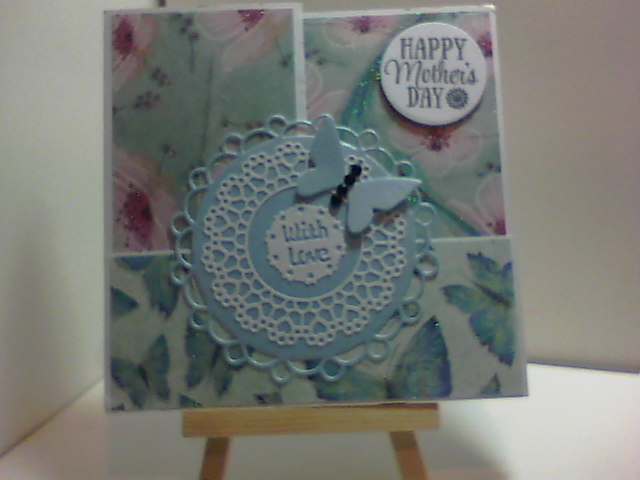
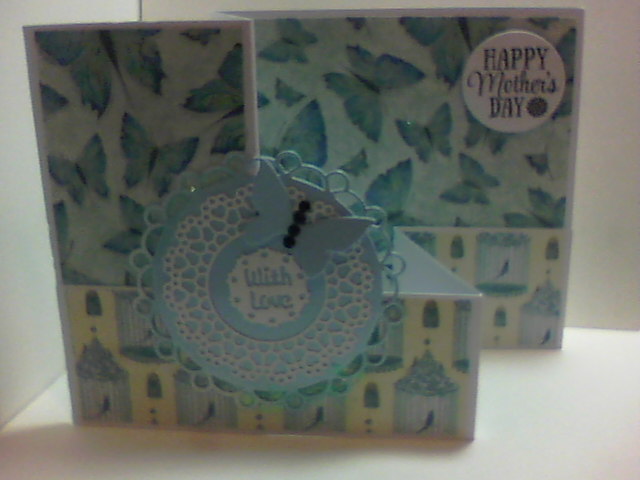
The cards are made from 300gsm smooth card stock, I buy it from Every Craft's A Pound when it's available and it's usually about £7.50 for 200 sheets which is really good value. They have 250gsm and 200gsm in for the same price but you get an additional 50 sheets per pack if my memory serves me correctly. I haven't bought any for a while because I've still got a pack of each  in my stash and I've also started to use Sheena's stamping card which is a lot more expensive but is thicker even though it's supposed to also be 300gsm which is the same as the super smooth. Plus you can't always get the particular card from ECAP unfortunately so I forget to look when I'm on the site. The card blanks are 5.5" square when folded and I decorated them with papers from the Kimono paper pack from Crafter's Companion. I love the gorgeous colours in this collection and the glitter highlights that are on many of the designs. I die cut a loopy circle using the free die set that came with last month's Diecutting Essentials magazine out of Centura pearl pale blue card from the pastels A4 card stack, it doesn't quite match but I didn't have any coloured card that did so thought this would do. I die cut the lacy circle using the second die in the set which also diecuts a small circle from the centre. I stamped the Happy Mother's Day greeting onto these circles and die cut a 'with love' sentiment which came free with a rose die set a few months ago - I'm afraid I can't remember which magazine it came free with. The butterfly was die cut using a nesting butterfly from a Sara Signature set that I got a few months ago, it's the smallest die in a set of three. I added black gems from my stash to form the body. I made the envelope using my WRMK envelope punch and stamped the large butterfly that came free with a magazine in the last couple of months, again I'm afraid I can't remember which magazine it was from - I do get rather a lot of magazines. I coloured them in using Flexmarkers and coated them with some clear Shimmer Marker before assembling the envelope.

I hope you like my latest makes and that you have a wonderful Mother's Day weekend. As always if you have any questions then please leave them in the usual places. Until next time - keep crafting!

Love and crafty hugs,

Sarah xxx

Monday, 22 August 2016

Creepy or Cute?

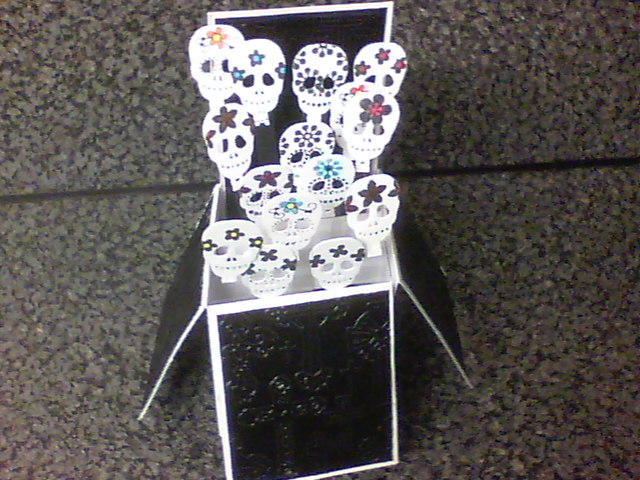
Hello crafty peeps and welcome to my crafty nook! I hope you all had a brilliant weekend and got up to lots of crafty adventures. It was my lovely hubby's birthday on Sunday and as he loves sugar skulls I made him a pop up box card full of them.


I cut all 15 skulls out using the skull and torso die that's part of the skeleton Perfect Partners by Sheena Douglass (Crafter's Companion) die set and just placed the card over the skull and not the full die to do some partial diecutting. I decorated the skulls by raiding my stamp collections and finding as many small flowers as possible - Tatty Twinkles stamps were where I got most of them from. I stamped them in black and added black dots round some eye sockets and over the embossed teeth. I coloured the open parts of the flowers with marker pens.

I made the pop up box in the usual way and cut panels of Centura Pearl black card stock to the required sizes then I embossed them using a Darice Crosses embossing folder making sure that each piece was placed slightly different to the others so they are all slightly different. Once embossed I added these panels to the card base. I stuck the decorated skulls onto thin strips of acetate and added them to the inner struts of the card, staggering them so they are all different sizes.


I made an envelope using my WRMK envelope punch board and then added Chris's name on the right hand side using metal letters mounted onto a strip of black card. I added tiny slivers of foam tape behind the metal letters so they are raised slightly above the black card.

Chris really liked his card and his first reaction to it was "Wow! It looks like the audience of a KISS concert!" - Priceless!

I must be honest this isn't to everyone's taste - I'm not even sure if it's to mine and I can't work out if it's cute or rather creepy lol. The main thing is that Chris loves it, even if no-one else does.

As always if you have any questions or comments then please leave them in the usual places as I'd love to hear from you. Until next time - keep crafting!

Love and crafty hugs,

Sarah xxx

Saturday, 16 July 2016

Another HOTP Steampunk Card

Hello crafty peeps and welcome to my crafty nook! First of all please excuse any typos that may be present in this post, my cat Jinx has decided to hog the desk so the keyboard is balanced on the edge and resting against my tum! I wouldn't be surprised if the little darling decides to climb on top of either the keyboard or me while I'm writing this. I like to pretend that I'm in charge but in all honesty Jinx rules the flat with a paw of iron lol - we're just his chattels.

Today I'd like to share the Steampunk themed birthday card I made for my wonderful friend Adam, it was made using the same stamp set as the card featured in yesterday's blog post.

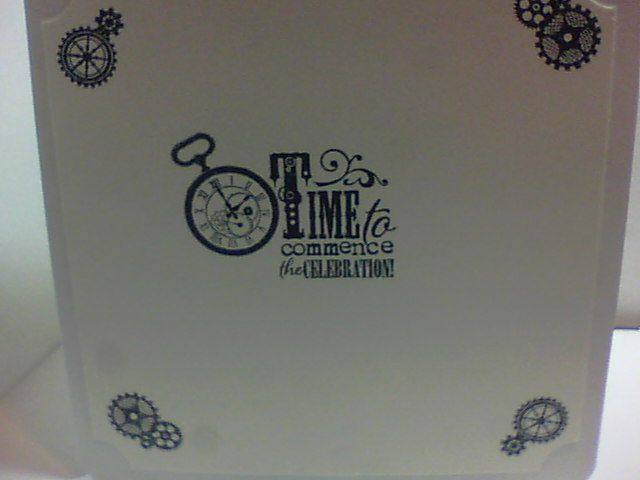
Envelope decorated with steampunk corner stamp

Steampunk blended distress ink birthday card

Close up of main image

Inside of card
I started this card by making the card blank from a sheet of Kraft card which I cut down to 11" x 5 1/2". I scored it at 5 1/2" and rounded the corners using a punch. Only one side of this card is Kraft and the other is an off white which makes it perfect for making card blanks out of as it means you don't have to use either a white pen to add your message inside or add a paler coloured insert. For this card though, I did add an insert as I wanted to add a stamped sentiment and the inner surface is rather slick which means the message smudges unless you heat set it. To make the focal image, I cut a sheet of cream card stock to 5" square and stamped the largest stamp from the set in the middle of the card. I then added most of the colour using Distress Inks and a blending tool. I started with Spiced Marmalade and pulled the colour in towards the centre of the card using the blending tool, I concentrated the colour around the image but added a little of it over the clock when the ink was nearly gone from the foam applicator so it's a much paler colour. I added some Fired Brick and finally a little Black Soot around the edges. I then added a little more of each colour until I got the blended look I wanted. I've no idea where I got the cream card from but it is brilliant for ink blending, I don't have a mini round blending tool yet and sometimes I find I have streaks and lines left on my project after I've coloured it in but this card seems to smooth all the colours together with very little skill on my part. Once the inks had thoroughly dried I added some yellow Flex marker to the light bulb. I added a layer of Glossy Accents over the bulb and the seconds indicator on the clock face and put it to one side to dry. While the Glossy Accents was drying I cut another piece of the cream card stock for the inside of the card and removed the corners using a ticket corner punch, I then stamped the sentiment and images as shown using Memento Black Tuxedo ink. I stuck this inside the card using double sided tape. I stamped "Happy Birthday" in the four corners then added the topper to the front of the card using more d/s tape once the Glossy Accents had set. As a final little touch I added a coating of Spectrum Noir Clear Glitter brush marker over the hat band. I made a matching envelope using my We R Memory Keepers Envelope Punch Board.

I really enjoyed making this card but I think if I duplicated it I'd add a thin border of black around the topper just to make it pop a bit more. I'm hoping Adam likes it as it's a bit different to the cards I usually make him. If you have any questions or comments then please leave them in the usual places. I hope you all have a brilliant weekend and until next time - keep crafting!

Love and crafty hugs,

Sarah xxx

p.s. I thought you might like to see a photo of my 'helper'


Thursday, 28 January 2016

Last Year's comp entry that I forgot to share..sorry!

Hello crafty peeps and welcome to my crafty nook! I hope you're all well. It's hard for me to believe but it's nearly the weekend AGAIN! And nearly the end of January!!! I can't believe how quickly this year is going, it doesn't seem like five minutes since Christmas. I've managed to achieve absolutely nothing this month and haven't even started to work on my goals. *hangs head in shame*

I promised a while ago to share the final cardmaking comp entry from last year. I left this entry until the last minute (I am a procrastination princess!) something I'm definitely not going to do this year if I enter the competitions this time round - it cost me a small fortune in postage costs last year and I'm not sure I can afford to waste the money on an obvious lost cause. Anyway here are some photos of my entries, as there are quite a few of them I won't be adding instructions on how to make the two cards or project but if anyone is interested on how they were made then please leave a message and I'll be happy to share them with you.

Box with flush fitting lid - returned damaged (which is why it's bulging at one side)

Zig zag folded mini album with tags inside pockets 

Both sides of album are secured with ribbon and you open it on the right hand side to access the first six months

Tag was damaged when I got it back but I couldn't remake it as I've lost the June stamp!

Each double page covers one month and has a die cut tag in the pocket behind the journalling panel

To access July - December you flip the album to the back and open on the right hand side again

Side view of July to December pages
Now for the two cards.

8" x 8" Rock Star Easel Card with guitar stopper
Alien box card
Close up of Alien toppers
Front flap of alien box card
Back interior panel of card with Saturn image
Outside mail art for the box card
Flap of mail art envelope
Alien surprise waiting for the viewer inside the envelope - love it's evil grin lol

Might not look like much but the topper is on an Action Wobble spring!


 The video above was with the related photo but for some reason it moved to the bottom when I added the second lot of photos. I hope you like the cards and mini album, I shall be using the mini album to record my achievements of 2016 (which explains why January is empty!) Hopefully I'll have some good things to record in it in the coming months. As always if you have any questions or comments then I'd love to see them so please leave them in the usual places. Until next time - keep crafting!

Love and crafty hugs,

Sarah xxx