The first card is for my sort of brother-in-law (it's for my sister's partner), I've got some really versatile stamps from Crafter's Companion called Sentimentals I bought them when CC had a sale sometime last year and one of the sets I bought were men sentiments. It has an -in-law stamp which I've never used because obviously when I make a card for my parents/sister -in-law it's from my husband and I, it seems a bit strange to put -in-law on the card as they aren't Chris's in-laws. Plus I'm really close to my in-laws (I'm very blessed in that respect) so like to call them mum and dad.
 |
| Steampunk Side Panel Card |
I made the panel card in the usual way and used some extremely old Dovecraft Masculine papers that have been knocking around my craftroom for at least 8 years, I tend to be a bit miserly with them if I'm honest because most of my scrapbook papers etc tend to be on the girly side. These panel pieces are from one design but were scraps from a different project. The round metallic elements in the corners are actually white Craftwork Card Candies coloured in using a bronze Papermania Metallic Shimmer Fluid Brush Marker which went on beautifully. However I wouldn't recommend using the markers to colour in super smooth cardstock like I did on the cog elements as I found the coverage to be patchy and it wasn't easy to colour. The cogs were cut out of a scrap of 200 gsm super smooth card stock using some First Edition dies. The sentiment was stamped in Memento Rich Cocoa ink using another of the Sentimentals range - Birthdays. I didn't take a photo of the inside of the panel but I added Brother-in-law to the top and a spare cog and Card Candy to the bottom left corner just to tie the inside with the outside.
 |
| Art Deco Side Panel Card |
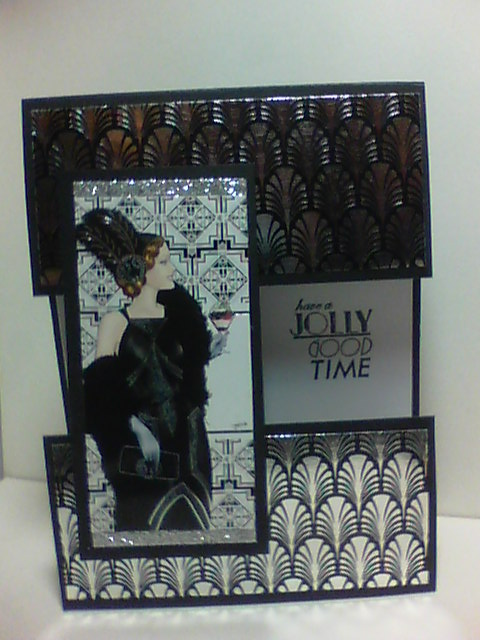
My second side panel card was decorated using some Art Deco themed papers, stamps and toppers from Papermania and like the first papers, they were released a number of years ago. The image on the front is actually a square topper which I've cut in half and added strips of glitter card to lengthen the topper so it didn't look out of proportion on the panel. The paper used is beautifully foiled and I had to really force myself to cut into it because it's so pretty lol. This style of card is quite compact (4 1/4" x 5 1/2") so unfortunately I can't use the stamps from the collection as the images are too big to fit on the vertical panel, I did use one of the sentiments though. This card is destined to be sent to my husband's Auntie next month for her birthday, she's rather a classy lady so I thought this card would be perfect for her.
I'm really loving this style of card, if you don't trim the card down to 28 cm as I suggested in the first blog post, then you can actually make two cards out of one sheet of A4 cardstock (still score at 14 cm though and cut all but two inches off the longer piece of the scored card then cut two 2" panels off the card that's removed) which makes it a very economical make. I know it's a bit early to be thinking about Christmas but after last year's fiasco where the majority of my friends and family didn't get a card from us as I ran out of time to make them, I may make some Christmas themed cards while I'm loving this style. I don't know about anyone else but I tend to go in phases with card blanks, sometimes it's all 8" square cards, sometimes it's something more unusual like a pop up box card. You've probably noticed if you're a regular reader of my blog.
Hopefully I'll be doing some crafting over the weekend so I'll have something new to share with you soon. As always if you have any questions or comments about anything featured in this blog then please leave them in the usual places. Until next time - keep crafting!
Love and crafty hugs,
Sarah xxx
No comments:
Post a Comment
I value your feedback and questions about this blog so please leave me a comment - let's spread the crafty love...
Sarah xxx