Hello crafty peeps and welcome to my crafty nook! I hope you are all well and enjoying the summer. I've been busy in my crudy the last few weeks which is why I've not posted for a while, I'm sorry if you've missed my usual updates but hopefully I should get back to posting on a more regular basis after the 18th August. As you will know from previous posts its Cardmaker of the Year time and even though the closing date for the competition is the 18th September 2015 I want to send my entry as early as possible so have set myself a deadline of 18th August 2015 to make them and get them ready for posting. Of course because I've set myself a deadline I'm having a bit of a craft block so I've spent hours in the crudy with very little to show for it (I have made a card for my nephew though - his birthday isn't until the 29th of December!) My 'beloved' cat hasn't been a great help either as he's decided the breakfast bar in the crudy is now his and insists on sleeping on it when I'm trying to work. I can't even shut him out as he's worked out how to pull the door handle down then he pushes the door open and jumps in before I even get off my chair! I haven't finished any cards apart from the one for my nephew but I have made myself a stamp press. I've wanted one for years but as they start at £12.94 on Amazon for a Fiskars large stamp press I've been really reluctant to buy one as it's basically just a thin sheet of clear plastic with sponge feet and I think nearly £13 is a lot of money for a piece of plastic. However a couple of months ago I ordered some generic replacement plates for my Big Shot off Ebay for £5 (I think) which due to the fact my Big Shot is pretty much kaput didn't work in the machine. I couldn't be bothered to send them back especially as it wasn't the seller's fault but down to the fact my rollers are ruined after two years of needing replacement cutting plates, so I just put them to one side hoping I could get my hands on a new Big Shot at some point in the future and use them as intended. The other day I was watching YouTube and saw someone who'd made her own out of a sheet of clear plastic and some make up sponges, I'm really sorry to say I can't remember who I was watching but she didn't show how to make one just mentioned that she'd made a stamp press out of the aforementioned items. You can imagine my excitement when I remembered my spare plates and the fact I'd bought a huge bag of make up sponges from Poundland when my niece came to stay a few months back. When I got the stuff together I realised I'd actually stored some Avon Nail Art sponges in the bag of cosmetic sponges and as there were four spare ones I decided to use them as the stamp press feet. I made the mistake of using clear 3D pearl effects as the adhesive as usually it sticks everything with a bond that can't be beat but because the sponges are very porous the glue just soaked into the sponges and they slid off when I picked the stamp press up even though they'd been drying for an hour. Unfortunately the glue pretty much dried instantly onto the plastic and it won't come off so the plate looks a bit messy. I washed all the glue out of the sponges (absolutely loads of it!) and stuck them down to the plastic plate with hot glue once the sponges had dried. Some of my stamps are thicker than others so I cut a thick round cosmetic sponge into four and stuck that onto the reverse side of the stamp press using the hot glue. This makes my homemade stamp press a lot more versatile than just having one depth of sponge feet.
 |
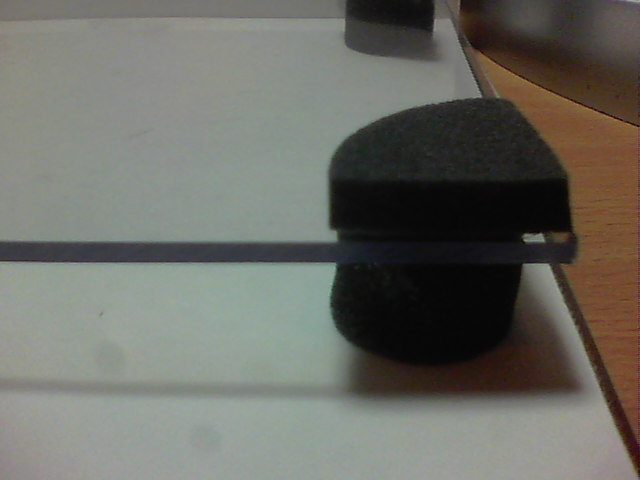
| My homemade stamp press |
 |
| Two different sized sponge feet for different thickness of stamps |
I've probably saved at least half of what it would cost me to buy a Fiskars stamp press and I have the satisfaction of knowing I made it myself using items I already had in for other purposes or that I couldn't use at this particular time anyway so were just cluttering up my already cluttered crudy. Admittedly the Fiskars stamp press has a grid etched into it to make it easier to line up stamps but I've managed without a grid for lining up stamps for nearly 15 years so it can't make that much of a difference to crafting. I've tried it out with a A6 sized stamp from Heartfelt Creations that I really love but haven't used much as it didn't stamp cleanly in the past but using the stamp press makes using big stamps really easy.
 |
| Iris Stamped Image |
 |
Close up of verse
|
I inked the stamp up with the new Tim Holtz Distress Ink in Blueprint Sketch - I think it's probably my favourite colour apart from Peacock Feathers which I really love, and I coloured it in using more of the Blueprint Sketch ink and an empty clear Wink of Stella brush marker filled with water. I used cracked Pistachio ink (another new colour - Craft Stash were offering the latest 7 Distress Inks for only £14.99, it cost me £4.75 just for one a few months ago!) to colour the leaves of the irises. I am incredibly proud of this panel as it's the best watercolouring I've ever done and it's really shimmery in real life because an empty Wink of Stella is never truly empty when the liquid runs out so using it as a water brush (another item that can be expensive) means that not only are you helping the environment by upcycling the pen but you are getting shimmer paints using ordinary inks or water colour paints.
I hope you've enjoyed seeing my latest project and I hope it inspires you to make your own. I'm sure you could get sheets of thick plastic even cheaper than what I paid and if you can't get nail art sponges then thick make up sponges will do just as well though some of the thicker cling mount stamps may be too thick for the sponge to actually press. I haven't tried it myself but doubling up the make up sponges and gluing them together might work too but I'd recommend testing it's sponginess before gluing onto the plastic because if the doubled sponge doesn't compress enough the inked stamp won't reach the paper or may stamp unevenly. Let me know if you make your own and leave a link in the comments section so I can come and take a look. As always if you have any questions or comments then please leave them in the usual places. I hope to have some cards to share with you soon. I have three birthdays coming up this month so I'll post the cards I make on here once it's the birthday concerned and hopefully I'll have some other cards and projects to share with you soon, until then - keep crafting!
Love and crafty hugs,
Sarah xxx


No comments:
Post a Comment
I value your feedback and questions about this blog so please leave me a comment - let's spread the crafty love...
Sarah xxx