Hello crafty peeps and welcome to my crafty nook! I hope you all had a brilliant week, it's been lovely here on the east coast - bright with a crispness to the air. I was supposed to do my spring cleaning two weeks ago but kind of lost heart in it when my mum-in-law wasn't able to come for Mother's Day and these bright days are making me wish I'd done a bit more than I ended up doing for just my mum visiting. (It's not that I don't make an effort for my mum's visits but she knows what a untidy moo I can be and she's seen me at my worst but I wanted to make a good impression on my in-laws!)
It was my mum-in-law's birthday last Sunday and it was my Gramps-in law's birthday Tuesday so I thought I'd share the cards I made for them.
The first card features the wonderful Verity Rose from Crafter's Companion. She was coloured in using Promarkers and Spectrum Noir Shimmer markers. I added details with a Sakura stardust pen on her hat and beads. The layering piece was die cut out using a Tonic Studio die and I ink blended over it using Salty Ocean and Tumbled Glass Distress Inks.
The second card was inspired by a card made by Christine Smith AKA CraFTiPoTeNTiAl https://www.youtube.com/watch?v=Dl_yNA4vpuo - please click the link to see the original card that inspired mine. Like Christine I used the hobby themed stamps that came free with Creative stamping Magazine a couple of months ago. I stamped them onto 200 gsm card and coloured them in using Flexmarkers then I fussy cut them out which was rather challenging for the pinchers/pliers and the screwdriver because the thin parts curled up on themselves after I cut them. I die cut the pinboard frame out of white card using two stitched rectangle dies from eBay and I held them in place using some washi tape so the dies didn't shift as the card went though the machine. I also stamped out the tool box and coloured it in using the Flexmarkers and then stamped over it using the small wood grain stamp from the set and the Happy Birthday sentiment. Again it was fussy cut out and I used a scalpel to cut out the inner part of the shape so I could add some extra tools. These tools were cut out using a set of dies from the Sara's Collection of Just For Men dies. I cut a piece of adhesive backed cork to just slightly smaller than the frame and layered the two together as shown to form the pin board.I added the tools with tape runner to the board and added foam pads to the back of the tool box - the tools were stuck to these so that they peeped out from the tool box. I used papers from Papermania Mr Mister range and added them to a Dovecraft A6 card blank using a tape runner from Crafter's Companion. I added the board to the 'wall' of the shed and the tool box to the 'floor' using extra glue on the tools that covered the sticky foam pads.
I did make another card for my mum-in-law on my mum's behalf but forgot to take any photos of it so I can't share here. As always if you have any questions or comments about my latest cards then please leave them in the usual places and until next time - keep crafting!
Love and crafty hugs,
Sarah xxx
Translate
Thursday, 6 April 2017
Saturday, 25 March 2017
Double Z-Fold Mother's Day Cards
Hello crafty peeps and welcome to my crafty nook! I hope you are all well and enjoying the first week of spring (at least here in the UK). The weather's been very mixed with bright sunny days and very rainy days too - typical British weather, no doubt it will be snowing by Easter lol. It's Mothering Sunday this weekend and I've invited my mum over for Sunday lunch - if all goes to plan I shall be making roast pork with stuffing, apple sauce (might even make it fresh *shock face*), mash potato, roast potatoes, carrots and cauliflower cheese. It's taken me a long time to realise that even though I don't particularly enjoy it, I'm actually a good cook and one of my latest dishes is cauliflower cheese - I've decided I'm going to try my hand at macaroni cheese next because strange as it might sound I've never had homemade before and if it's as tasty as cauliflower cheese then it's going to be pretty good (I think the secret is to add freshly ground nutmeg to the cheese sauce). Anyway enough of cooking, let's get on to something I do enjoy - crafting! In my last post, I shared the invite I made for my mum and this time I'd like to share the cards I've made for my mum and mum-in-law.
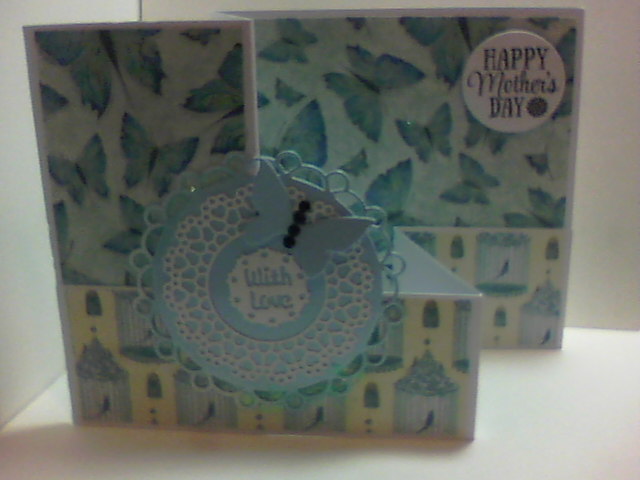
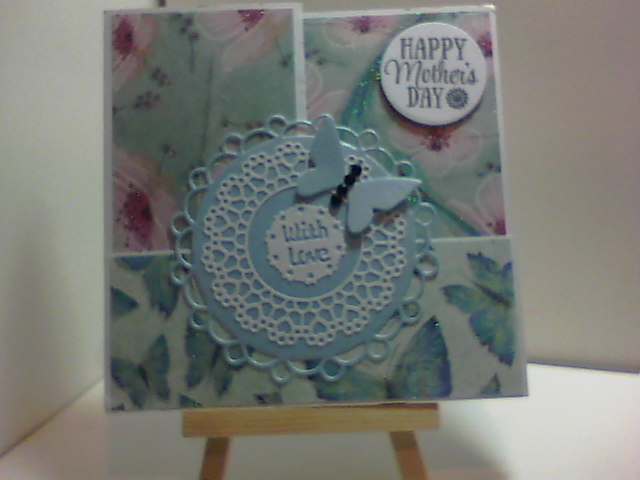
The cards are made from 300gsm smooth card stock, I buy it from Every Craft's A Pound when it's available and it's usually about £7.50 for 200 sheets which is really good value. They have 250gsm and 200gsm in for the same price but you get an additional 50 sheets per pack if my memory serves me correctly. I haven't bought any for a while because I've still got a pack of each in my stash and I've also started to use Sheena's stamping card which is a lot more expensive but is thicker even though it's supposed to also be 300gsm which is the same as the super smooth. Plus you can't always get the particular card from ECAP unfortunately so I forget to look when I'm on the site. The card blanks are 5.5" square when folded and I decorated them with papers from the Kimono paper pack from Crafter's Companion. I love the gorgeous colours in this collection and the glitter highlights that are on many of the designs. I die cut a loopy circle using the free die set that came with last month's Diecutting Essentials magazine out of Centura pearl pale blue card from the pastels A4 card stack, it doesn't quite match but I didn't have any coloured card that did so thought this would do. I die cut the lacy circle using the second die in the set which also diecuts a small circle from the centre. I stamped the Happy Mother's Day greeting onto these circles and die cut a 'with love' sentiment which came free with a rose die set a few months ago - I'm afraid I can't remember which magazine it came free with. The butterfly was die cut using a nesting butterfly from a Sara Signature set that I got a few months ago, it's the smallest die in a set of three. I added black gems from my stash to form the body. I made the envelope using my WRMK envelope punch and stamped the large butterfly that came free with a magazine in the last couple of months, again I'm afraid I can't remember which magazine it was from - I do get rather a lot of magazines. I coloured them in using Flexmarkers and coated them with some clear Shimmer Marker before assembling the envelope.
I hope you like my latest makes and that you have a wonderful Mother's Day weekend. As always if you have any questions then please leave them in the usual places. Until next time - keep crafting!
Love and crafty hugs,
Sarah xxx
The cards are made from 300gsm smooth card stock, I buy it from Every Craft's A Pound when it's available and it's usually about £7.50 for 200 sheets which is really good value. They have 250gsm and 200gsm in for the same price but you get an additional 50 sheets per pack if my memory serves me correctly. I haven't bought any for a while because I've still got a pack of each in my stash and I've also started to use Sheena's stamping card which is a lot more expensive but is thicker even though it's supposed to also be 300gsm which is the same as the super smooth. Plus you can't always get the particular card from ECAP unfortunately so I forget to look when I'm on the site. The card blanks are 5.5" square when folded and I decorated them with papers from the Kimono paper pack from Crafter's Companion. I love the gorgeous colours in this collection and the glitter highlights that are on many of the designs. I die cut a loopy circle using the free die set that came with last month's Diecutting Essentials magazine out of Centura pearl pale blue card from the pastels A4 card stack, it doesn't quite match but I didn't have any coloured card that did so thought this would do. I die cut the lacy circle using the second die in the set which also diecuts a small circle from the centre. I stamped the Happy Mother's Day greeting onto these circles and die cut a 'with love' sentiment which came free with a rose die set a few months ago - I'm afraid I can't remember which magazine it came free with. The butterfly was die cut using a nesting butterfly from a Sara Signature set that I got a few months ago, it's the smallest die in a set of three. I added black gems from my stash to form the body. I made the envelope using my WRMK envelope punch and stamped the large butterfly that came free with a magazine in the last couple of months, again I'm afraid I can't remember which magazine it was from - I do get rather a lot of magazines. I coloured them in using Flexmarkers and coated them with some clear Shimmer Marker before assembling the envelope.
I hope you like my latest makes and that you have a wonderful Mother's Day weekend. As always if you have any questions then please leave them in the usual places. Until next time - keep crafting!
Love and crafty hugs,
Sarah xxx
Monday, 20 March 2017
Petal Fold cards (Updated)
Hello crafty peeps and welcome to my crafty nook! I hope you all had a brilliant weekend, it's the first day of spring here in the UK so hopefully the weather will improve. It's Mothering Sunday next weekend and a couple of months ago I invited (in person) my mum and my mum and dad-in-law to Sunday lunch on Mother's Day. I wanted to make it a bit special by making proper invites and sending them in the post. Unfortunately my in-laws won't be coming now as they've agreed to have Millie at a sleepover the night before so my sister-in-law can go with her boyfriend to his parents 50th Wedding Anniversary and they'll be too tired to come to ours the next day. I'd already almost made the invites when we found out but luckily I'd not added the invite part at that point as I needed to find a suitable sentiment so I don't have to bin the second card. This is the card for my mum.
Here is the one I made for my mother-in-law but without the invited panel.
The cards are pretty similar, I just used different papers to decorate the petals and the inner part. To make this card you need to cut a piece of card to 8" square and score all four sides at 2". Cut off the outer squares so you are left with a + shape. To make the petals I went through my circle dies and found one that fitted nicely on the flaps and traced around it. I cut the shapes out so each flap became a semi circle. I used a slightly smaller circle die to cut out the panel pieces (2 of them) and then cut them in half and added them to the outside parts of the flaps with tape runner. I cut a piece of decorative card to just under 4" and added it to the inside of the card. The actual invite card was cut to 3.5" square and stamped with You're Invited (stamp from stash) and a small butterfly that's from a stamp set from Ebay. You fold the card the same way you would a cardboard box.
I've also made an acceptance card in the same style for my sister and her husband to be - they are getting married in May and the invite came on Friday.
This card was made the same way but with different papers etc and I made an envelope for it using my WRMK envelope punch board.
I hope you like my latest makes, as always if you have any questions or comments then please leave them in the usual places. Until next time - keep crafting!
Love and crafty hugs,
Sarah xxx
Just a quick update - I got this in the post today, it's a card made by my craft crush (lol that's what my hubby says I have because I get really excited when I get a new video notification) Christine Smith AKA CRaFTi PoTeNTiAl on Youtube , you may recognise her name from various crafting magazines such as Creative Stamping magazine as she often has a feature using the free covermounts. Christine ran a giveaway for one of three thank you cards after reaching 1000 subscribers on YouTube and I was absolutely delighted to be one of the three. Because I responded first I was able to choose the card I wanted and I asked for the blue version. It is absolutely gorgeous in real life and sadly my camera has not done it justice as it's about a 1000% nicer in real life. Anyway enough gushing (now you know why Chris sings "It's just a little crush" every time I mention Christine lol) here's the lovely thank you card.
Here is the one I made for my mother-in-law but without the invited panel.
The cards are pretty similar, I just used different papers to decorate the petals and the inner part. To make this card you need to cut a piece of card to 8" square and score all four sides at 2". Cut off the outer squares so you are left with a + shape. To make the petals I went through my circle dies and found one that fitted nicely on the flaps and traced around it. I cut the shapes out so each flap became a semi circle. I used a slightly smaller circle die to cut out the panel pieces (2 of them) and then cut them in half and added them to the outside parts of the flaps with tape runner. I cut a piece of decorative card to just under 4" and added it to the inside of the card. The actual invite card was cut to 3.5" square and stamped with You're Invited (stamp from stash) and a small butterfly that's from a stamp set from Ebay. You fold the card the same way you would a cardboard box.
I've also made an acceptance card in the same style for my sister and her husband to be - they are getting married in May and the invite came on Friday.
This card was made the same way but with different papers etc and I made an envelope for it using my WRMK envelope punch board.
I hope you like my latest makes, as always if you have any questions or comments then please leave them in the usual places. Until next time - keep crafting!
Love and crafty hugs,
Sarah xxx
Just a quick update - I got this in the post today, it's a card made by my craft crush (lol that's what my hubby says I have because I get really excited when I get a new video notification) Christine Smith AKA CRaFTi PoTeNTiAl on Youtube , you may recognise her name from various crafting magazines such as Creative Stamping magazine as she often has a feature using the free covermounts. Christine ran a giveaway for one of three thank you cards after reaching 1000 subscribers on YouTube and I was absolutely delighted to be one of the three. Because I responded first I was able to choose the card I wanted and I asked for the blue version. It is absolutely gorgeous in real life and sadly my camera has not done it justice as it's about a 1000% nicer in real life. Anyway enough gushing (now you know why Chris sings "It's just a little crush" every time I mention Christine lol) here's the lovely thank you card.
Monday, 13 March 2017
A double Z fold Easter Card
Hello crafty peeps and welcome to my crafty nook! I hope you've all had a brilliant weekend and managed to get lots of crafting done. Spring is most definitely in the air and I've been inspired by the bright sunshine and vibrant green colours to make an extra special Easter card for three of my nieces. I've actually made two of these cards and I will show you both cards as they are slightly different versions of the same design. Unfortunately I used some gorgeous coloured linen effect card to make my original card not realising that it would crack when I scored it and it's actually ripped at one of the folds so I've had to mend it using some tape which means it's not good enough to give away now.
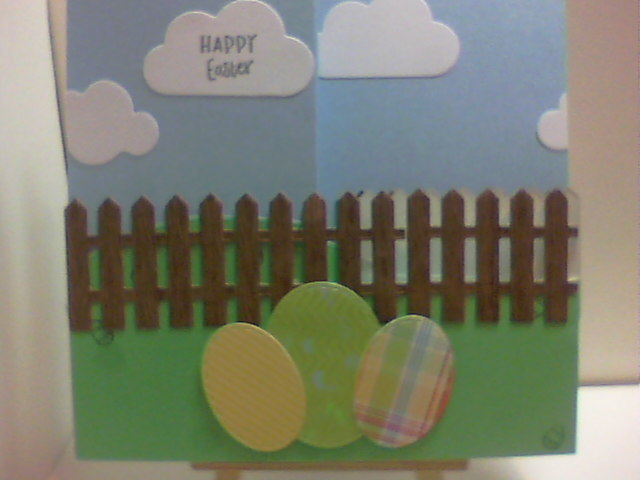
There are lots of double z fold cards out there at the moment - Dawn's Stamping Thoughts on YouTube has an easy to follow tutorial and there are lots of other tutorials on YouTube - just put Double Z fold cards in the search box and you'll get loads of different videos to choose from. Most if not all Double Z fold cards are 4 1/4 " x 11" which I found a little small. The card folds down to 4 1/4" x 5 1/2" so I cut my card to 5 1/2" x 11" so it folds down to 5 1/2" x 5 1/2". I used the free fence die that came with issue 144 of Papercraft Essentials magazine and a couple of the stamps from the same issue. I also used a stitched border die from Ebay, a couple of cloud dies (one Ebay and one from Crafter's Companion) and three stitched oval dies also from Ebay.
The card base was made from Centura Pearl blue card from the Pastels collection, it has a very subtle sheen to it. The green parts were made using Dovecraft Premium card stock. I used one of the free stamps that came with this month's issue of Creative Stamping magazine to stamp a wood grain pattern onto the fence pieces after I die cut them out of brown card using the free fence die. I needed 7 die cuts to complete the fence on this card. The Easter eggs were die cut out of a DCWV 6" x 6" paperstack (it's actually card weight though) called The Birthday Wishes stack - you can't see on the photos but some of the papers have holographic film on them either completely (the green chevron pattern) or in spots. The other cards in the stack are made with a glossy finish. After die cutting the stitched hillside (because it's 11" long I needed to die cut the card twice taking care to line the die up with the previous cut) I stamped a load of mini Easter eggs using a tiny little stamp from the Springtime die and stamp set that came free with Papercraft Essentials magazine onto the green hill and front strip, a few of them are completely hidden by the fence but I think the girls will have fun having a Easter Egg Hunt on a card and there are 14 visible eggs to find (they're not all obvious though!) I used the Happy and Easter stamps from the same stamp set to stamp the greeting on the cloud. I made a matching envelope using my WRMK Envelope Punch Board and decorated the flap and front with the mini Easter Egg stamp.
The second card is the original card but I used linen effect card stock instead of Centura Pearl blue card and Dovecraft Premium green card. Although the linen card from The Works is gorgeous, it's not suitable for scoring and folding because it cracked and totally split down one score line. I only used the two smallest oval dies for the Easter eggs on this card and used card covered with Dovecraft designer papers to make the eggs - they were actually scraps left over from the giraffe 1,2,3 card so it was quite a thrifty card to make.
I hope you like my latest makes, they were quite time consuming to make thanks to all the die cutting but the actual Z Fold card itself is very easy to make as it just involves a couple of cuts with a trimmer and some score lines - you could even just trim the card down to 11" (full width) score it then cut down to 5.5" so the double Z fold part is already scored as long as you are using cardstock that's either plain white or dual coloured as you would need to flip the scored part so the folds mirror each other and a pearlised card on one side would look odd with the plain side making up the second Z. Easter cards are not something I usually make mainly because rather like Christmas cards it's often cheaper just to buy them in bulk rather than hand crafting them but I had a lot of fun making these two. There is a variation on the double Z fold card which incorporates the box elements of a pop up box card and I'm considering making a couple of them for Mother's Day (less than two weeks away!)
As always if you have any comments or questions then please leave them in the usual places. Until next time - keep crafting!
Love and crafty hugs,
Sarah xxxx
There are lots of double z fold cards out there at the moment - Dawn's Stamping Thoughts on YouTube has an easy to follow tutorial and there are lots of other tutorials on YouTube - just put Double Z fold cards in the search box and you'll get loads of different videos to choose from. Most if not all Double Z fold cards are 4 1/4 " x 11" which I found a little small. The card folds down to 4 1/4" x 5 1/2" so I cut my card to 5 1/2" x 11" so it folds down to 5 1/2" x 5 1/2". I used the free fence die that came with issue 144 of Papercraft Essentials magazine and a couple of the stamps from the same issue. I also used a stitched border die from Ebay, a couple of cloud dies (one Ebay and one from Crafter's Companion) and three stitched oval dies also from Ebay.
The card base was made from Centura Pearl blue card from the Pastels collection, it has a very subtle sheen to it. The green parts were made using Dovecraft Premium card stock. I used one of the free stamps that came with this month's issue of Creative Stamping magazine to stamp a wood grain pattern onto the fence pieces after I die cut them out of brown card using the free fence die. I needed 7 die cuts to complete the fence on this card. The Easter eggs were die cut out of a DCWV 6" x 6" paperstack (it's actually card weight though) called The Birthday Wishes stack - you can't see on the photos but some of the papers have holographic film on them either completely (the green chevron pattern) or in spots. The other cards in the stack are made with a glossy finish. After die cutting the stitched hillside (because it's 11" long I needed to die cut the card twice taking care to line the die up with the previous cut) I stamped a load of mini Easter eggs using a tiny little stamp from the Springtime die and stamp set that came free with Papercraft Essentials magazine onto the green hill and front strip, a few of them are completely hidden by the fence but I think the girls will have fun having a Easter Egg Hunt on a card and there are 14 visible eggs to find (they're not all obvious though!) I used the Happy and Easter stamps from the same stamp set to stamp the greeting on the cloud. I made a matching envelope using my WRMK Envelope Punch Board and decorated the flap and front with the mini Easter Egg stamp.
| here is where the card ripped |
The second card is the original card but I used linen effect card stock instead of Centura Pearl blue card and Dovecraft Premium green card. Although the linen card from The Works is gorgeous, it's not suitable for scoring and folding because it cracked and totally split down one score line. I only used the two smallest oval dies for the Easter eggs on this card and used card covered with Dovecraft designer papers to make the eggs - they were actually scraps left over from the giraffe 1,2,3 card so it was quite a thrifty card to make.
I hope you like my latest makes, they were quite time consuming to make thanks to all the die cutting but the actual Z Fold card itself is very easy to make as it just involves a couple of cuts with a trimmer and some score lines - you could even just trim the card down to 11" (full width) score it then cut down to 5.5" so the double Z fold part is already scored as long as you are using cardstock that's either plain white or dual coloured as you would need to flip the scored part so the folds mirror each other and a pearlised card on one side would look odd with the plain side making up the second Z. Easter cards are not something I usually make mainly because rather like Christmas cards it's often cheaper just to buy them in bulk rather than hand crafting them but I had a lot of fun making these two. There is a variation on the double Z fold card which incorporates the box elements of a pop up box card and I'm considering making a couple of them for Mother's Day (less than two weeks away!)
As always if you have any comments or questions then please leave them in the usual places. Until next time - keep crafting!
Love and crafty hugs,
Sarah xxxx
Wednesday, 8 March 2017
In the Pink
Hello crafty peeps and welcome to my crafty nook! I hope you've all had a good weekend, Chris and I babysat two of our nieces on Saturday which was a lot of fun but rather exhausting - toddlers have a lot of energy!
I'm still enjoying making the 1,2,3 fold card so I have a couple more example to share and another pink themed card (not a 1,2,3 fold card this time).
The Miss Chatterbox card is for one of my great nieces (both celebrate their birthdays this month). The papers came from Trimcraft and I just fussy cut around one of the Miss Chatterbox printed on a paper and added it to a stitched die cut circle as shown. I added spots of clear shimmer marker for extra interest and a polka dotted adhesive ribbon to the belly band. The second card featuring the baby giraffe is for my other great niece and I also used some papers from Trimcraft. The baby giraffe die was from Ebay and is called a baby cow on the website. I added a diecut flag and a sentiment from my stash to the belly band. The thank you card features a stamp set which came free with one of my magazine subscriptions. I coloured the image in using ProMarkers then covered the entire panel with clear shimmer marker so it really sparkles when you move it.
I hope you like my latest creations. If you'd like more details on how any of the cards were made then please let me know in the comments section. Until next time - keep crafting!
Love and crafty hugs,
Sarah xxx
I'm still enjoying making the 1,2,3 fold card so I have a couple more example to share and another pink themed card (not a 1,2,3 fold card this time).
The Miss Chatterbox card is for one of my great nieces (both celebrate their birthdays this month). The papers came from Trimcraft and I just fussy cut around one of the Miss Chatterbox printed on a paper and added it to a stitched die cut circle as shown. I added spots of clear shimmer marker for extra interest and a polka dotted adhesive ribbon to the belly band. The second card featuring the baby giraffe is for my other great niece and I also used some papers from Trimcraft. The baby giraffe die was from Ebay and is called a baby cow on the website. I added a diecut flag and a sentiment from my stash to the belly band. The thank you card features a stamp set which came free with one of my magazine subscriptions. I coloured the image in using ProMarkers then covered the entire panel with clear shimmer marker so it really sparkles when you move it.
I hope you like my latest creations. If you'd like more details on how any of the cards were made then please let me know in the comments section. Until next time - keep crafting!
Love and crafty hugs,
Sarah xxx
Subscribe to:
Posts (Atom)