Hello crafty peeps and welcome to my crafty nook! Happy 2018 to you all!! I hope you are all have a great year so far and a good week too. If you're not be consoled by the fact that it's almost the weekend - yay for that Friday feeling! I am trying to be a lot more organised this year and I've already made nine Christmas cards. I'm not going to share them with you today because I forgot to take any photos of them. I may have a bit of trouble in future taking photos because there was a slight craftquake in my crudy last night and a couple of boxes fell off the shelf above my workspace and landed on my daylight lamp and on my head and shoulder! I've got a bit of a headache today but worse is the fact my daylight lamp is broken or at least near as - it flickers and makes a strange hissing sound when it's switched on. I can't seem to work out how to remove the three tube lightbulb so I can buy another one so I'm not sure what I'm going to do about it. Without it it's rather hard to craft as the main light in my crudy is very dim and we don't have any spare bulbs at the moment. Anyway enough of my troubles and woes (which are very slight as I'm the first to admit!) it's my mum's birthday on Sunday so I've made her a butterfly themed birthday card. I'm not sure how good the photos are using my new camera, it's still very new to me and it doesn't come with proper instructions just a start up guide and a troubleshooting leaflet so I'm not really sure what I'm doing with it if I'm totally honest and the picture quality doesn't seem to be any better than my old camera (maybe I'm just a bit rubbish at making cards - eek!)
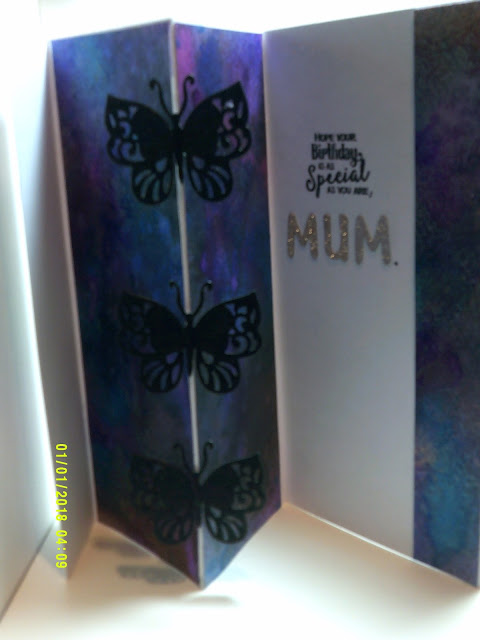
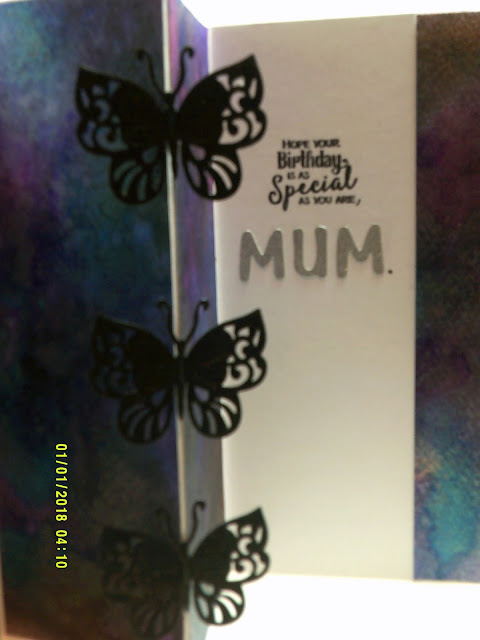
First of all please ignore the time/date stamp that appears on each of the photos - I've no idea how to remove it from the saved photos (it'll be really annoying to have that on any photos I print off!) plus it's actually the wrong time and date as I forgot to set it on the camera. The colours are quite good on these photos but you can't see the shimmer and gold shine that there is in real life unfortunately. To make this card I first worked on the watercolour card panels. I have a pack of watercolour card from Amazon which is approximately 8" x 5" and I used two for this card. I have a number of shimmer ink sprays and I started by spraying the card with blues, pinks and purples. I allowed them to dry then added goldtone black, midnight black, silver black and white shimmer sprays over the top and again allowed it to dry before adding further colours on top. I wanted a sort of galaxy background combined with the iridescence of a butterfly's wing, I'm not sure if I've quite achieved that but I'm very pleased with how the backgrounds came out. I allowed the panels to fully dry for a couple of hours while I made the rest of the card. The next thing I made was the floating butterfly elements. I die cut one of the dies that came in my Advent calendar from Crafter's Companion three times out of black glitter card stock (The Works 6" x 6" glitterstack only £1.50 but I'm not sure if they sell it anymore) and six times out of plain black card. You need three butterflies for each floating element. I cut the antennae and the lower part of the body off the plain black butterflies just leaving a small strip linking the wings together. I folded these butterflies in half and added them one butterfly wing to wing per side of the back of the glittery butterflies so that the glittery butterflies are flat on top of two halves of the other butterflies (if this isn't clear please let me know and I'll add a photo step by step tutorial to the blog) with the other halves of the butterflies sticking down underneath the glittery butterfly - these will be stuck down either side of the final fold in the card to form hinges so the butterfly can move from side to side. I used wet glue in a fine tipped nib bottle to adhere all the butterflies. I put the butterflies under something heavy so the wings wouldn't shift out from one another and made the card blank. I wanted to make a bigger than normal sized card so used an entire sheet of 300gsm white card. I scored it at 5cm, 12cm and 19.5 cm and from the left side in I folded it valley, mountain, valley to form my card blank - you may recognise the style as it was a firm favourite last spring and I made quite a few of them lol. To update it I combined it with the hover card style I made last September. Once all my elements were dry and ready to use I started to assemble my card but first I had to cut my watercolour panels to fit my card. The front panel was cut to 4.5cm by the full length of the card (around 8") which leaves a very thin border around the panel and it was adhered to the front of the card on the shortest panel as shown. I then added a 2.5cm wide strip of the watercolour paper to the right hand side of the card again this left a very small border of card showing around it. It was time to add the butterflies and I started with the middle one first adding it to the centre of the mountain fold by sticking the loose wings either side of it with wet glue - I held the wings tightly against the card until I was sure they were well stuck down. I added the remaining two butterflies in the same way above and below the middle one as shown. I cut the remaining pieces of watercolour card to 7cm by the full length and stuck them on the mountain fold panels covering up the half butterfly wings that were already adhered there. Because you need to cover these wings as much as possible the white card border should only be apparent on three sides of the panel as the watercolour card should be as close to the edge as you can get them. I added a die cut Happy Birthday to the thin front panel and a sentiment and a glittery silver die cut mum to the inside to complete the card. As it's a bit bigger than a normal card, I made an envelope using my WRMK Envelope Punch Board out of a sheet of scrapbook paper.
It's one of those unfortunate things that it's next to impossible to capture the shimmer and shine of this card in a still photo, even in real life you need to move the card so the light can catch the shimmer and make it pop so these photos really don't do the card justice. I've got to say it's one of my favourite cards (certainly of this year lol) and I really hope my mum likes it. I haven't got things set up to make video tutorials yet though that's certainly one of my goals for 2018 but I think I need to master taking stills before I progress to videos and I think it's fairly obvious from these photos that I have a lot of work ahead of me!
As always if you have any questions or comments then please leave them in the usual places and until next time - keep crafting!
Love and crafty hugs,
Sarah xxx


What a beautiful card Sarah-I’m sure your Mum will be thrilled with it. I love the way the butterflies are balanced on the folds of the card.
ReplyDeleteHope you can work out how to fix your lamp.
Michele
Thanks Michele, I really like the butterflies too.
ReplyDeleteCrafty hugs,
Sarah xxx